Installation on IONOS
This section walks through deploying the CloudCasa Self-hosted server onto an IONOS Cloud Managed Kubernetes cluster. It covers the prerequisites, the IONOS-specific infrastructure choices, the installation itself, exposing the service, and the post-installation configuration.
Note
This section covers only what is specific to IONOS Cloud. The generic installation procedure, the full list of Helm values, and the authoritative prerequisites are documented in Installation, which you should read first.
Overview
CloudCasa is a data protection, recovery, and data mobility solution for Kubernetes, cloud databases, and cloud native applications. In addition to the SaaS offering, CloudCasa can be deployed self-hosted, on-premises or inside your own cloud environment, including IONOS Cloud.
A self-hosted CloudCasa deployment on IONOS Cloud consists of four main components:
Server - All CloudCasa service components except the database run in a single namespace, typically “cloudcasa-server”, on the IONOS Managed Kubernetes cluster.
Database - Catalog data is stored in MongoDB, deployed by default in its own namespace (“cloudcasa-mongo”) on a 16 GB persistent volume backed by an IONOS storage class.
Agent - A lightweight agent is installed on each cluster you want to protect, which may or may not be the same cluster that hosts CloudCasa. It connects outbound to the CloudCasa server over gRPC on port 443.
Object storage - An S3-compatible or Azure Blob store that holds the backup data. On IONOS Cloud this is typically IONOS S3 Object Storage, although any S3-compatible target reachable from your clusters will work.
Only control-plane traffic, meaning agent-to-server communication, flows through the CloudCasa server. During backup and restore the agents talk directly to the object storage, so the backup data itself never transits the CloudCasa server. There is no connection between a self-hosted CloudCasa deployment and the CloudCasa SaaS service.
Prerequisites
Gather the following before installing. See Installation for the complete, platform-independent prerequisite checklist.
Kubernetes cluster
An IONOS Cloud Managed Kubernetes cluster, created either with the Kubernetes Manager in the Data Center Designer (DCD) or through the IONOS Cloud API. IONOS currently offers Kubernetes 1.33 and 1.34, with 1.31 and 1.32 having reached end of life, so choose a version that is both still supported on IONOS and supported by CloudCasa.
A dedicated cluster for CloudCasa is recommended. Do not use CloudCasa to back up the same cluster it is installed on; protect the CloudCasa catalog with catalog backups instead, as described in Catalog backup/restore.
A node pool sized for the CloudCasa server components and MongoDB. A good starting point is three worker nodes with at least 4 vCPU and 8 GB RAM each; scale up for larger environments.
Download the kubeconfig for the cluster from the DCD Kubernetes Manager, or through the IONOS Cloud API or CLI, and confirm access with
kubectl get nodes.
CLI tools
Helm 3, if you are using the Helm installation method.
kubectl, configured against the IONOS Managed Kubernetes cluster.
Storage class
IONOS Managed Kubernetes ships with a built-in block storage CSI driver (provisioner
cloud.ionos.com) and provides ready-to-use storage classes, typically named
ionos-enterprise-hdd (the default) and ionos-enterprise-ssd. Confirm which
classes are available and pick one that can provision PVs successfully:
$ kubectl get storageclass
Use an SSD-backed class for MongoDB if performance matters, which is what we
recommend. Note the class name, since you will pass it to CloudCasa as
storageClassName during installation.
Network configuration
Decide how the single external-facing CloudCasa service, amds-envoy-grpcapi, will
be exposed. On IONOS Cloud there are two straightforward options, both described in
Networking on IONOS Cloud:
Kubernetes Service of type LoadBalancer - IONOS Managed Kubernetes allocates a static public IP and attaches it to one of the worker nodes, which then acts as the ingress node for the service. It does not create a separate managed load balancer appliance. This is the simplest option and is recommended for most deployments. It is supported on public node pools only, because private node pools do not support the LoadBalancer service type.
Ingress controller such as ingress-nginx, fronted by an IONOS Load Balancer. This is useful if you already run an ingress controller and want to consolidate external endpoints, or if you need advanced routing.
Authentication provider
Decide on an authentication provider: LDAP, Azure AD, Google, any OIDC provider, or “local”, which is not recommended for production but is useful for a proof of concept. See Authentication for the available providers and their settings.
Confirm that the CloudCasa server running on IONOS Cloud can reach the provider’s endpoints. This may require outbound internet access, or for LDAP, connectivity to your identity infrastructure, for example through IONOS Cloud VPN or site-to-site connectivity if the directory is on-premises.
Decide which users and groups are allowed to log in (
auth.allowedUsersandauth.allowedUserGroups) and which of them are site-admins.
Certificates
Decide whether to use cert-manager, which we recommend, or manually created TLS secrets. If you are using cert-manager, install it first:
$ helm repo add jetstack https://charts.jetstack.io
$ helm install cert-manager jetstack/cert-manager --namespace cert-manager \
    --create-namespace --version v1.12.4 --set installCRDs=true
Note
IONOS Cloud does not currently offer a native cert-manager DNS-01 webhook. For a publicly trusted certificate, use an HTTP-01 solver, which works once your IONOS public IP has a DNS A record pointing to it, or a DNS-01 solver for a DNS provider you control, for example if your domain’s DNS is hosted on Route 53 or Cloudflare. Otherwise, use a self-signed Issuer for proofs of concept and internal use.
License and CloudCasa credentials
Access to the CloudCasa support portal at support.cloudcasa.io. Log in with your email address to receive a temporary access code.
A valid license file, tied to the UID of the kube-system namespace on your IONOS cluster. This is not required for proofs of concept.
$ kubectl get namespace kube-system -o jsonpath='{.metadata.uid}'
Helm repository credentials for helm.cloudcasa.io.
Azure Container Registry (ACR) credentials for pulling the CloudCasa server images.
Database (optional)
By default, CloudCasa deploys its own MongoDB StatefulSet on an IONOS block storage PVC, and no extra setup is required. You can instead point CloudCasa at an external MongoDB, either self-managed on an IONOS VM or a managed MongoDB Atlas instance, as described in Point to an external MongoDB (optional).
Email server (optional, recommended)
The SMTP host, port, sender address, and credentials, reachable from the CloudCasa server. These are used for job-failure notifications and organization invitations.
Object storage for backups
An S3-compatible bucket or Azure Storage Account to hold the backup data. On IONOS Cloud, IONOS S3 Object Storage is the natural choice: it is S3-API compatible and can be used both as the CloudCasa backup target and, later, as the catalog backup target.
Ensure that client clusters, meaning any cluster with a CloudCasa agent installed including the CloudCasa server cluster itself if you plan to back up other clusters from it, have network access to the chosen object storage endpoint.
Reference architecture on IONOS Cloud
A typical deployment looks like this:
One IONOS Managed Kubernetes cluster hosts the CloudCasa server (namespace “cloudcasa-server”) and MongoDB (namespace “cloudcasa-mongo”).
The
amds-envoy-grpcapiservice is exposed externally through a Service of type LoadBalancer, which is a static IONOS public IP attached to an ingress node, or through an ingress controller exposed the same way.One or more IONOS Managed Kubernetes clusters, or clusters on other clouds or on-premises, run the CloudCasa agent and connect outbound to the CloudCasa server on port 443.
IONOS S3 Object Storage, or another S3-compatible or Azure target, stores the backup data. The agents write to it directly.
An SMTP server and an identity provider are reachable from the CloudCasa server for notifications and authentication.
Preparing the IONOS cluster
Create the cluster
In the DCD, open Kubernetes Manager ► Create Cluster, choose a Kubernetes version that is currently supported on IONOS, and create a node pool with your desired VM sizing.
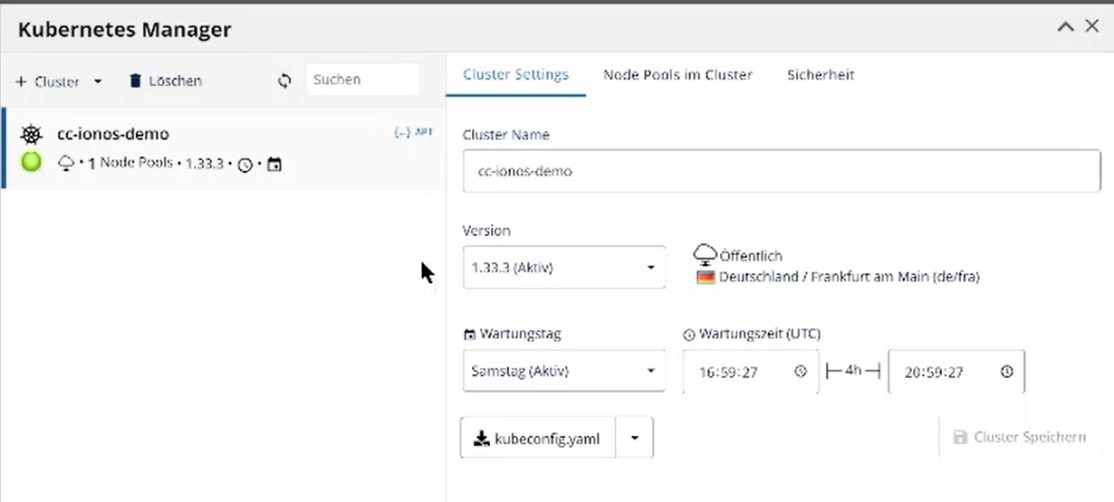
Choose public or private node pools depending on whether the nodes need direct
internet egress. Note that private node pools support neither Kubernetes services of
type LoadBalancer nor static node IPs, so choose a public node pool if you plan to
expose CloudCasa with serviceType: LoadBalancer. A public node pool is also the
simplest choice for a first deployment, because the agent images and Helm charts must
be pulled from the CloudCasa registries over the internet.
Download the kubeconfig once the cluster is Active, and verify access:
$ export KUBECONFIG=~/Downloads/kubeconfig.yaml
$ kubectl get nodes
Confirm the storage class
$ kubectl get storageclass
Note the default class name, for example ionos-enterprise-hdd, or the SSD class
name, for example ionos-enterprise-ssd, to use as storageClassName in your
Helm values.
Install cert-manager (recommended)
$ helm repo add jetstack https://charts.jetstack.io
$ helm install cert-manager jetstack/cert-manager --namespace cert-manager \
    --create-namespace --version v1.12.4 --set installCRDs=true
Installing the CloudCasa server
Create the namespaces
$ kubectl create ns cloudcasa-server
# Optional, only if you need to set labels or policies before installing:
$ kubectl create ns cloudcasa-mongo
Note
If you create the cloudcasa-mongo namespace yourself, set the Helm parameter
mongo.createNamespace=false.
Create a certificate issuer
The following is a simple self-signed Issuer for an initial deployment or a proof of concept:
$ kubectl -n cloudcasa-server apply -f - <<EOF
apiVersion: cert-manager.io/v1
kind: Issuer
metadata:
  name: selfsigned-issuer
spec:
  selfSigned: {}
EOF
For a production deployment with a publicly trusted certificate, see Certificates and Refresh the TLS certificate.
Create the image pull secret
$ kubectl create secret docker-registry myregistrykey \
    --docker-server=https://cloudcasa.azurecr.io \
    --docker-username=<ACR_USERNAME> \
    --docker-password=<ACR_PASSWORD> \
    --namespace=cloudcasa-server
Add the CloudCasa Helm repository
$ helm repo add cloudcasa https://helm.cloudcasa.io --username <USERNAME> --password <PASSWORD>
Prepare a Helm values file
Create my_values_file.yaml containing only the values you want to override. A
minimal IONOS-oriented starting point:
storageClassName: ionos-enterprise-ssd   # or ionos-enterprise-hdd
licenseKey: <CONTENTS OF LICENSE FILE>
serviceType: LoadBalancer                # IONOS allocates a public IP on an ingress node
auth:
  allowedUsers:
    - admin@example.com
  siteadminUsers:
    - admin@example.com
emails:
  enabled: true
  method: smtp
  smtp:
    host: smtp.example.com
    port: "587"
    sender_email: cloudcasa@example.com
    password: <SMTP_PASSWORD>
The key values are:
storageClassName(required) - The IONOS storage class identified in Storage class.licenseKey(required) - The contents of the license file from the support portal, for example--set licenseKey=$(cat <licenseKeyFilePath>).serviceType- Set this toLoadBalancerso that IONOS allocates a public IP and attaches it to an ingress node. Omit it, which defaults toNodePort, if you plan to expose CloudCasa through an ingress controller instead.auth.*- Which users and groups may log in, and which of them are site-admins.emails.*- The SMTP configuration for notifications and invitations.
See Installation for the full list of supported values.
Point to an external MongoDB (optional)
Skip this step to use the default in-cluster MongoDB. To use an external instance, for example one self-managed on an IONOS VM or a MongoDB Atlas instance, create the credentials secret:
$ kubectl -n cloudcasa-server create secret generic mongo-secrets \
    --from-literal=username=mongo_user \
    --from-literal=password=mongo_user_password
Then add the following to your values file:
mongo:
  createStatefulset: false
  url: "mongodb://<host>:27017"
  authSecretName: mongo-secrets
Install the CloudCasa server
$ helm install cloudcasa-server cloudcasa/cloudcasa-server --create-namespace \
    --namespace cloudcasa-server --wait --timeout 15m0s \
    --values my_values_file.yaml
For air-gapped IONOS environments, meaning nodes without internet egress, download
the chart .tgz from the CloudCasa support portal and reference it directly instead
of the repository name, as described in Air-gapped IONOS deployments (optional).
Point CloudCasa at its external address
Once the deployments are running, find the external IP or hostname that IONOS
assigned to amds-envoy-grpcapi:
$ kubectl -n cloudcasa-server get svc amds-envoy-grpcapi
If you used serviceType: LoadBalancer, this shows the EXTERNAL-IP that IONOS
allocated for the service. Set amdsEnvoyUrl accordingly, either to an IP address
or to a DNS name you create pointing at that IP, and upgrade:
$ echo "amdsEnvoyUrl: <CLOUDCASA-ENVOY-EXTERNAL-IP-OR-DNS>" >> my_values_file.yaml
$ helm upgrade cloudcasa-server cloudcasa/cloudcasa-server --wait \
    --namespace cloudcasa-server --values my_values_file.yaml
Refresh the TLS certificate
If you are using cert-manager, refresh the TLS secret so that it is issued for the correct DNS or IP name:
$ kubectl -n cloudcasa-server delete secret amds-envoy.tls && \
    kubectl -n cloudcasa-server rollout restart deployments/amds-envoy
$ kubectl -n cloudcasa-server describe cert amds-envoy   # check status
CloudCasa is now reachable at https://<amdsEnvoyUrl>. If you used the self-signed
issuer, browsers and kubectl-based agent installations will show certificate
warnings; see the note about curl -k below.
Notes
Client clusters normally install the agent with
kubectl apply -f <AGENT-YAML>. The exact URL is shown in the CloudCasa web console when a cluster is registered.If you used a self-signed certificate issuer, use
curl -k <AGENT-YAML> | kubectl apply -f -instead.If you do not plan to use the CloudCasa AWS RDS database protection, you can hide the Databases tab by setting
ui.enable_databases: false.
Networking on IONOS Cloud
CloudCasa exposes a single service, amds-envoy-grpcapi, which must be reachable
from the browser used for the web console and from every client cluster’s agent.
CloudCasa has no preference for how this is exposed. On IONOS Cloud, the two
supported patterns are described below. See Networking for the
platform-independent networking reference.
Option A: Kubernetes LoadBalancer service (recommended)
Set serviceType: LoadBalancer in your Helm values, as shown in
Prepare a Helm values file. On IONOS Managed Kubernetes this allocates a static public
IP and assigns it to one of the worker nodes, which acts as the ingress node for the
service, and no extra manifests are required. Note that this is not a separate
managed load balancer appliance, and that the LoadBalancer service type is supported
on public node pools only. This is the simplest path, and it works well for both the
CloudCasa web console and the agent connections.
Create a DNS A record pointing your chosen hostname at the external IP, then set
amdsEnvoyUrl to that hostname, as described in Point CloudCasa at its external address, for
a valid and stable certificate.
Option B: nginx ingress behind an IONOS Load Balancer
If you already run ingress-nginx on the cluster, itself exposed through an IONOS
LoadBalancer service, install CloudCasa with serviceType left at the default
(NodePort) and create an ingress with TLS passthrough, since CloudCasa terminates
TLS itself in the amds-envoy pod:
apiVersion: networking.k8s.io/v1
kind: Ingress
metadata:
  annotations:
    kubernetes.io/ingress.class: nginx
    nginx.ingress.kubernetes.io/backend-protocol: "GRPCS"
    nginx.ingress.kubernetes.io/ssl-redirect: "true"
    nginx.ingress.kubernetes.io/proxy-body-size: "0"
    nginx.ingress.kubernetes.io/proxy-read-timeout: "600"
  labels:
    amds-app: envoy
    amds.component: envoy
  name: amds-envoy-grpcapi
  namespace: cloudcasa-server
spec:
  ingressClassName: nginx
  rules:
    - host: <FQDN-OF-CLOUDCASA-SERVICE>
      http:
        paths:
          - backend:
              service:
                name: amds-envoy-grpcapi
                port:
                  number: 443
            pathType: ImplementationSpecific
TLS considerations
CloudCasa terminates TLS inside the amds-envoy-grpcapi pod itself. Any ingress or
load balancer placed in front of it, as in Option B, must be configured for TLS
passthrough rather than TLS termination, so that the certificate mounted on the pod,
which matches amdsEnvoyUrl, is what the clients see.
Agent connection timeouts
The agent maintains an always-on gRPC connection to the CloudCasa server, which can
be idle for long periods. Some load balancers close idle connections. If you see the
agent state flapping between ACTIVE and PENDING, increase the idle timeout on
whatever fronts the service, whether that is an IONOS Network or Application Load
Balancer you integrated manually, a firewall, or your ingress controller through
service annotations. This typically means raising the idle timeout to several
minutes, following the same pattern documented for AKS, GKE, and OpenShift in
Networking. You can set custom annotations on the amds-envoy-grpcapi
service with the Helm parameter serviceAnnotations.
Networking requirements summary
Client clusters must be able to open a gRPC connection to the CloudCasa server, reach the chosen object storage, and pull images from the CloudCasa and agent container registries.
The CloudCasa server must be able to reach the CloudCasa ACR or your mirrored registry, the authentication provider, an external MongoDB if one is used, the object storage used for catalog backups, and the SMTP server if one is configured.
User workstations need outbound HTTPS (TCP 443) access to the CloudCasa URL.
Air-gapped IONOS deployments (optional)
If your IONOS node pool has no direct internet egress, meaning a fully private node
pool, download the Helm chart .tgz and mirror all of the required images into a
container registry that is reachable from the cluster. This could be the IONOS Cloud
private registry offering or a self-hosted registry running on an IONOS VM.
$ helm install cloudcasa-server cloudcasa-server-<version>.tgz \
    --namespace cloudcasa-server --values my_values_file.yaml
Set the following values to point at your mirrored registry:
images:
  userContainerRegistry: myregistry.example.com
  imagePullPolicy: IfNotPresent
  registry: catalogicsoftware
  agentRegistry:      # Leave empty to force agent images through your registry too
Post-installation tasks
Log in as the user listed in auth.allowedUsers. That user becomes the
administrator of their own organization, and can invite other users regardless of the
allow-list.
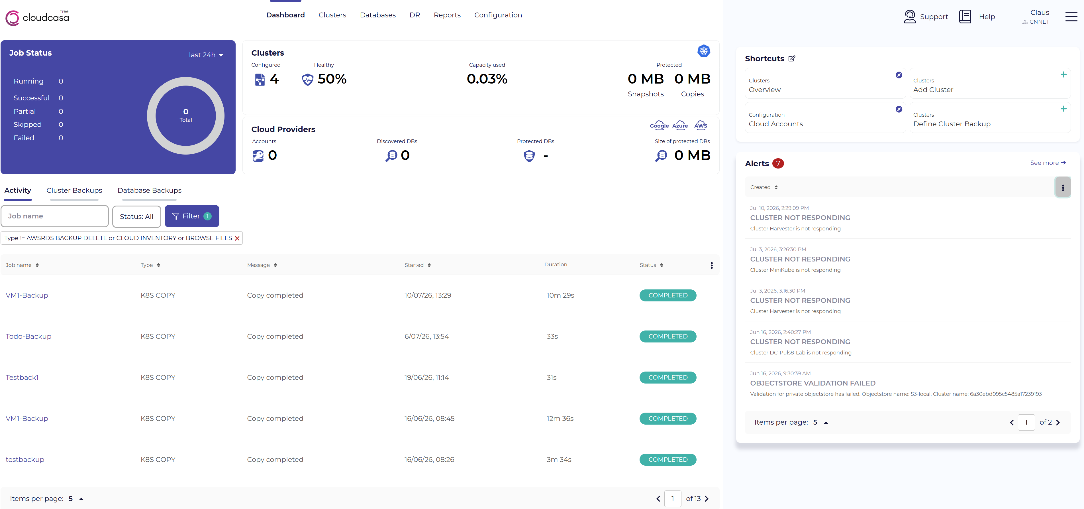
This opens the Dashboard view of your CloudCasa server.
See Post-installation tasks for the platform-independent post-installation tasks.
Configure the backup object storage
Go to Configuration ► Storage ► Add storage.
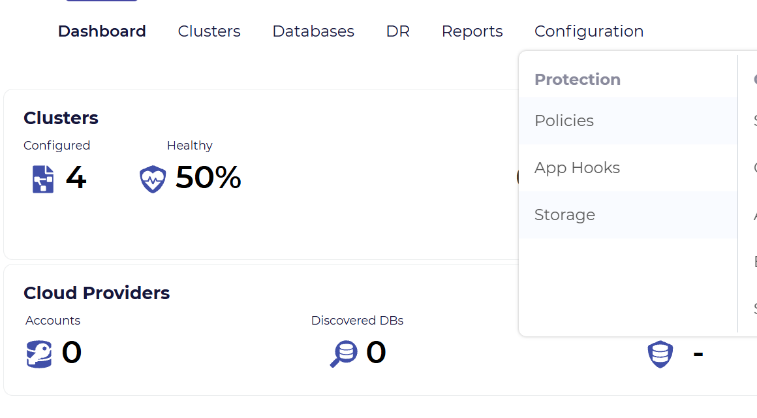
Add your IONOS S3 Object Storage bucket, or another S3-compatible or Azure target, with its endpoint, access key, and secret key. You can optionally set it as the organization default so that it is pre-selected for new backups; individual clusters and backups can still override it.
Configure the catalog backup
If you are using the default in-cluster MongoDB, configure a scheduled catalog backup
to the same IONOS S3 bucket or a separate one, so that the CloudCasa catalog itself
can be restored in a disaster recovery scenario. This uses the
mongo.backupLocation Helm values together with the casactl CLI CLI running
inside the amds-apiserver pod. See Catalog backup/restore for the full procedure.
Schedule storage maintenance
CloudCasa runs storage maintenance once a day. Since maintenance and backups cannot run simultaneously, configure the maintenance window under Settings ► Advanced options ► Storage maintenance scheduling policy to avoid overlapping with your backup schedules.
Add clusters and define backups
Register your IONOS clusters, or any other Kubernetes clusters, from Clusters ► Add cluster, and run the generated
kubectl applycommand shown in the web console. Usecurl -k ... | kubectl apply -f -instead if you used a self-signed certificate.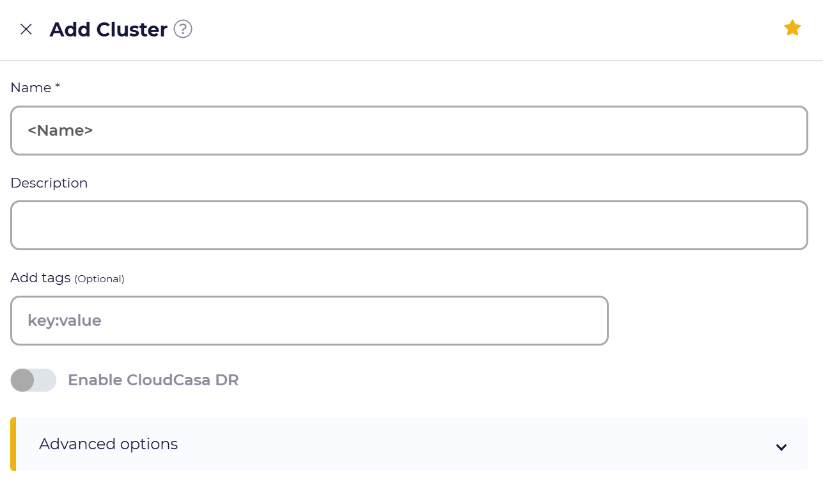
Define backup policies under Configuration ► Policies.
Create cluster backups, and later restores, from the Protection menu.
Upgrading CloudCasa
Keep a custom Helm values file, rather than editing values.yaml, so that upgrades
are a simple repeatable command:
$ helm repo update cloudcasa
$ helm upgrade cloudcasa-server cloudcasa/cloudcasa-server --wait \
    --namespace cloudcasa-server --values my_values_file.yaml
Reference links
Installation - The generic CloudCasa Self-hosted installation instructions.
Networking - The CloudCasa networking reference.
CloudCasa Support Portal - License, credentials, and chart downloads.
Note
This section adapts the generic CloudCasa Self-hosted installation instructions to IONOS Cloud specifics, namely the Managed Kubernetes storage classes, the IONOS Cloud load balancer exposure, and IONOS S3 Object Storage. Always cross-check the exact Helm value names and chart versions against Installation before installing, since these can change between releases.