Protecting clusters
After adding cluster, create a backup job to protect it.
See also
To add a cluster in your CloudCasa organization, see Adding clusters.
To protect databases, see Protecting databases.
Defining a backup job
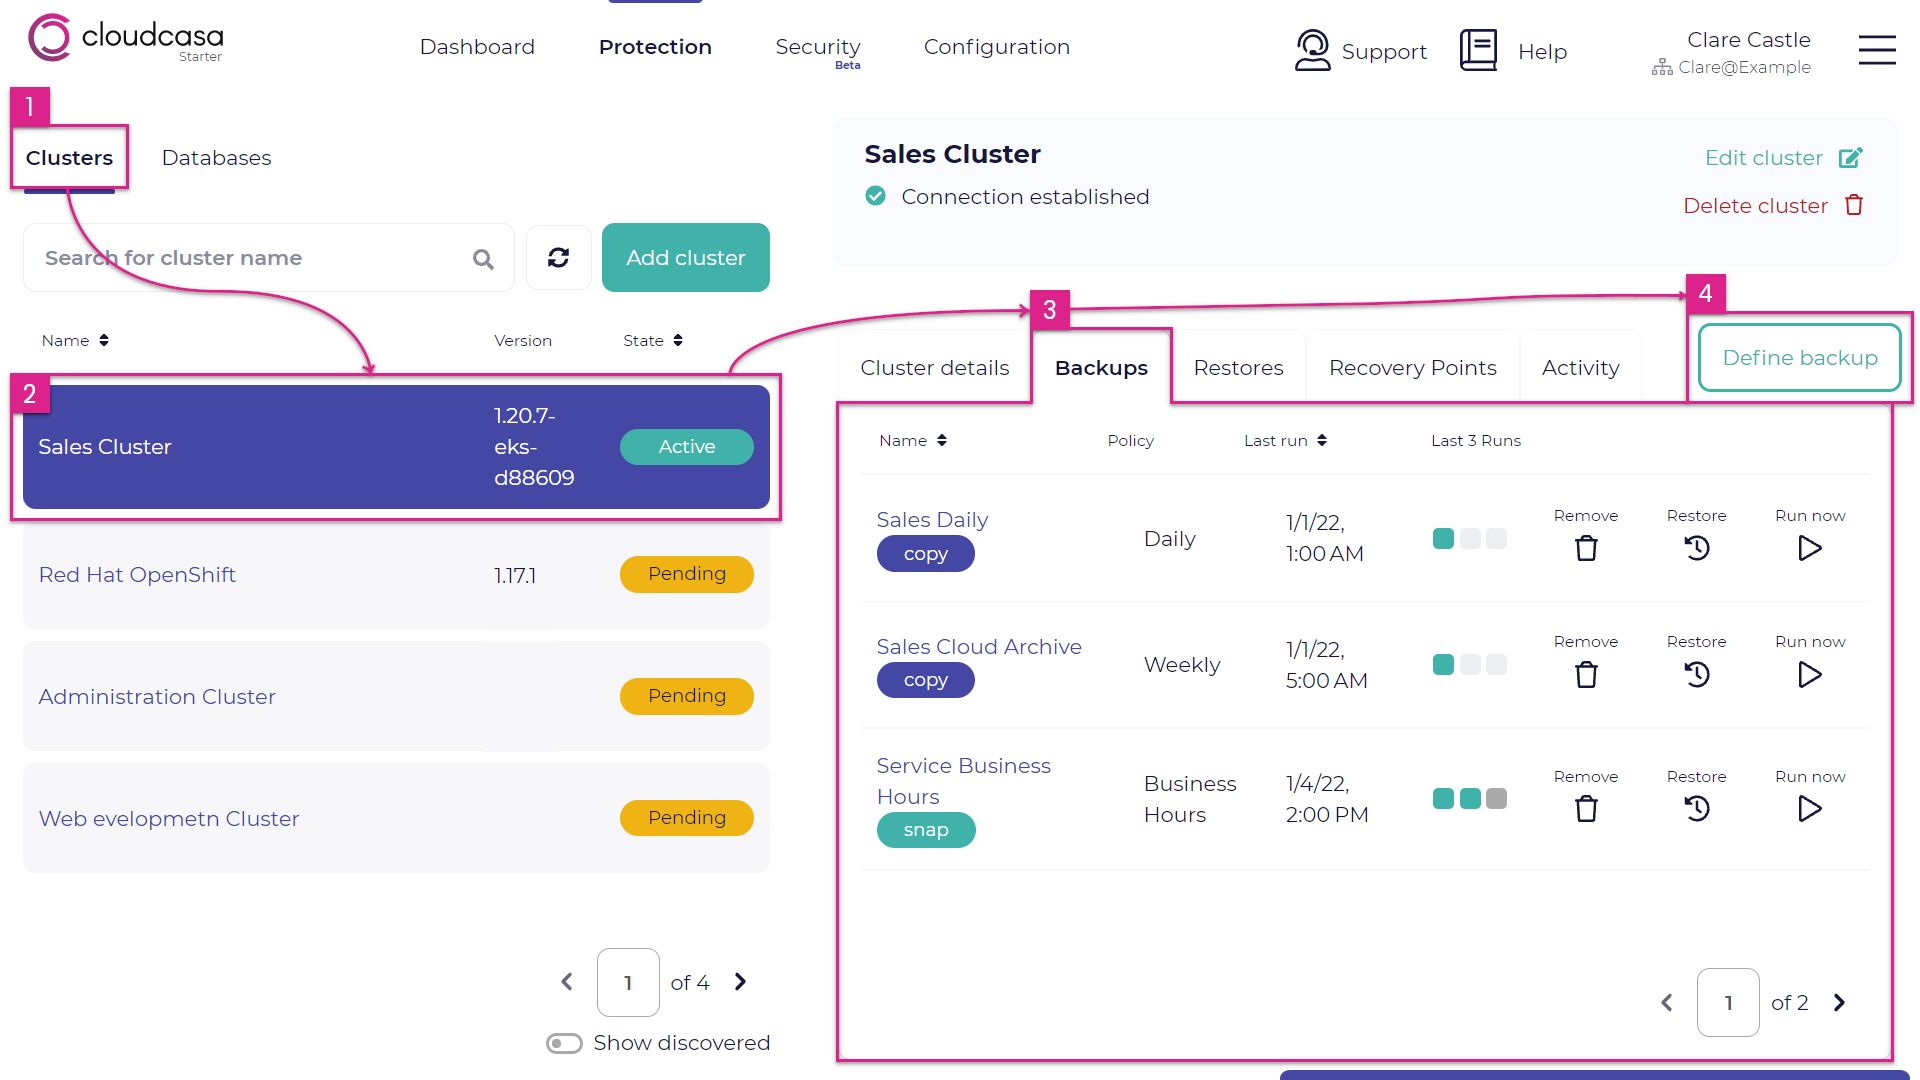
In the Protection page, open the Clusters tab in the navigation box.
In the inventory pane, select a cluster to protect.
Click Define backup to open the Add new backup pane.
In Step 1 of the Add new backup pane, enter the following fields:
- Backup name
A name of your backup job.
- Cluster
The cluster to protect.
- Add Tags (optional)
Key-value pairs that you can use arbitrarily to manage backup jobs in CloudCasa.
Click Next.

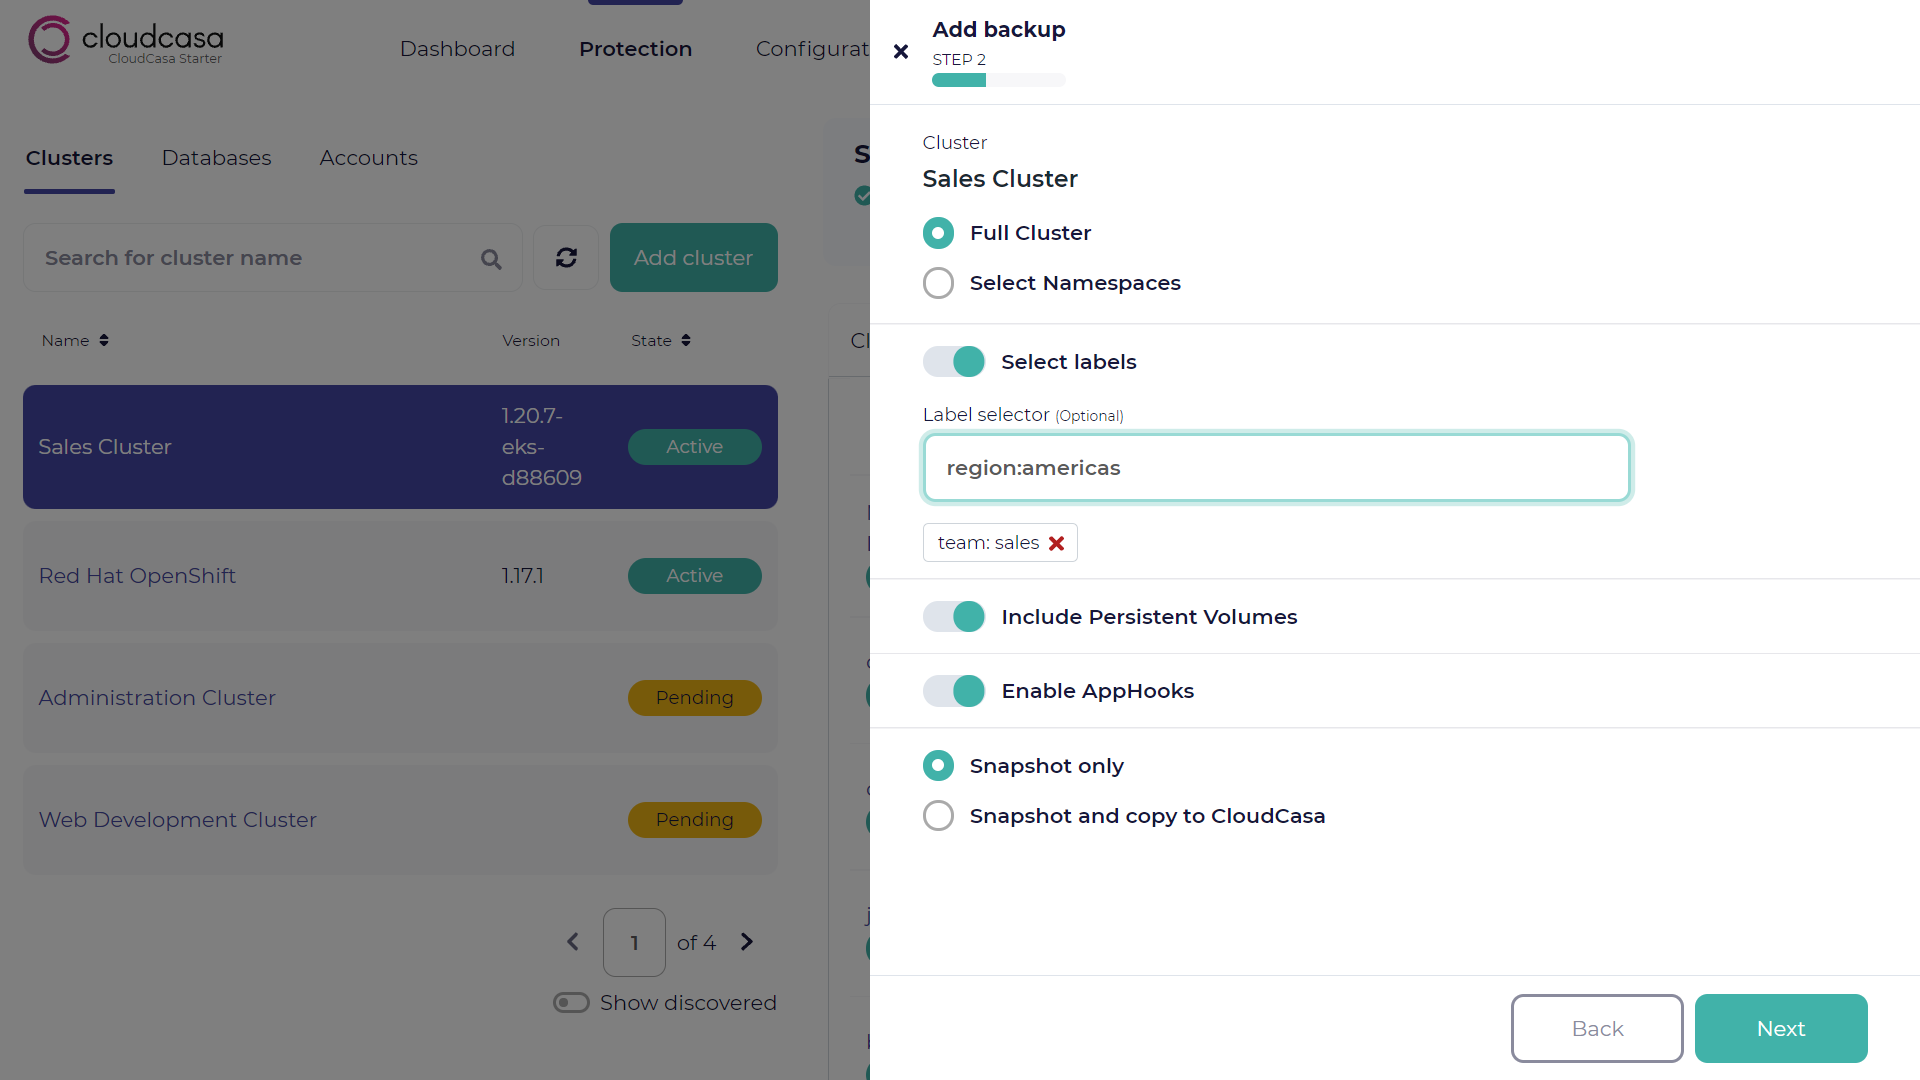
Enter the following values:
- Cluster
Select either one of Full Cluster or Select Namespaces. If you choose Select Namespaces, enter the namespaces to protect.
- Select labels (optional)
Enter key-value pairs to specify the labels for the object that you want to protect in the cluster.
- Include Persistent Volumes
Enable this option to protect the Kubernetes Persistent Volumes in the cluster.
- Enable App Hooks
Enable this option to protect the App Hooks in the cluster.
Snapshot only or Snapshot and copy to CloudCasa
Tip
In CloudCasa, there are two data protection methods:
- CloudCasa Backups
Store your backup in the CloudCasa Storage.
- CloudCasa Snapshots
Store your snapshot in your own public cloud storage: Amazon S3, third-party storage which has a compatible interface with Amazon S3, and Microsoft Azure Blob storage.
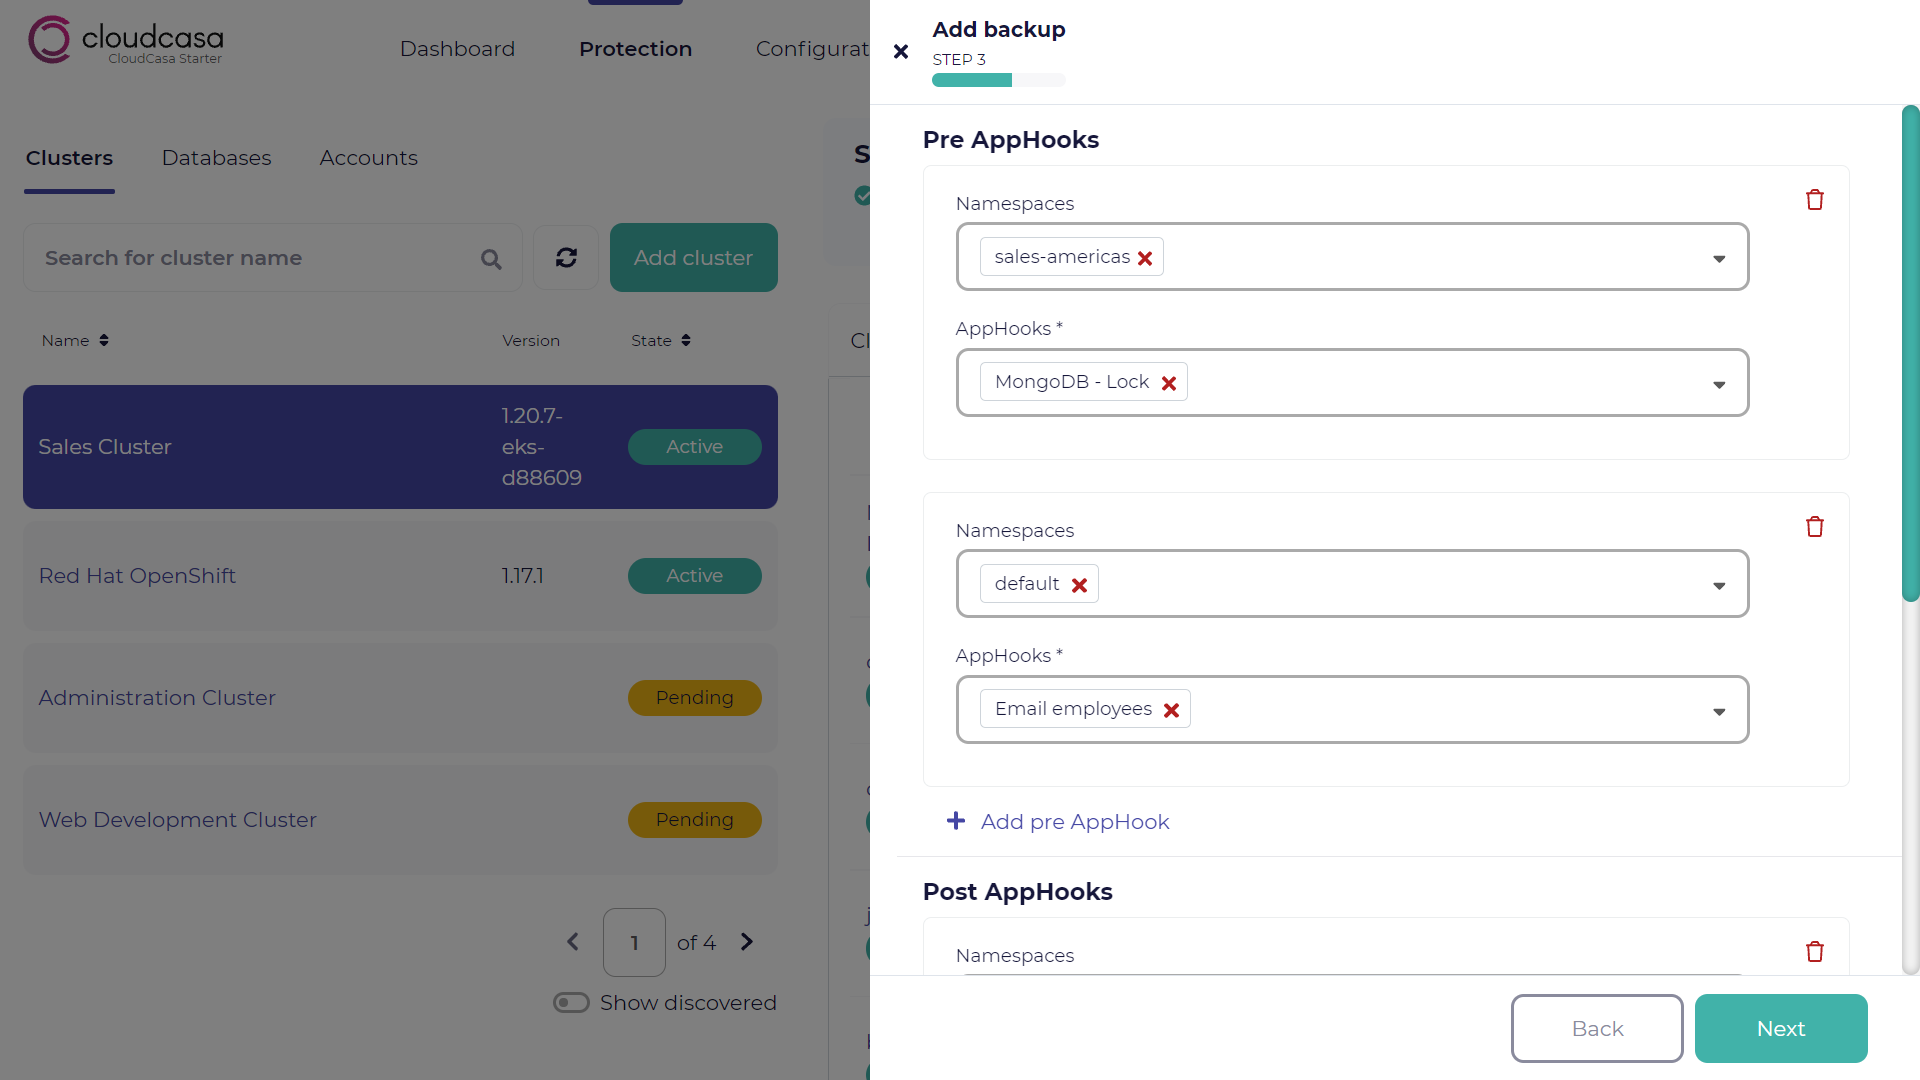
If you enabled App Hooks in the previous step, select the pre-backup App Hooks, post-backup App Hooks, or both. Click Next.
See also
For more information about App Hooks, see App Hooks.
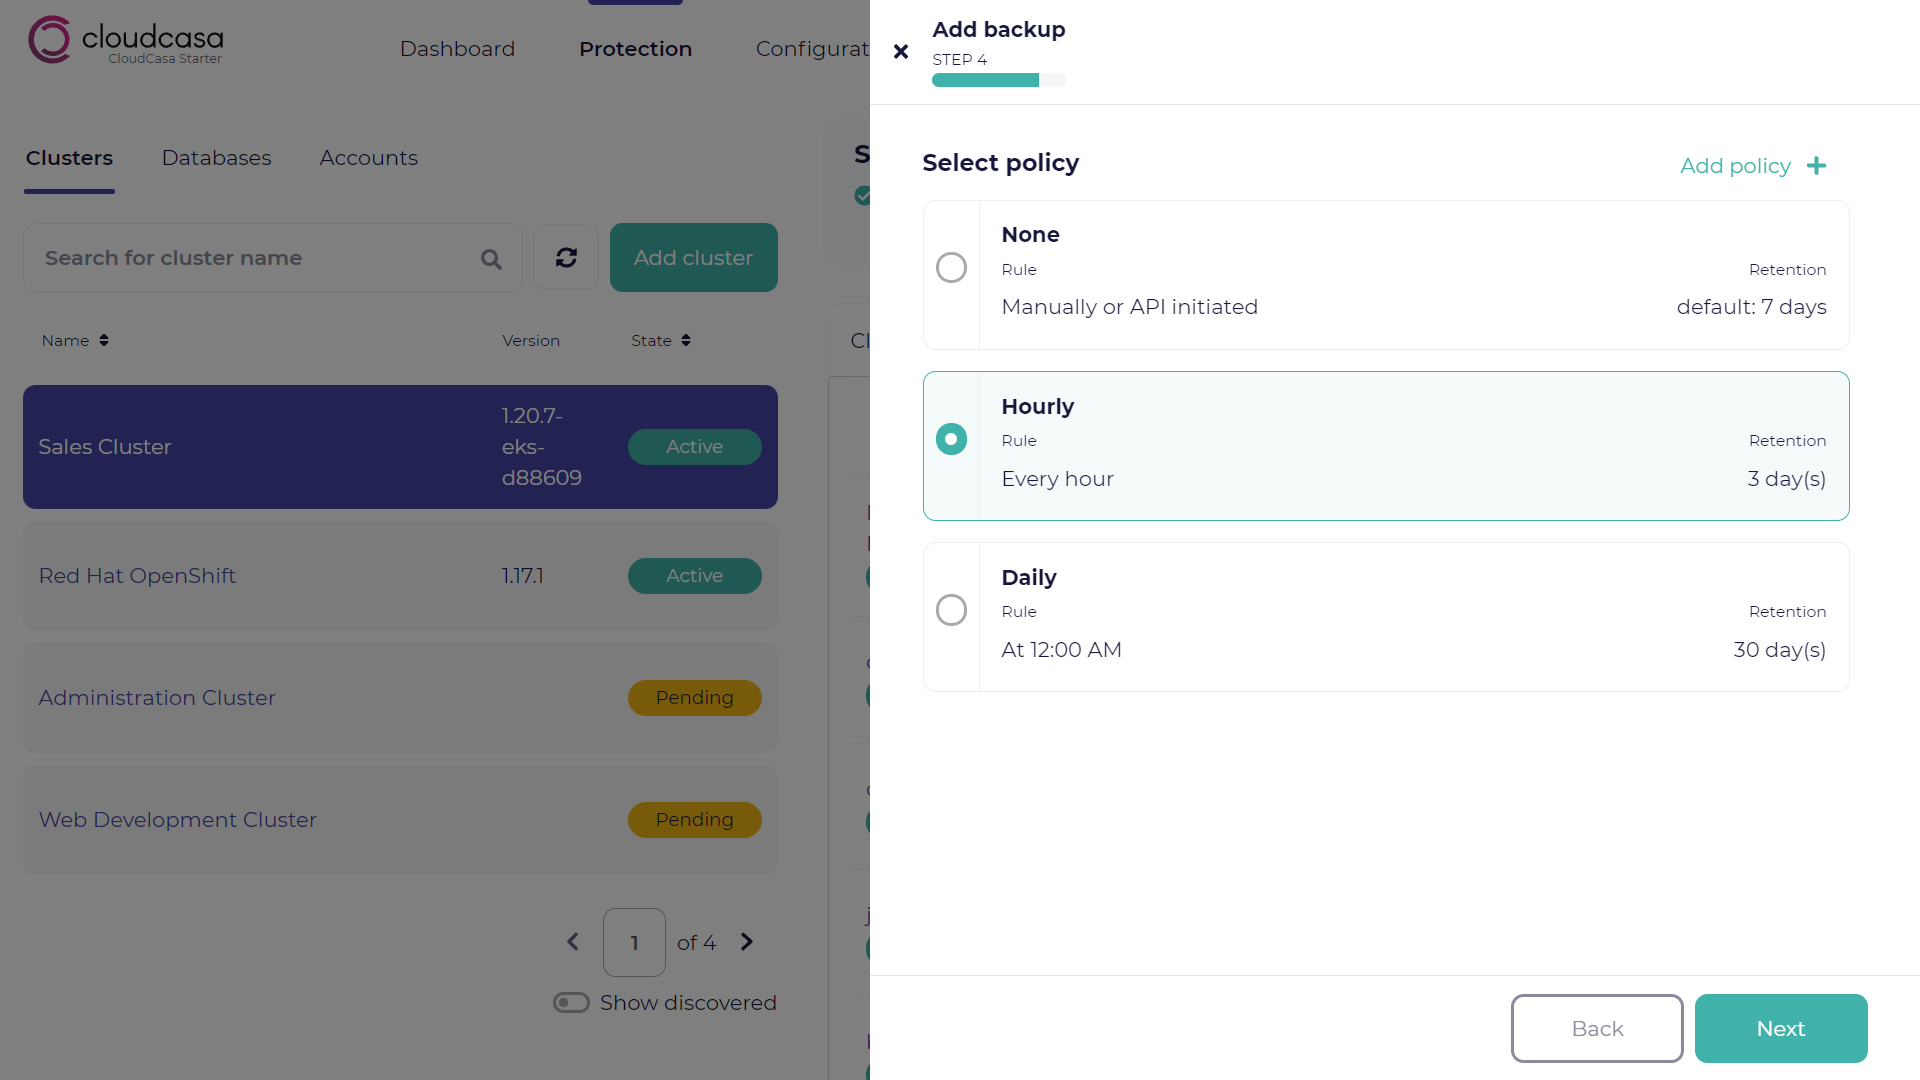
Select a policy for the backup. Click Next.
See also
For more information about policies, see Policies.
Review the summary of the backup, and click Create.