Security: Scan Jobs
Security scans in CloudCasa are performed by defining and running security scan jobs. These can be scheduled or run on an ad-hoc basis, just like Kubernetes and database backup jobs. A single job can be used to perform security scans on multiple clusters and/or cloud accounts. Policies are used to define when these jobs will run and for how long the results will be stored. The Security/Scan Jobs page allows you to view and manage security scan jobs.
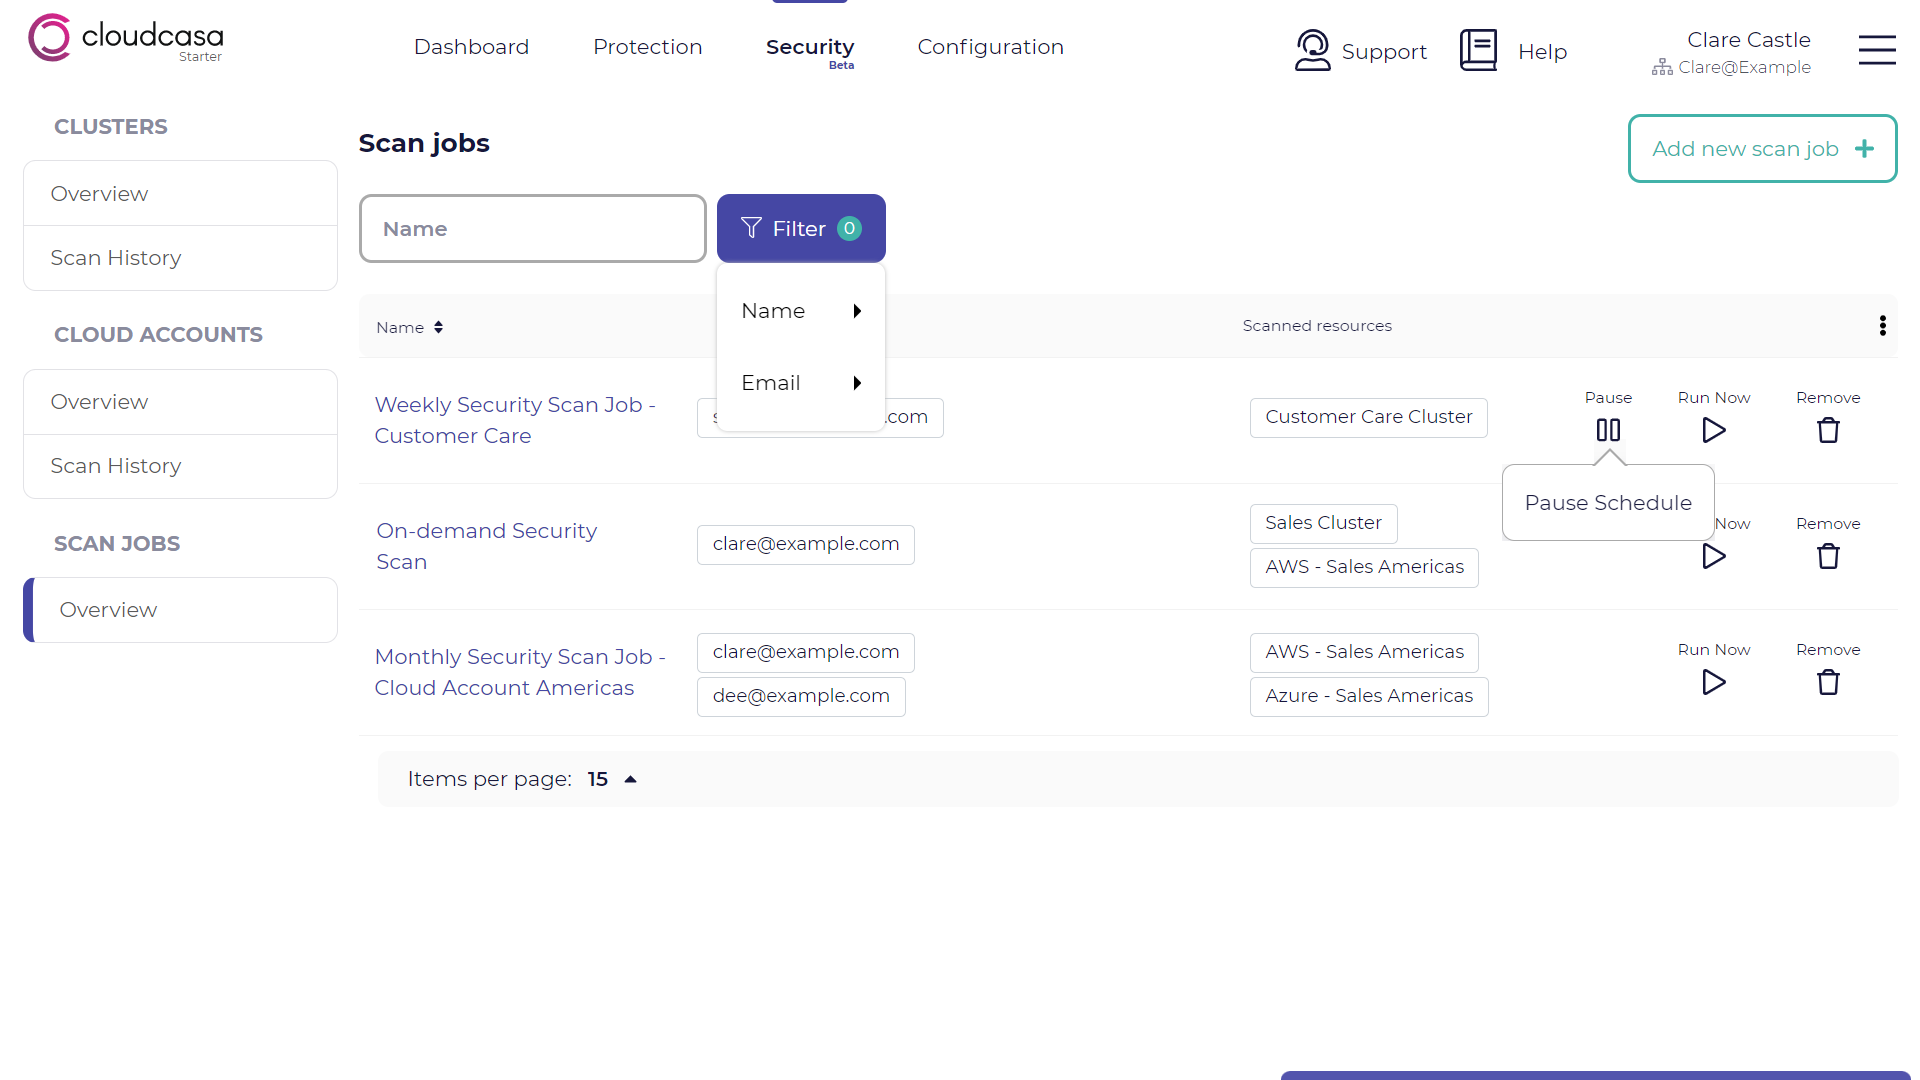
The Security Scan Jobs Overview page will display a list of all defined jobs, as well as some basic information about them such as the resources they scan, the email address(es) where result summaries will be sent, and the status of the last three runs. On the right are action button for each job, including Pause/Resume to pause or resume scheduling of a job with schedule policies defined, Run Now to start the job immediately regardless of schedule policies, and Remove to delete the job. Clicking on a job name will open the Security Scan Job wizard, allowing you to view and edit the job details.
You can define a new security scan job by clicking on the Add new scan job button at the upper right of the page.
See also
- See the following topics to see the results of security
scan jobs:
Creating a security scan job
Take the following steps to create a new security scan job:
On the Security Scan Jobs Overview page, click Add new scan job.
In the Create New Security Scan Job pane, fill in the following fields:
- Security Scan Name
Name the security scan job.
- Clusters
Select cluster(s) that you want to scan.
- Cloud Accounts
Select cloud account(s) that you wish to scan. Currently only scanning of AWS accounts is supported.
You can select multiple clusters and cloud accounts if you wish, but you must select at least one cluster or cloud account to proceed.
- Send email report
Selecting this option will cause CloudCasa to generate an email summary report at the end of each scan job run. After enabling it, you will be prompted to supply one or more email addresses to which the report will be sent. By default, the address for your login will be selected. Click on the red “X” to remove it and then add another if you wish to use a different address. Note that the email report will only be generate if at least one scan in the job succeeds.

Click Next.
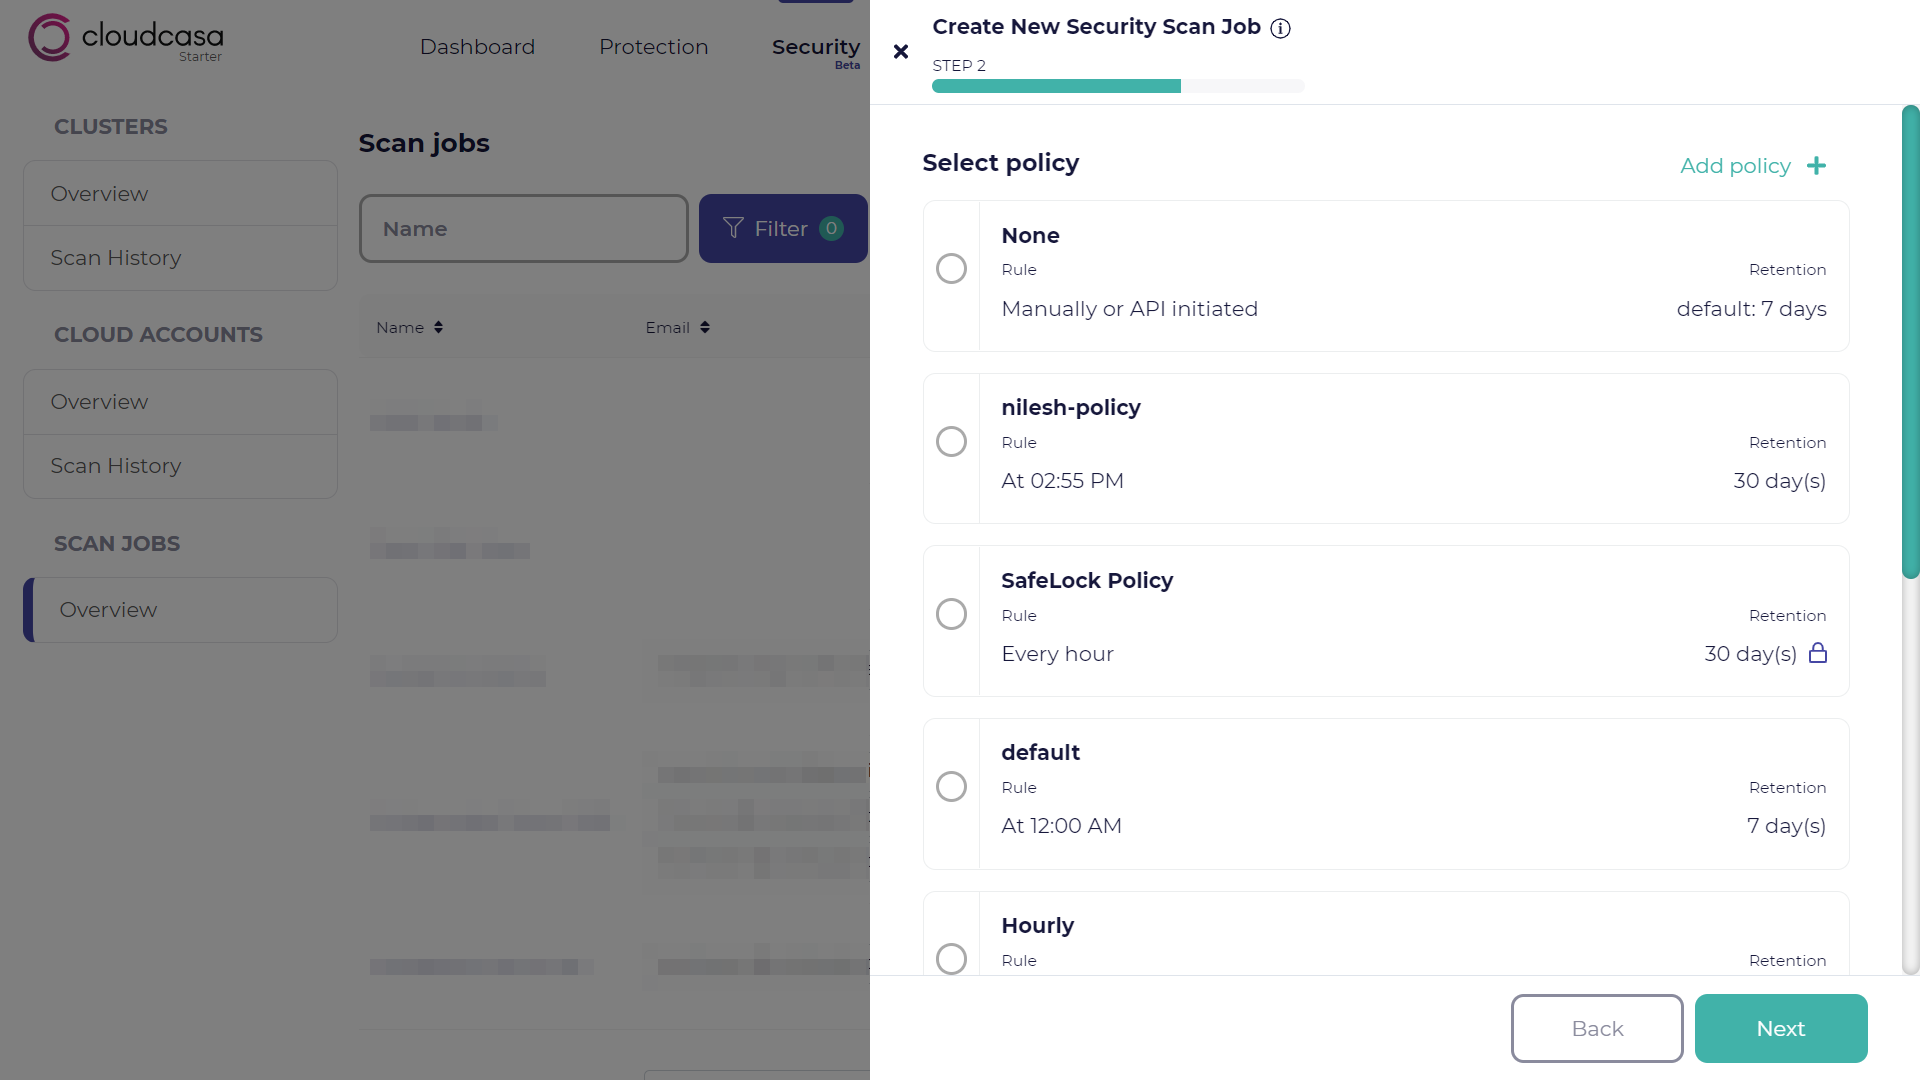
Select a policy to schedule the security scan job. If you select None, the job will not be run automatically, but can be run on an ad-hoc basis via the UI or API. The retention time in the policy will define how long the scan results will be stored. Click Next.
See also
For more information about policies, see Policies.
Tip
With the free service plan, you cannot schedule security scan jobs. You can only run them manually on an ad-hoc basis.
Review the summary of the new security scan job. Click Save.
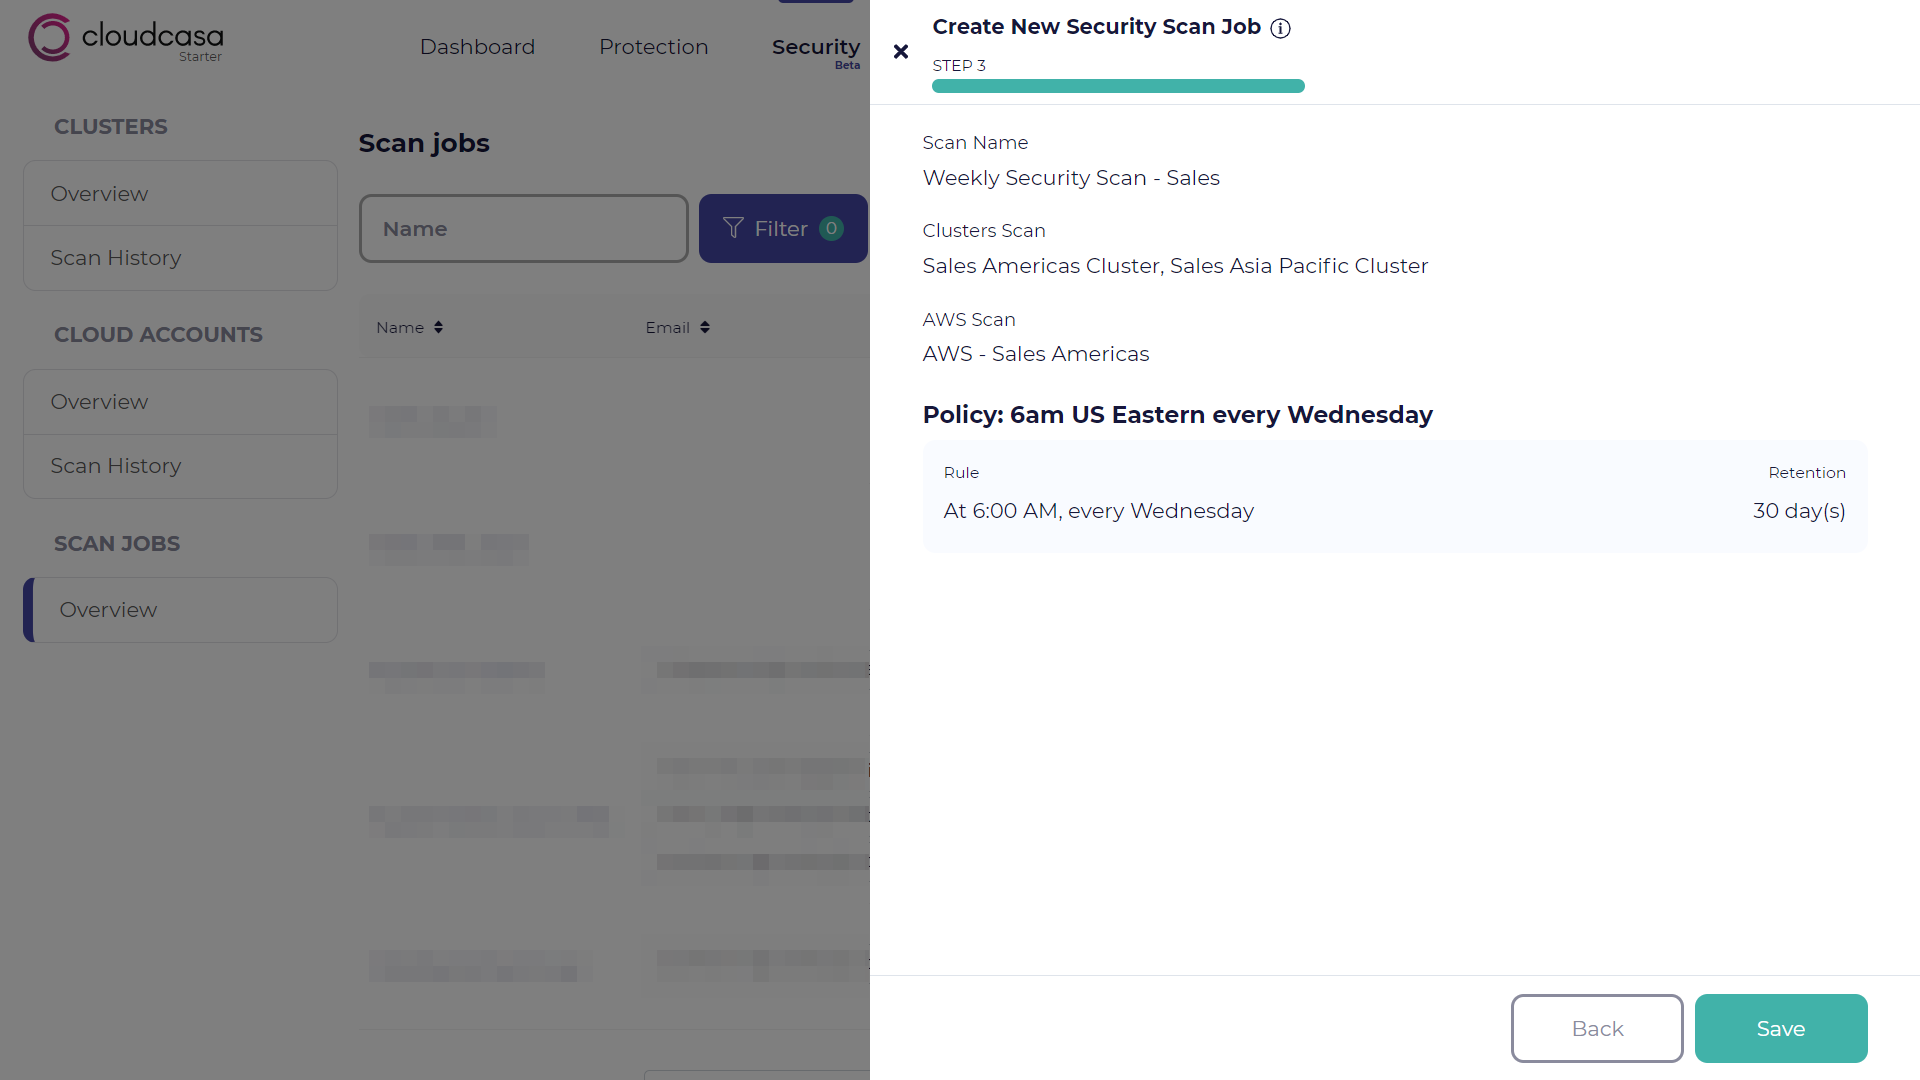
You will see the new job in the Scan Jobs page.