Database Restore Wizard
The database restore wizard allows you to create and edit restore jobs for RDS databases.
The wizard can be opened from several locations, including the Database Overview page, the Database Backup page, the Database Restores page, and the Database Recovery Points page. Depending on where it is started from, a database and/or recovery point may already be selected.
In Step 1, select a database to restore if one is not selected already (see above). Next select one of the following restore types:
- Restore from point in time
Restore to a specific point in time using the RDS PIT restore feature.
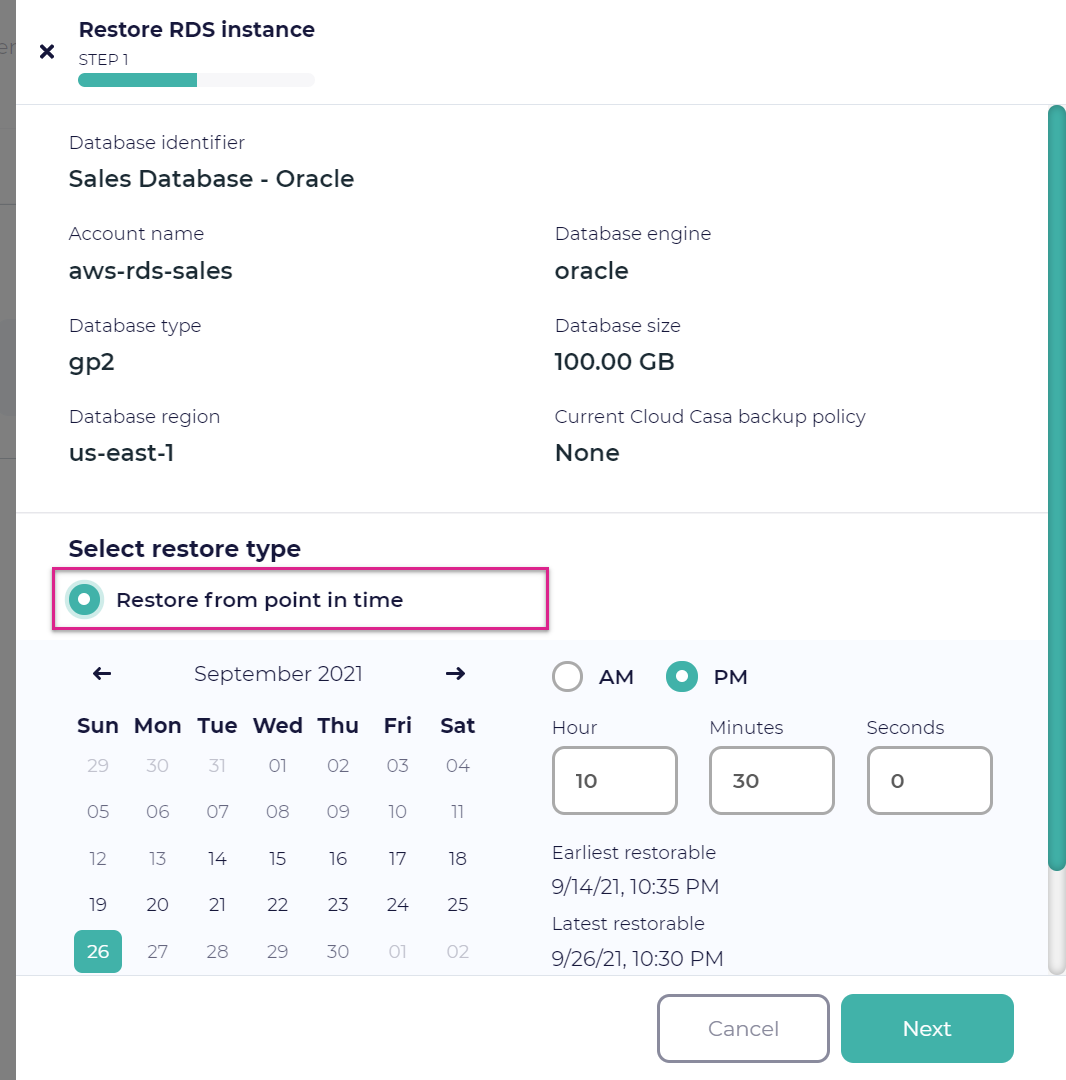
- Restore from available recovery points
Select a recovery point from a list of all available snapshots.

After selecting a recovery point, click Next to go to Step 2.
In Step 2, enter the Restore Name and the DB identifier. The restore name is only used to identify the restore job, and can be set to whatever you want. The DB identifier is the name of the new RDS database or Aurora cluster instance that will be created by the restore.
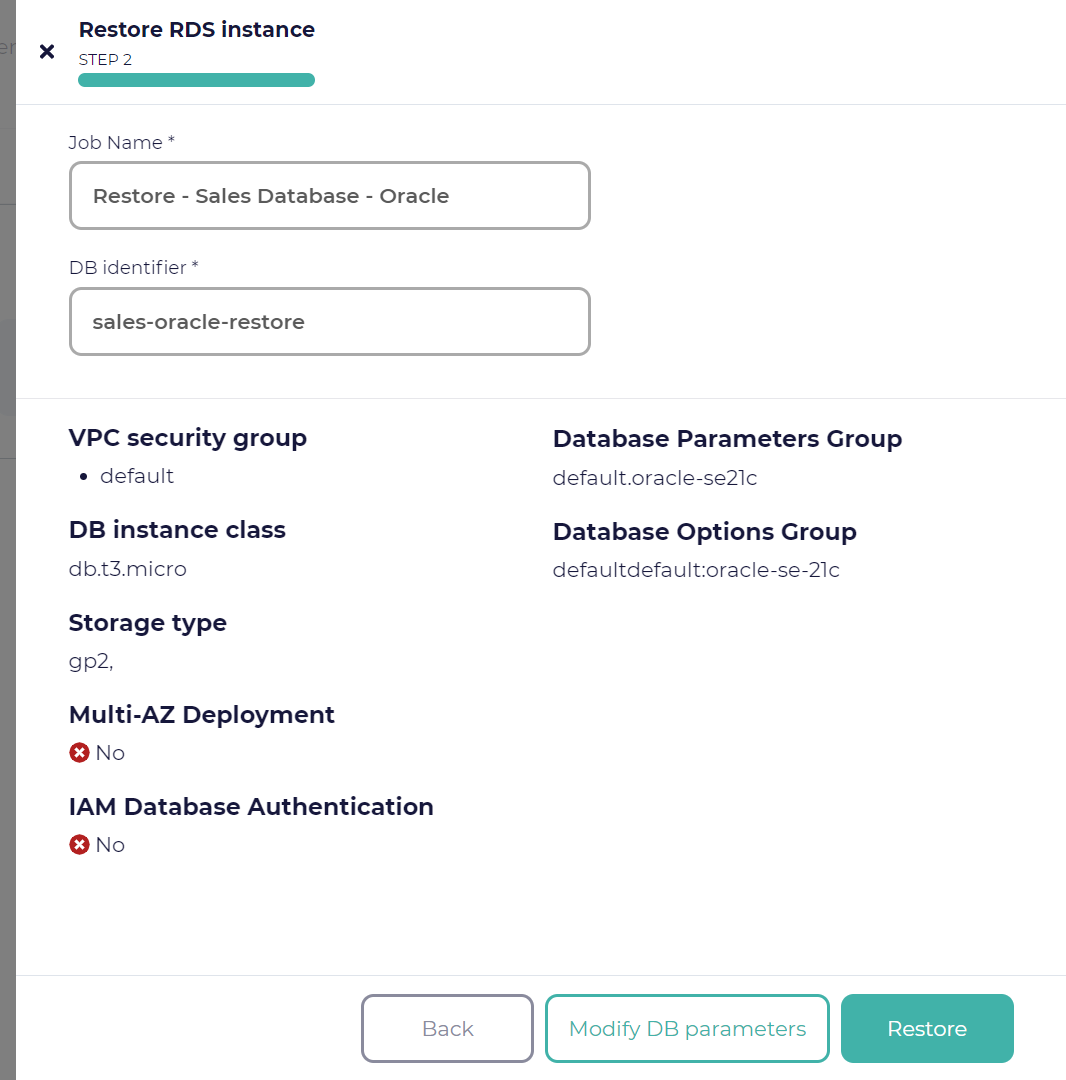
Click Restore to create the restore job.
(Optional) You can click Modify DB parameters to modify RDS database parameters. By default, the saved parameters from the backed up database will be used. You can modify the following:
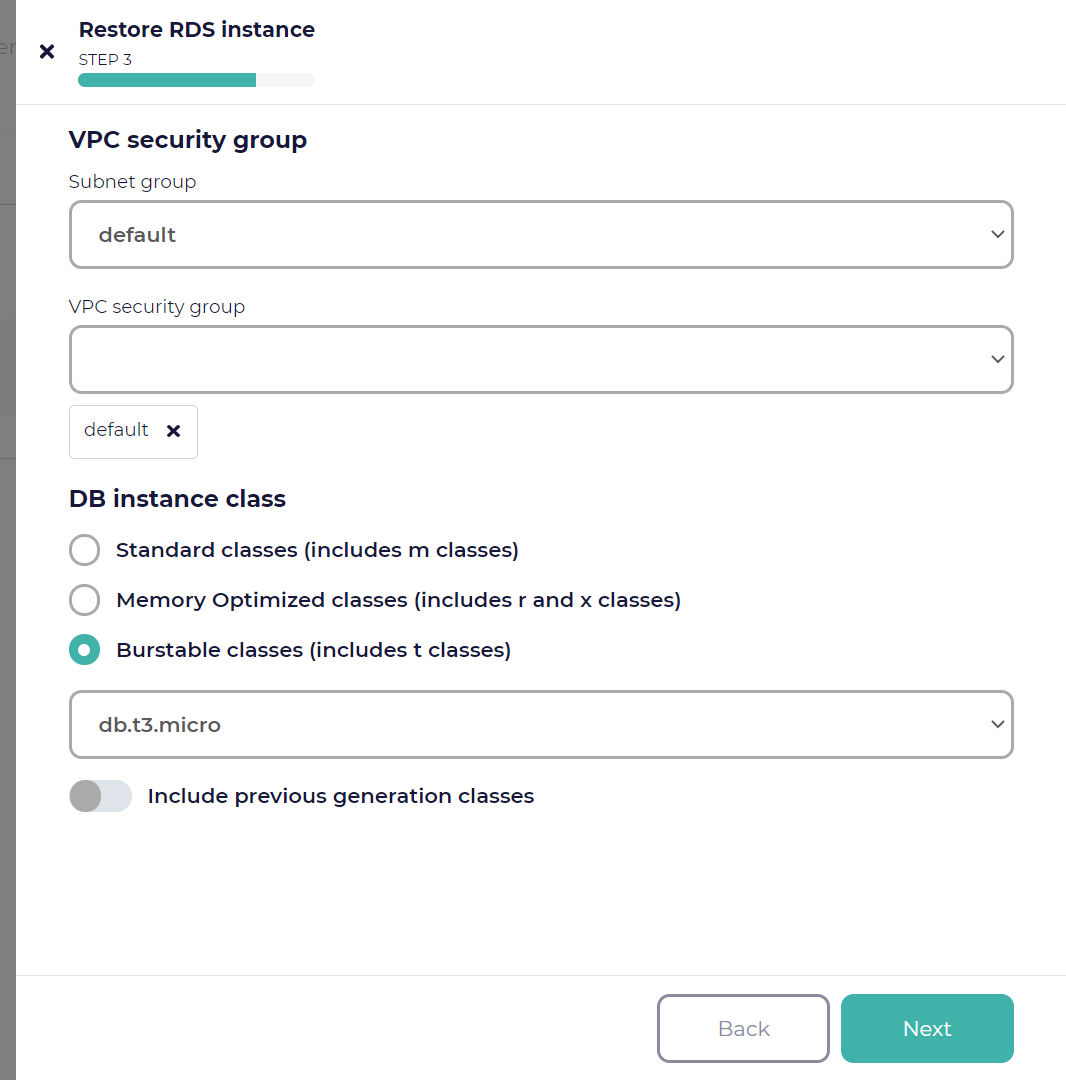
- VPC security group ► Subnet group
Specify the subnet group of your Amazon Virtual Private Cloud (VPC).
- VPC security group ► VPC security group
Specify the security groups of your Amazon VPC. You can select multiple items.
See also
For general information about Amazon VPC for Amazon RDS, see the following document:
AWS Amazon Relational Database Service (RDS) User Guide: “Working with a DB instance in a VPC”
- DB instance class
Specify the DB instance class of Amazon RDS. First, select one of the following class groups:
Standard classes
Memory optimized classes
Burstable classes
Then, select the database instance class from the drop-down list.
See also
For general information about the DB instance classes of Amazon RDS, see the following document:
AWS Amazon Relational Database Service (RDS) User Guide: “DB instance classes”
- Include previous generation classes
Enable this option to add older classes to the list of available instance classes.
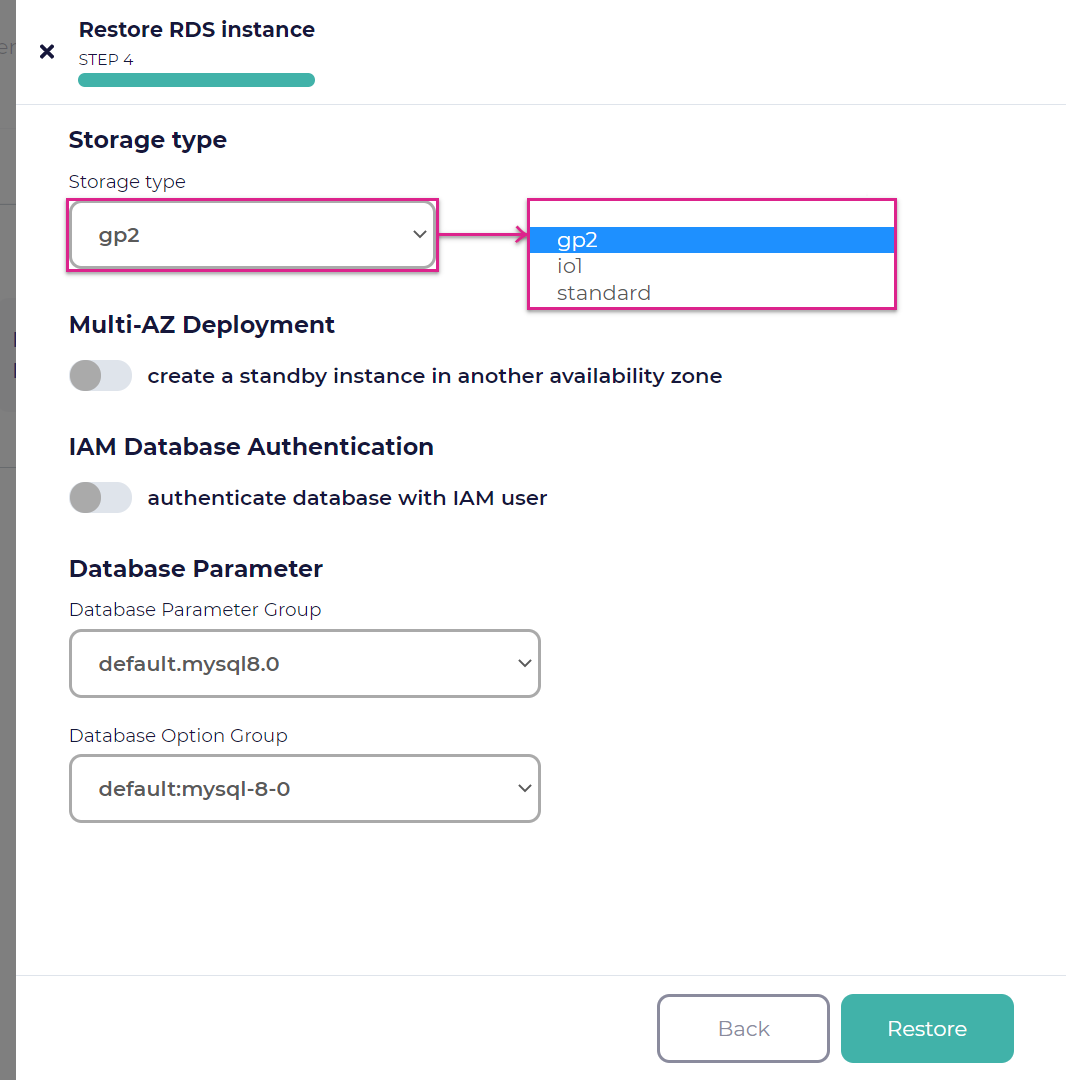
Click Next to go to Step 5, and configure the following values:
- Storage type ► Storage type
Select the storage type from the following types:
Amazon EC2 General Purpose SSD (gp2)
Amazon EC2 Provisioned IOPS SSD (io2)
Previous generation volume types
See also
For general information about Amazon RDS DB instance storage, see the following document:
AWS Amazon RDS User Guide: “Amazon RDS instance storage”
- Multi-AZ Deployment ► create a standby instance in another availability zone
Enable this option to create a standby instance in a different Amazon RDS Availability Zone (AZ).
See also
For general information about Amazon RDS Multi-AZ deployments, see the following document:
AWS Amazon RDS features: “Amazon RDS Multi-AZ Deployments”
- IAM Database Authentication ► authenticate database with IAM user
Enable this option to authenticate the database with a AWS Identity and Access Management (IAM) user.
See also
For general information about AWS IAM, see the following document:
- Database Parameter ► Database Parameter Group
Specify the database (DB) parameter group of Amazon RDS.
See also
- For general information about the DB parameter groups
of Amazon RDS, see the following document:
AWS Amazon Relational Database Service (RDS) User Guide: “Working with DB parameter groups”
- Database Parameter ► Database Option Group
Specify the option group of Amazon RDS.
See also
For general information about the option groups of AWS RDS, see the following document:
AWS Amazon Relational Database Service (RDS) User Guide: “Working with option groups”
Click Restore to create the restore job.
You can monitor the running restore job and check its completion status in the Dashboard Activity tab.