Cluster Recovery Points
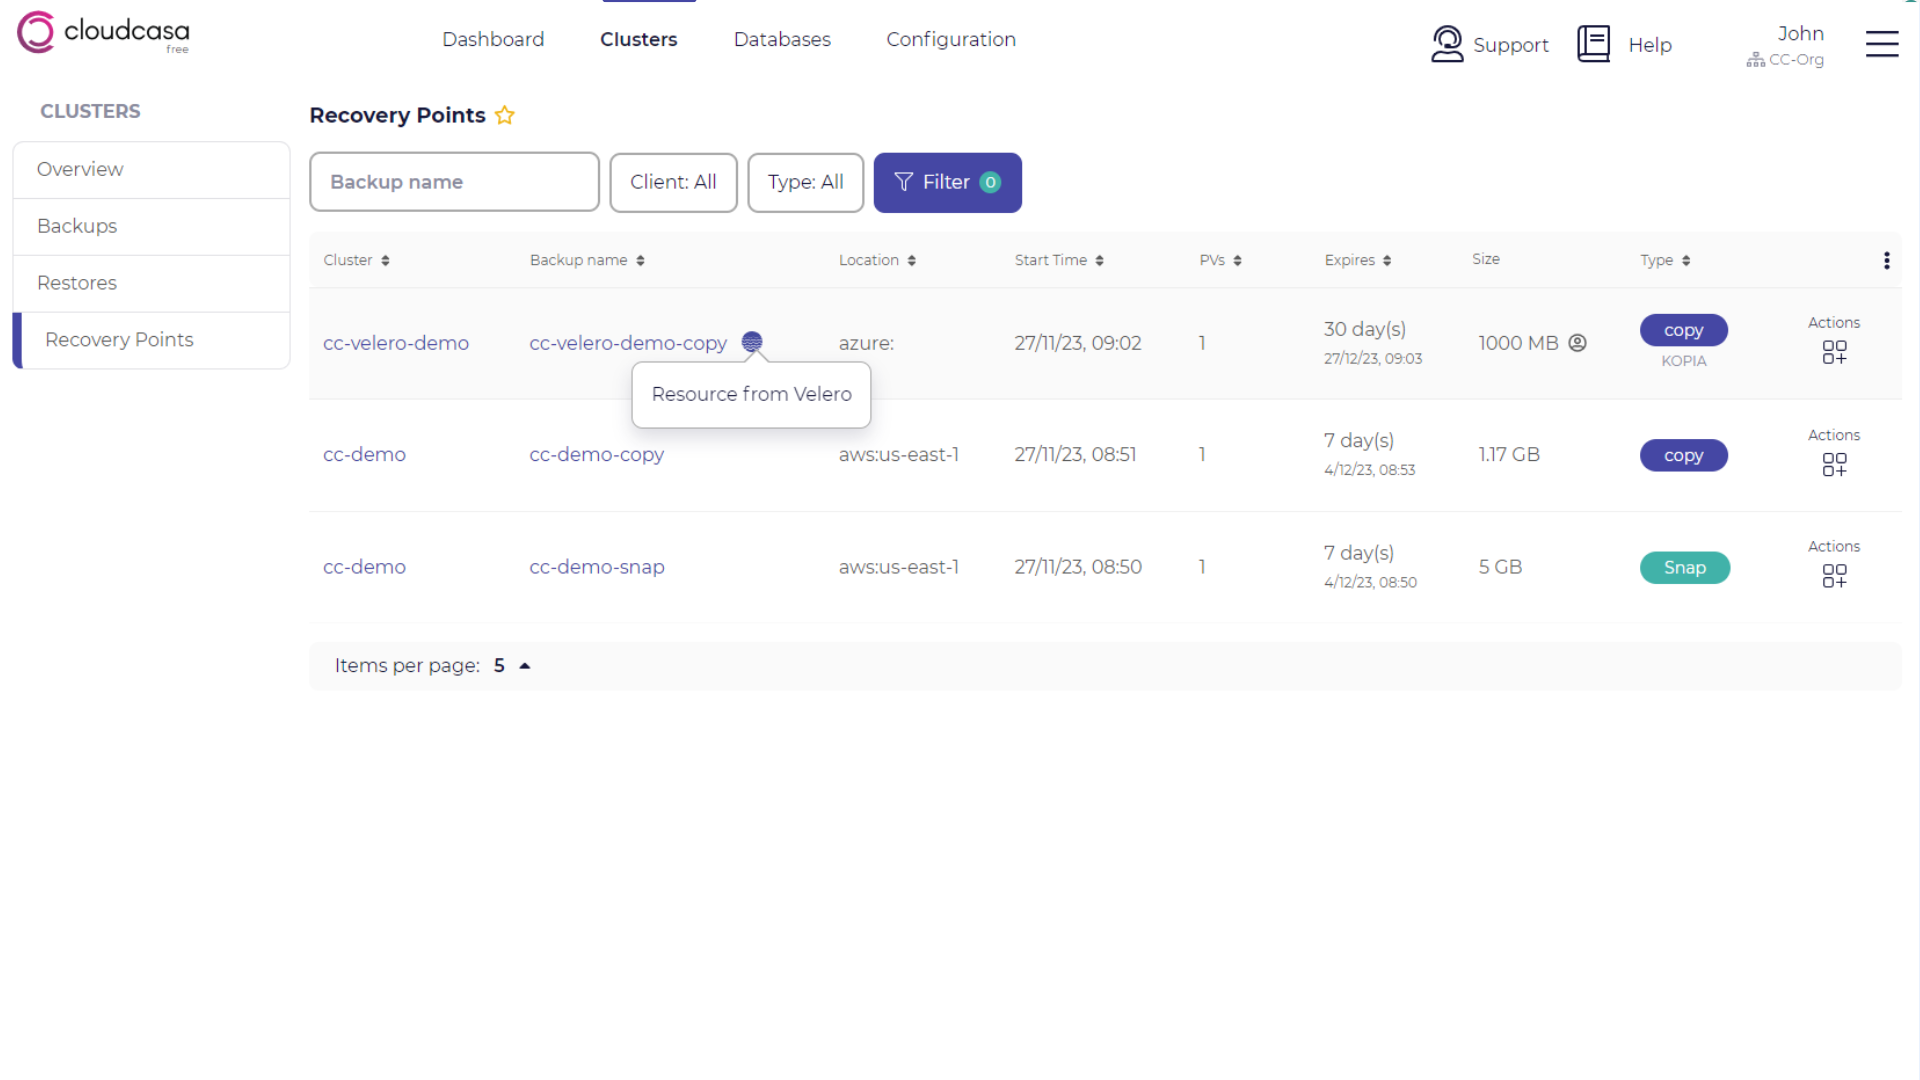
The Clusters/Recovery Points page lists all of your currently available recovery points from all Kubernetes backups. You can browse the recovery points using sorting and filtering, initiate restores, and manually remove recovery points if they aren’t locked.
Every time a cluster backup job runs successfully, it creates a recovery point. You can use any existing recovery point to restore your cluster resources and persistent volumes (PVs). The restore can be performed to the same cluster or to a different cluster.
Note
With the Free Service Plan, backup retention times are limited to a maximum of 30 days.
You will typically see many recovery points listed if you have regularly backed up your Kubernetes clusters. To help you quickly find the correct one for a restore, you can sort or filter by cluster, backup name, storage location, start time, and backup type (snapshot vs. copy).
Available operations in the Cluster Recovery Points page
For each recovery point listed, the following operations may be available:
- Extend the retention period of a recovery point using SafeLock
Click SafeLock to add time to the retention period for a recovery point using SafeLock. For example, say that you create a recovery point with SafeLock on January 1, 2023, and the retention period is set to 10 days. On January 9, you extend the retention period by 10 days so that the recovery point will be purged on January 20 instead of January 10. Because SafeLock is enabled with this recovery point, you cannot delete it until the expiration day nor can you shorten the retention period. For more information about SafeLock, see SafeLock.
- Running a restore job manually
Click Restore to define a restore job using the recovery point. For more information about restore jobs for clusters, see Cluster Restores
- Removing a recovery point manually
Click Remove to manually delete a recovery point without SafeLock even before the expiration date and time. You cannot remove recovery points with SafeLock enabled until they expire.
- Browse the recovery point
Click Resources to browse the recovery point with the resource browser. This is an easy way of finding out exactly what is in a given recovery point if you aren’t sure how the backup was configured when it was run.
Click Files to browse the files in the recovery point’s PVs with the file browser.
Browsing Recovery Points
The recovery point browsers can be used to examine and recover resources and files contained in recovery points.
Browsing Resources
You can browse recovery points and see all of the resources included in them using the resource browser. To do this, select Resources from recovery point actions in the list. This will open the recovery point resource browser, which allows you to browse resources included in the recovery point by namespace, resource type, or resource name (selectable at the top of the pane).
If you have sufficient permissions, you also have the ability to retrieve and view the YAML for each resource by clicking on the View (eye) icon next to the resource name. Note that for this to work, an administrator must have enabled the Enable viewing of resource YAML when browsing backups option on the Configuration/Settings page. Also note that data from resource of type Secret will automatically be redacted.
This is an easy way of finding out exactly what is in a given recovery point if you are not sure how the backup was configured when it was run. It’s also a convenient way of manually comparing or updating a resource in your cluster with one from a recovery point.
Browsing Files
You can browse and retrieve files from the PVCs in a recovery point, and even from within VMs in a recovery point, using the file browser. To do this, select Files from recovery point actions for any “Copy” type recovery point in the list. This will open the Recovery Point File Browser.
Since VMs typically use block type PVs that are opaque to the Kubernetes cluster itself, the normal CloudCasa file-level restore facility will not work with them. But you can retrieve individual files from a VM’s filesystems by using the Recovery Point File Browser.
Use the browser to choose the VM you are interested in, and click the Browse icon next to it to open the VM file browser. The VM file browser will actually mount an image of the VM filesystem, so you will need to choose a proxy cluster and select the PVC(s) you are interested in browsing. The Proxy Cluster can be any cluster that supports running VMs and has access to the backup storage containing the recovery point. It defaults to the source cluster.
Note that you may need to wait for several minutes for file data to be retrieved. You can browse the VM’s filesystems and select files to be retrieved. These files can be downloaded directly to your workstation or to another system as a zip file. Click Download and choose “Download Now” or “Create Download Link”. Download links will expire in 1 hour, by default.
