Overview of Clusters
The Clusters Overview page provides information about all of the Kubernetes clusters that have been configured in or automatically discovered by CloudCasa. It also allows you to add, edit, or remove clusters, to link discovered clusters to already configured clusters, and to install or update the agent on configured clusters.
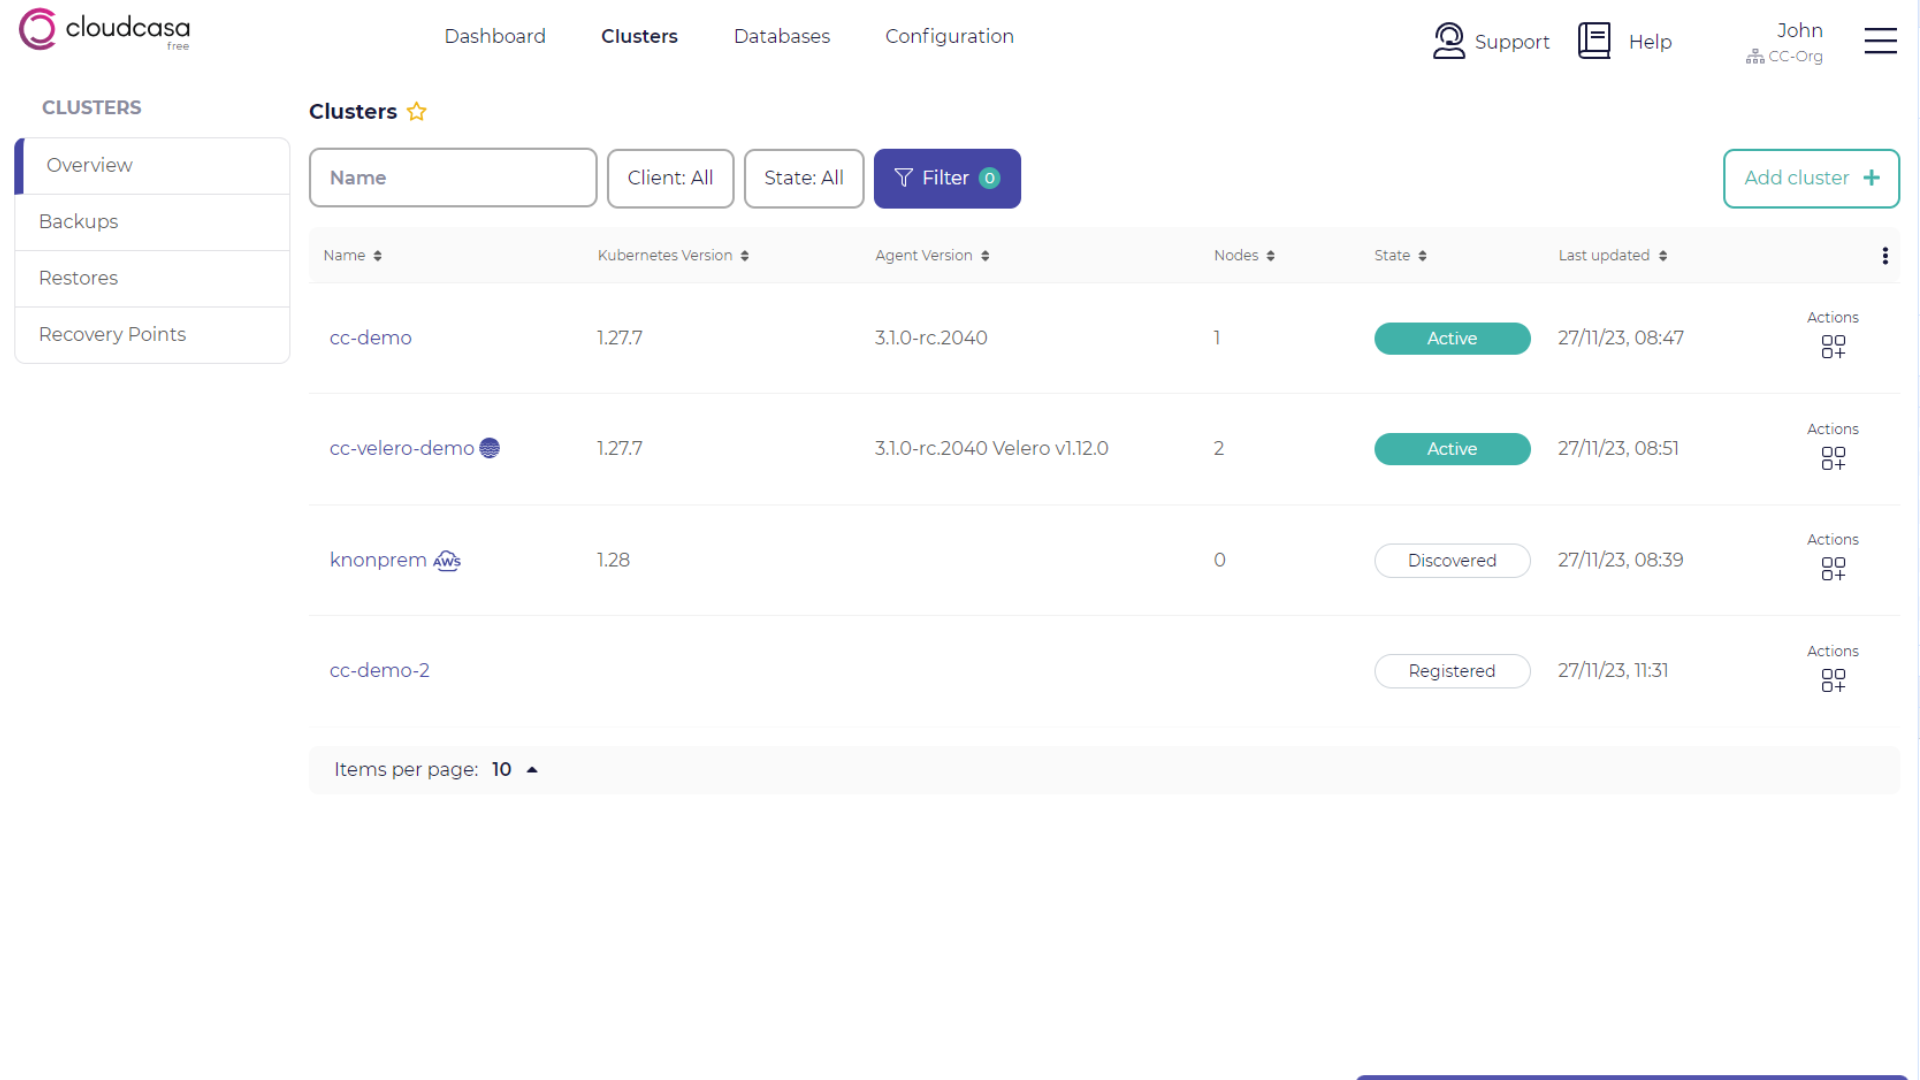
From the menu bar, go to Clusters/Overview. In the list of cluster instances, you will see the name, description, version, status, tags, modified time, and creation time for each cluster instance. You can also filter and sort the cluster instance list by these values. Note that not all columns are displayed by default.
Cluster status includes the following states:
ACTIVE - The cluster is configured and the agent is running and connected.
DISCOVERED - The cluster was auto-discovered, but has not yet been configured.
PENDING - The cluster was previously ACTIVE, but the agent has lost its connection.
REGISTERED - The cluster is configured, but the agent has not yet connected to CloudCasa.
Click on a cluster to open the Cluster Dashboard page for that cluster. Mouse-over the “Actions” icon for a cluster to display the available action buttons for that cluster. Depending on the cluster state, these may be Edit, Remove, Link, and Hide.
Edit - Allows you to edit a discovered or configured cluster, and also to launch or re-launch the agent installation or update process.
Remove - Allows you to delete a configured cluster. Note that you may first have to delete associated objects such as jobs. You cannot delete a discovered cluster, since it would just be re-discovered during the next cloud account scan. However, you can Hide it instead.
Hide - Allows you to hide a discovered cluster so that it will not display in the Clusters/Overview list or the Cloud Account dashboard Clusters tab. You can see discovered clusters that have been hidden by going to the Cloud Account dashboard Clusters tab and removing the “Hidden=False” filter on the table. You can then un-hide them, if desired, by clicking the Unhide button.
Link - Allows you to tell CloudCasa that a discovered cloud cluster is really the same as an already configured cluster. You do this by linking the discovered (source) cluster to the already configured (destination) cluster. You can rename it as the same time, if you wish.
Click the “Add cluster” button in the upper right to configure a new cluster.
See also
See Adding a Cluster for more information about adding clusters.
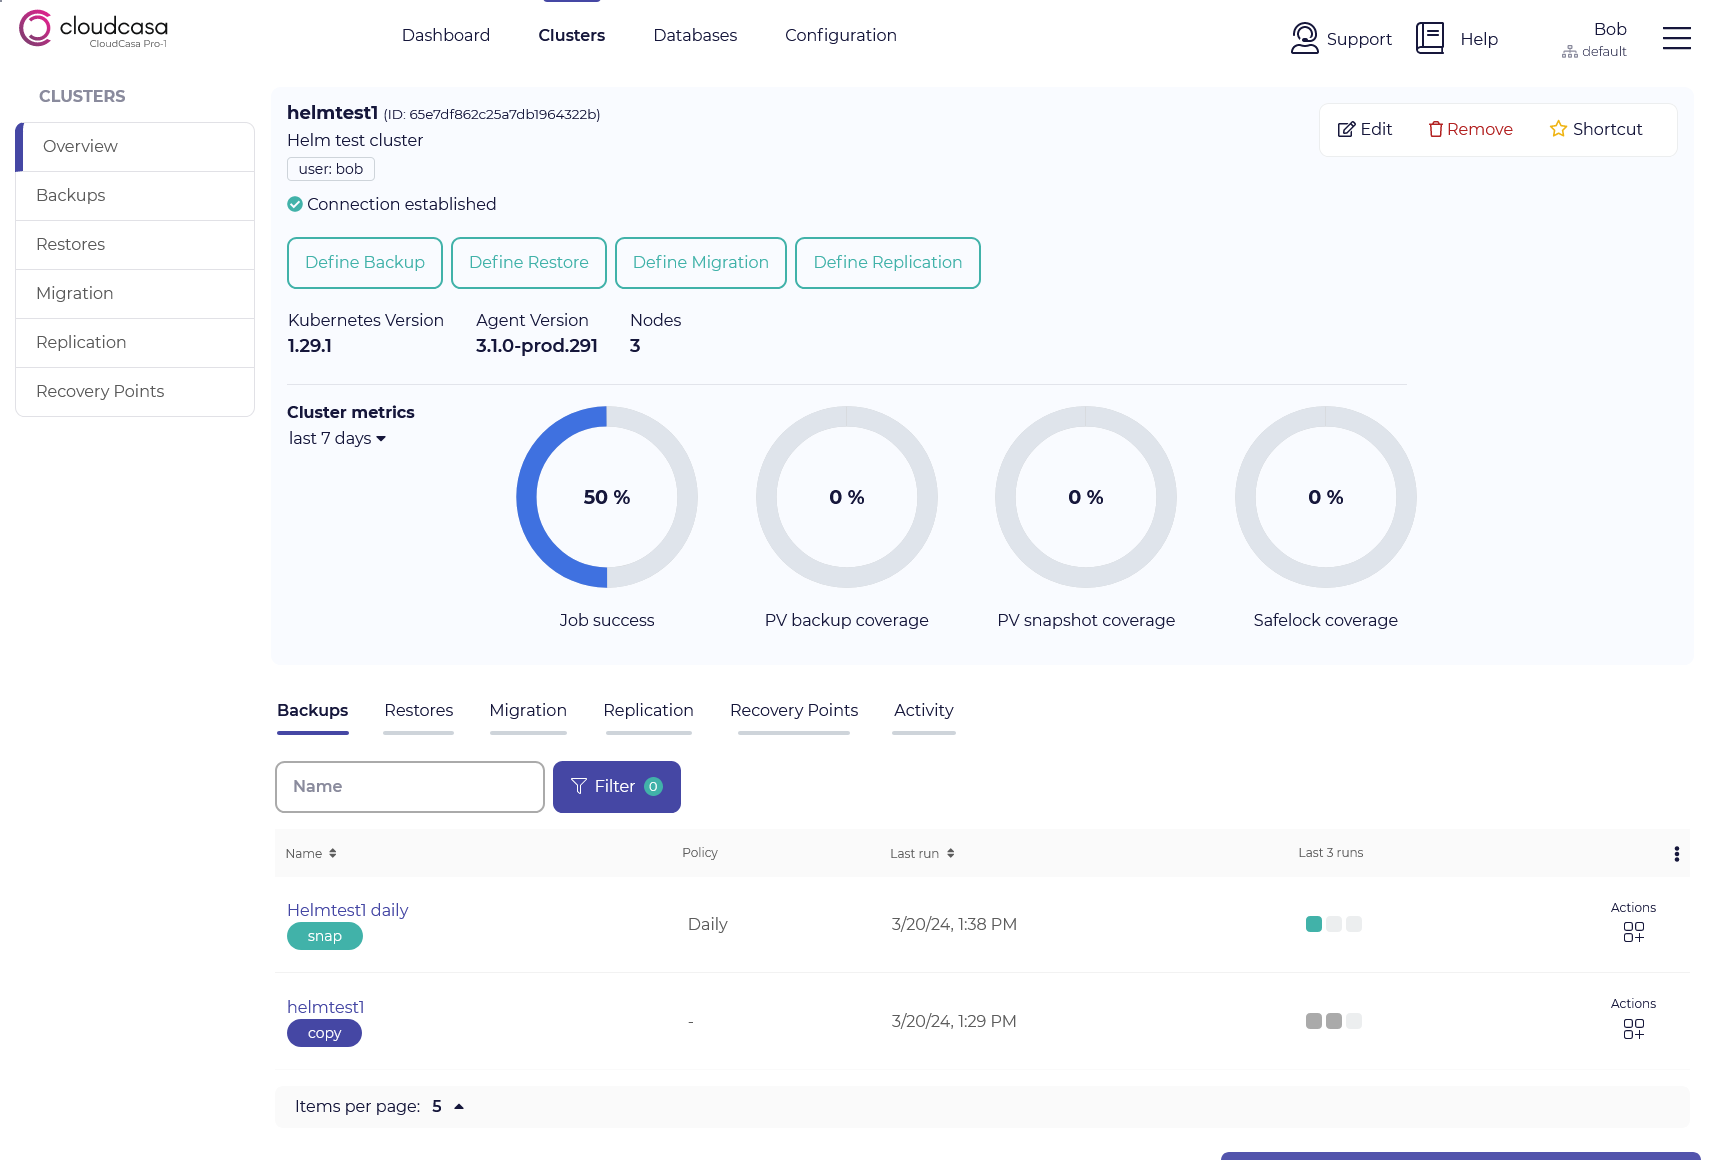
Cluster Dashboard
You can drill down on any item in the cluster instance list to see additional information including:
Cluster name
Cluster ID
Connection status
Cluster metrics from the last 24 hours, 7 days, or 30 days: - Job success percentage - PV backup coverage percentage - PV snapshot coverage percentage - SafeLock coverage percentage
There are also tabs that display:
Backup jobs defined for the cluster
Restore jobs defined for the cluster
Migration jobs defined for the cluster
Replication jobs defined for the cluster
Recovery points available for the cluster
Activity (recent job runs) for the cluster
At the top of the page, controls are available to edit or delete the cluster and to define new jobs.
Adding a cluster
See Adding a Cluster for step-by-step instructions on how to add a cluster to CloudCasa.
Editing or upgrading a cluster
Selecting Edit for a cluster will open the Edit Cluster pane. The options provided are similar to those displayed when adding a cluster, except for the following:
The ClusterID and Status are displayed.
Action buttons are displayed at the top, which vary depending on the state of the cluster.
The Update available button is displayed if an agent update is available for the cluster. Clicking it will initiate the update.
The Install button is displayed if the cluster is not Active. Clicking it will open the agent installation dialog.
The Permissions button is always displayed. Clicking it will open the “Manage cluster permissions” dialog. This allows you to create an ACL to grant specific permissions to the cluster to users or groups, for all or selected namespaces. Note that permissions assigned at the cluster level add to permissions the user or group may have from user groups and roles.
See also
See Adding a Cluster for more information about editing clusters.