Cluster Restore Wizard
The Restore Cluster wizard allows you to create and run a Kubernetes cluster restore definition. The data can be restored to the source cluster or to a different cluster. In the latter case, you can choose an existing cluster, or create a new one in any cloud provider account that you have registered with CloudCasa.
The Restore Cluster wizard can be initiated from many places in the UI, including: Clusters/Restores, Clusters/Recovery Points, Clusters/Backups, the Cluster dashboard, the Cluster dashboard Backups, Restores, & Recovery points tabs, and the Dashboard “Cluster Backups” tab.
Restoring a Kubernetes backup
Depending on how you reached the Restore Cluster wizard, the source cluster and recovery point may already be selected for you.
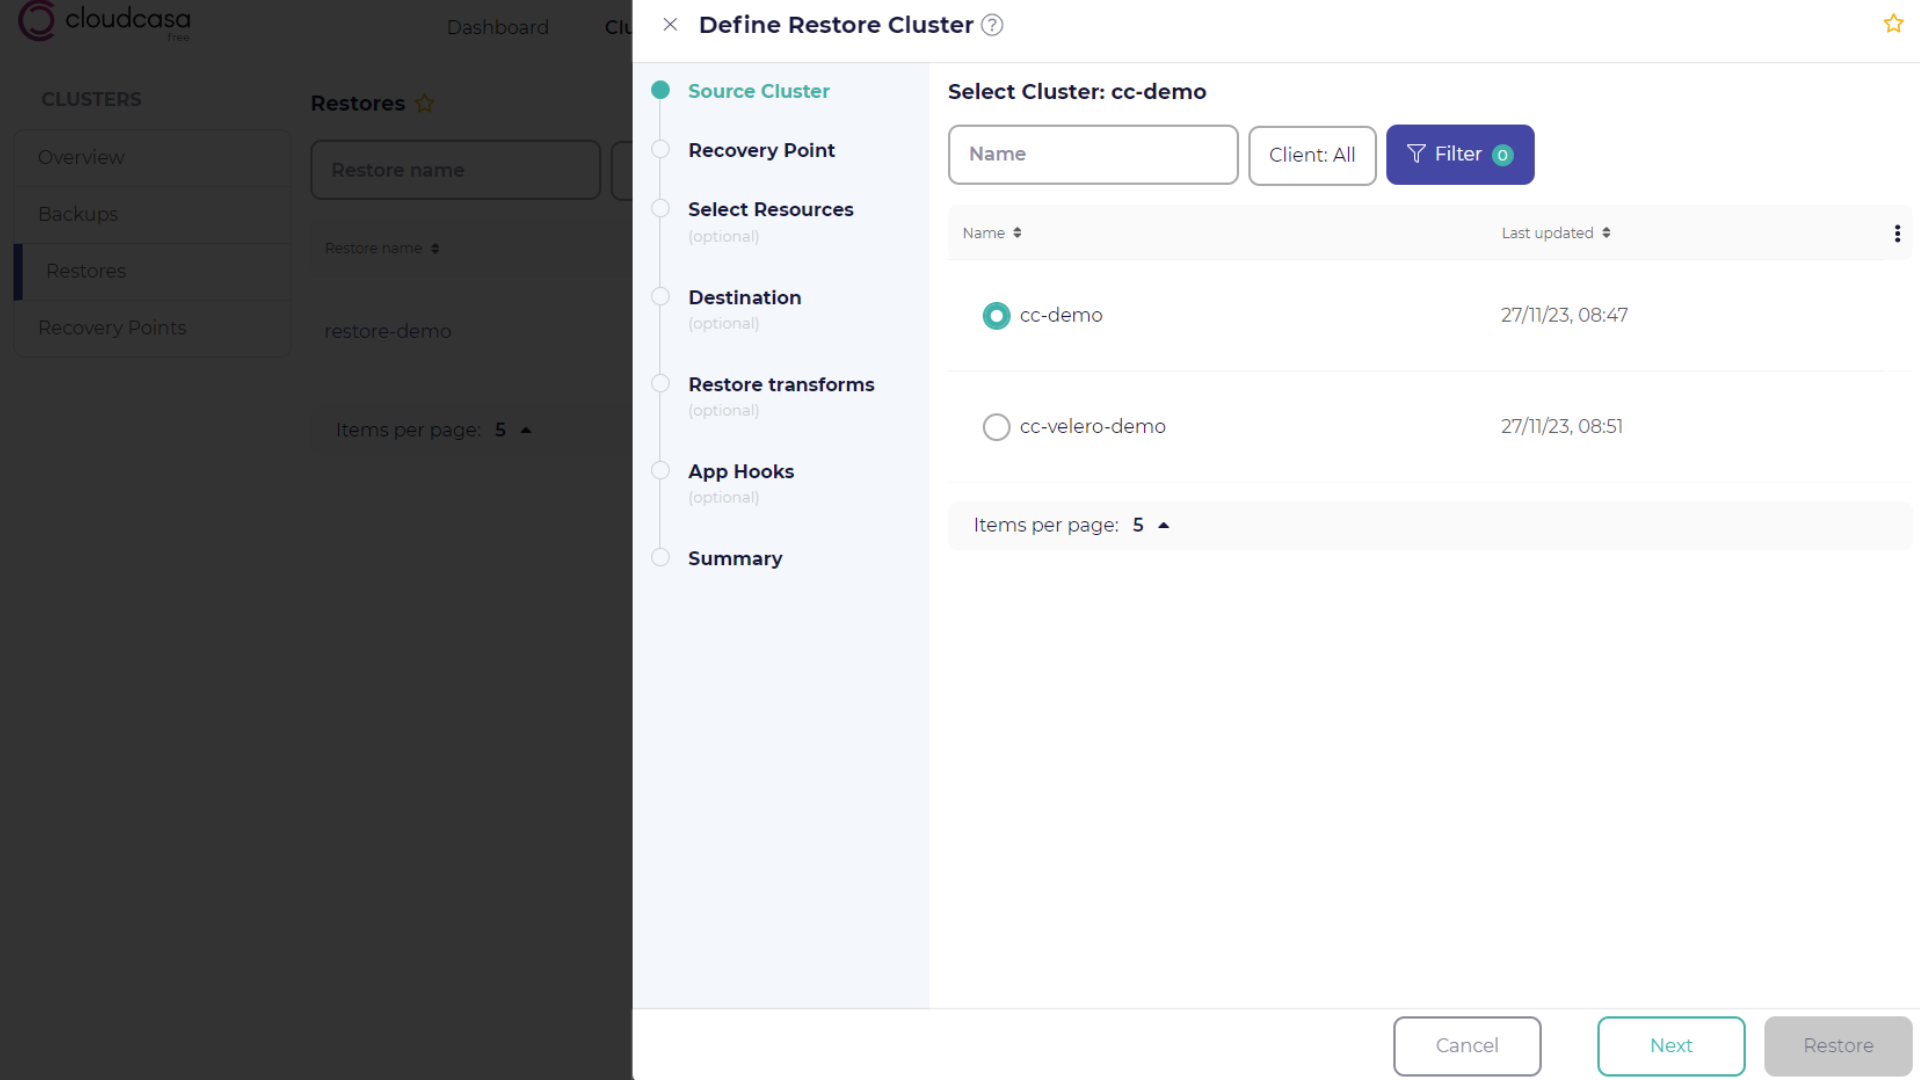
Source cluster selection
In the Source Cluster step, select the cluster to restore from. You can choose only one source cluster and recovery point for each restore job.
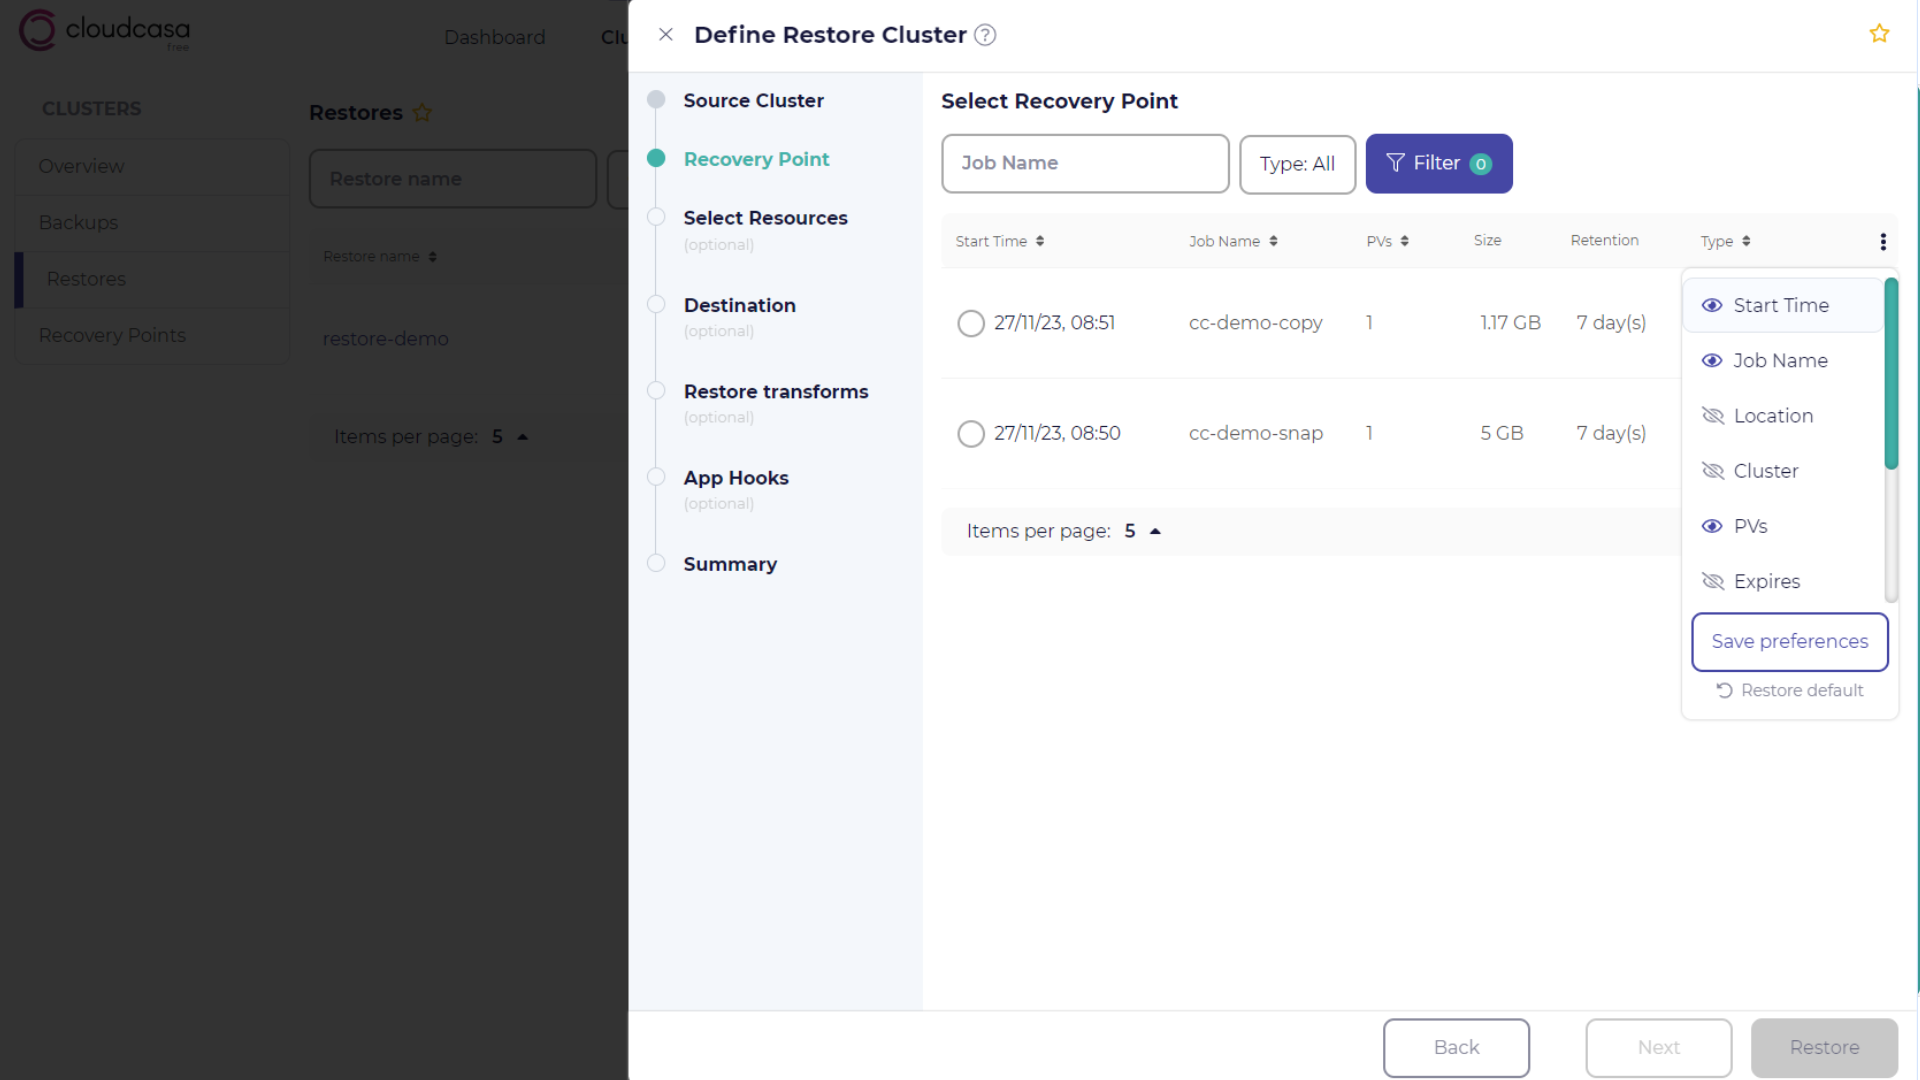
Recovery point selection
In the Recovery Point step, select a recovery point to restore from using the list provided. You can use filters and sorting to help you to quickly find the best one.
Resource selection
In the Select Resources step, you choose which cluster resources to restore. You can also set several advanced options related to restore performance.
Three tabs are available for different types of resource selection.
Standard selections is for normal restores of an entire cluster, of selected namespaces, or using selection by resource type and/or label selector.
VMs/PVCs allows you to easily select individual VMs or PVCs for restore.
Specific resources allows you to choose individual resources to restore using the resource browser.
Files allows you to restore individual files from a selected PV using the file browser.
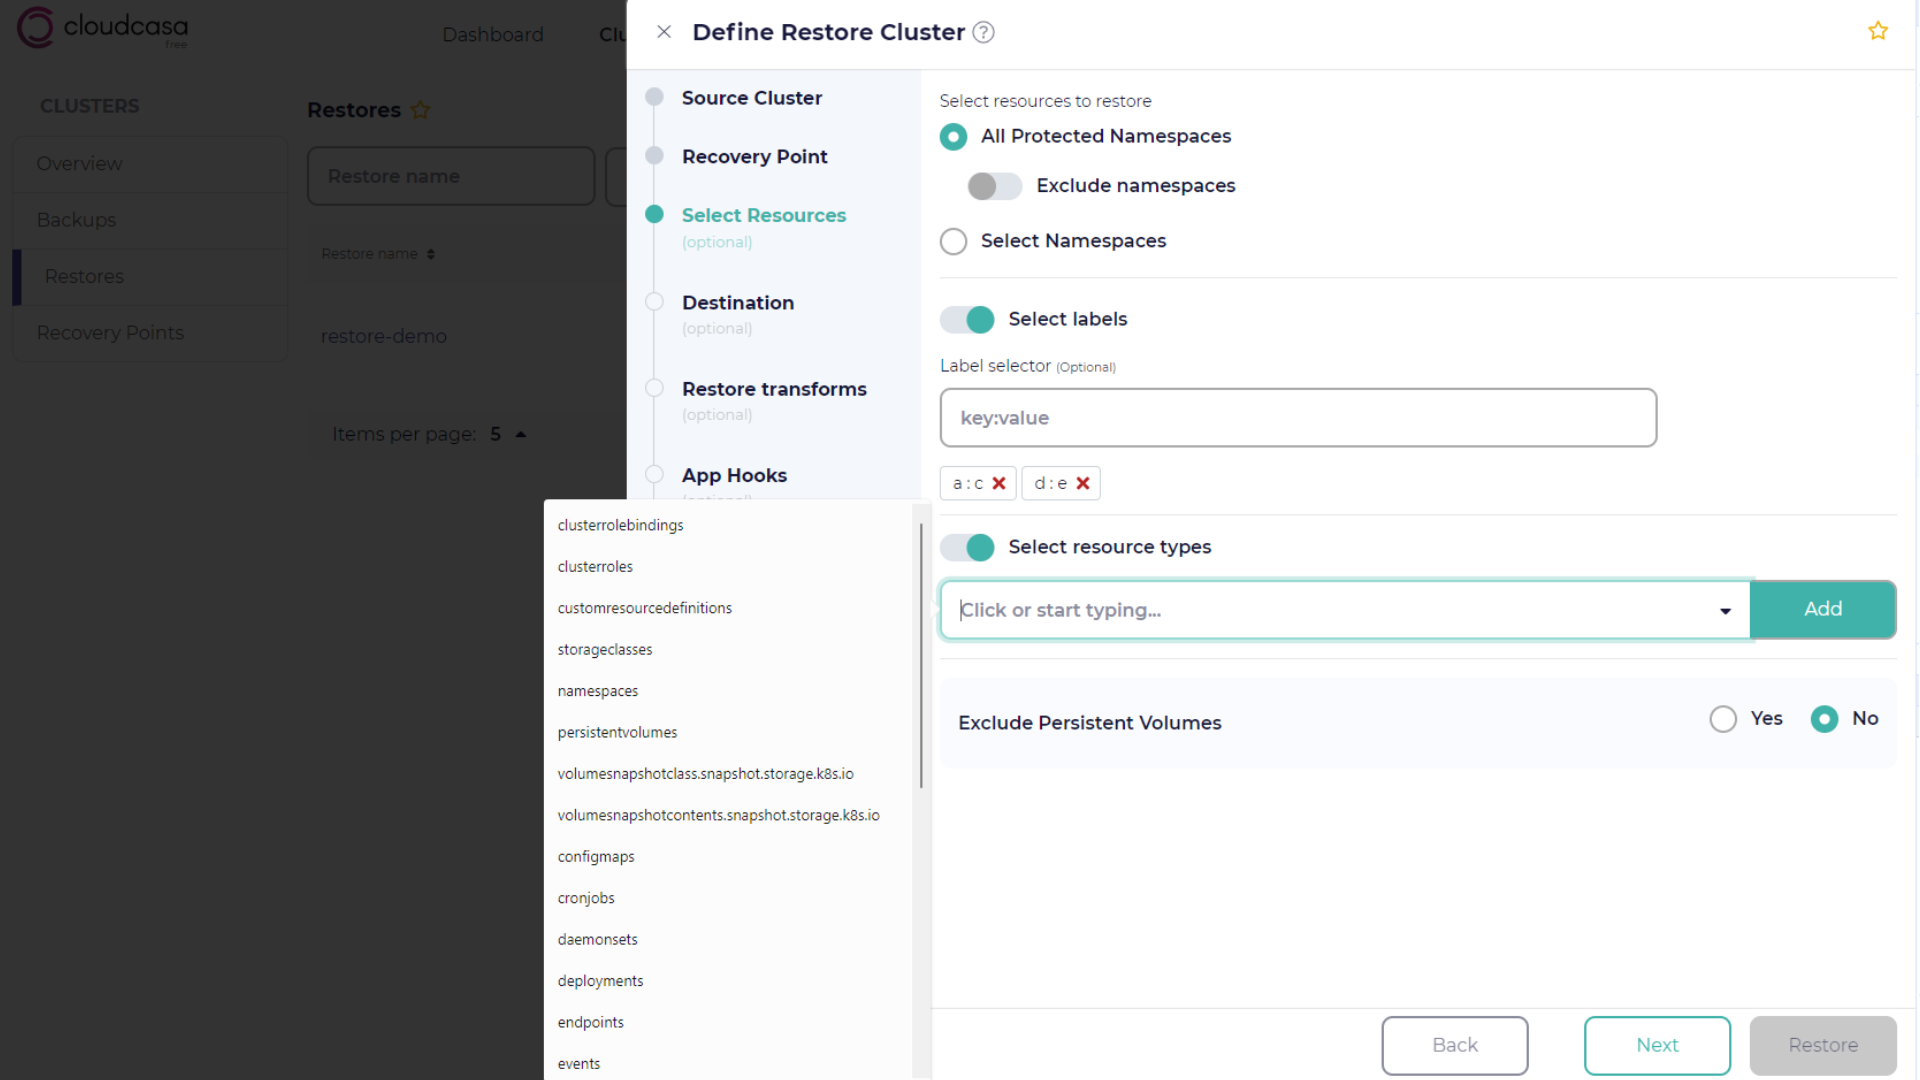
Standard selections tab
Using the Standard selections tab is the default method of selecting resources for restore. Use this for the most common restore scenarios such as restoring an entire cluster, restoring selected namespaces, or restoring using label selectors and/or resource types.
The following options are available:
- Select namespaces to restore
Select All Protected Namespaces to restore resources in all namespaces. Choose Select Namespaces in order to include specific namespaces. Note that only namespaces which were included in the backup will be displayed. If you choose All Protected Namespaces, you can select the Exclude namespaces option to exclude specific namespaces from the restore.
- Choose whether to restore all cluster-scoped resources
If anything other than “Full cluster” was selected for restore (i.e. namespaces were selected or excluded), you will be given the option to include all cluster-scoped resources. If selected, the system will attempt to restore all cluster-scoped resources. Otherwise, only cluster-scoped resources associated with selected resources (e.g. PVs associated with PVCs) will be restored
- Select labels (optional)
Leave this option off to restore all resources regardless of their labels. Enable it to selectively restore resources based on their labels by entering key-value pairs, for example, “product: life-insurance”.
Tip
If you enter multiple label selectors separated by spaces in the Select Labels field, the relationship between them is assumed to be logical AND. So if you enter
a:b c:d, it means thatamust equalbANDcmust equaldin order for the selector to match.CloudCasa will also allow you to enter a single key with multiple comma-separated values, and the relationship between these is assumed to be logical OR. So entering
a:b,cmeans thatamust equalbORc. These can be combined, so enteringa:b,c x:ymeans thatamust equalbORcANDxmust equaly. That’s equivalent to(a == b || a == c) && x == y. Note that OR is not currently possible between different keys.- Select resource types (optional)
Leave this option off to restore all resources regardless of type. Enable it to select one or more resource types to restore. You can select common resource types from the drop-down list, or type in the names of custom resources. You can also toggle the “Exclude” option to restore all resource types except for the selected types. “Include” is the default.
- Include all cluster-scoped resources
If enabled, the system will attempt to restore all cluster-scoped resources. Otherwise, only cluster-scoped resources associated with selected resources (e.g. PVs associated with PVCs) will be restored. Full cluster restores always restore all cluster-scoped resources, but when selected namespaces are being restored this is optional. This option defaults to off. This option is only shown if full cluster restore has not been selected (i.e. namespaces are selected or excluded).
- Exclude Persistent Volumes
Select this option to skip restoring persistent volumes.
Tip
Note that the filters applied by this page are additive. For example, if you select namespace “alpha”, select label “color:red” and select resource type “secret”, only resources from namespace alpha with the type secret and having the label “color:red” will be restored.
Tip
Resources which already exist in the destination cluster will by default not be overwritten. See the Overwrite existing resources option in the Restore transforms step below.
VMs/PVC tab
Using the VMs/PVCs tab allows you to quickly select individual VMs or PVCs for restore. Click “Select resources” to open the resource browser to add VMs or PVCs to the selection list. Remove VMs or PVCs from the selection list by clicking on the wastebasket icon.
Note that selecting a VM will automatically include all resource related to it, making restore of individual VMs simple. Likewise, selecting a PVC will automatically include the appropriate PV.
The maximum number of VMs/PVCs that can be individually selected in this manner is 128.
Specific resources tab
Using the Specific resources tab allows you to select individual resources with the resource browser for restore. Clicking Select resources after selecting the tab will open the resource browser. After that, just click on the resources you want to select them.
Note that selecting a VM will automatically include all resource related to it, making restore of individual VMs simple.
The maximum number of resources that can be individually selected in this manner is 128.
Files tab
Using the Files tab allows you to restore individual files from a selected PV using the file browser.
First, you must choose an active Destination cluster, since that cluster’s agent will be used to access the file data in the backup. Next you can choose the source Namespace and PVC. Click Select Files and the file browser will open, allowing you to make your selections. Then choose the destination Namespace and PVC for the restored files.
You can also choose to restore the files to a different Target directory in the destination PVC. If a hierarchy of directories is selected, the target directory will serve as the root of the restored hierarchy.
Note the maximum number of file/directory selections (not individual files) is currently limited to 32.
Advanced Options
Opening the Advanced options section under any resource selection tab will allow you to set the following options. Modifying these settings from the defaults should not usually be necessary. Note that these options are available only when restoring from backup storage, not when restoring from snapshots.
- Concurrent PVs
Select the maximum number of PVCs in a pod that will be restored at once. Note that the concurrency only applies to PVCs of a single pod. For example, if there are 8 PVCs mounted in a pod that is being restored and the concurrency is set to 4, 4 PVCs are restored at once (which means that 4 PVCs will be attached to each mover pod). On the other hand, if there are 4 pods with one PVC each, then each PVC is restored separately, even with a concurrency value of 4.
The allowed range is between 1 and 16. The default is 2 PVs.
- Total Concurrent files
Sets the number of files that will be restored concurrently across ALL PVs. The default is 24.
Increasing parallelism can increase the speed of the restore at the expense of more memory and bandwidth usage. Using large values may necessitate increasing the Data mover memory limit (see below).
- Max transfer rate per PV
Specifies the maximum transfer rate for the data transfer between each PV and the destination storage during the restore job, in MB per second. Leave this field blank to set no limit. The default value “Unlimited”.
- Data mover pod timeout
Time that the agent will wait for the data mover pod to start. The default is 15 minutes. This should only need to be changed from the default in special cases.
- Data mover memory limit
The maximum amount of memory in MB that the data mover pod will be permitted to allocate during the restore process. This limit is set in order to protect the cluster. If the mover pod exceeds this limit, the pod will be killed and the restore will fail. The allowed range is 512MB to 8GB, with a default of 1024 MB.
- Azure Files Snapshot Restore Method (for Snapshot Restore on AKS clusters only)
This option controls which method is used when restoring snapshots of Azure Files PVs. It appears only for AKS clusters with Kubernetes version 1.29 or greater. The choices are Auto, CSI Driver, and CloudCasa Azure Files Mover. Auto is the default. Note that with AKS versions prior to 1.29 the CSI Driver method is not available, so CloudCasa Azure Files Mover will always be used.
See also
See AzureFile (CSI) for additional information.
Click Next to proceed.
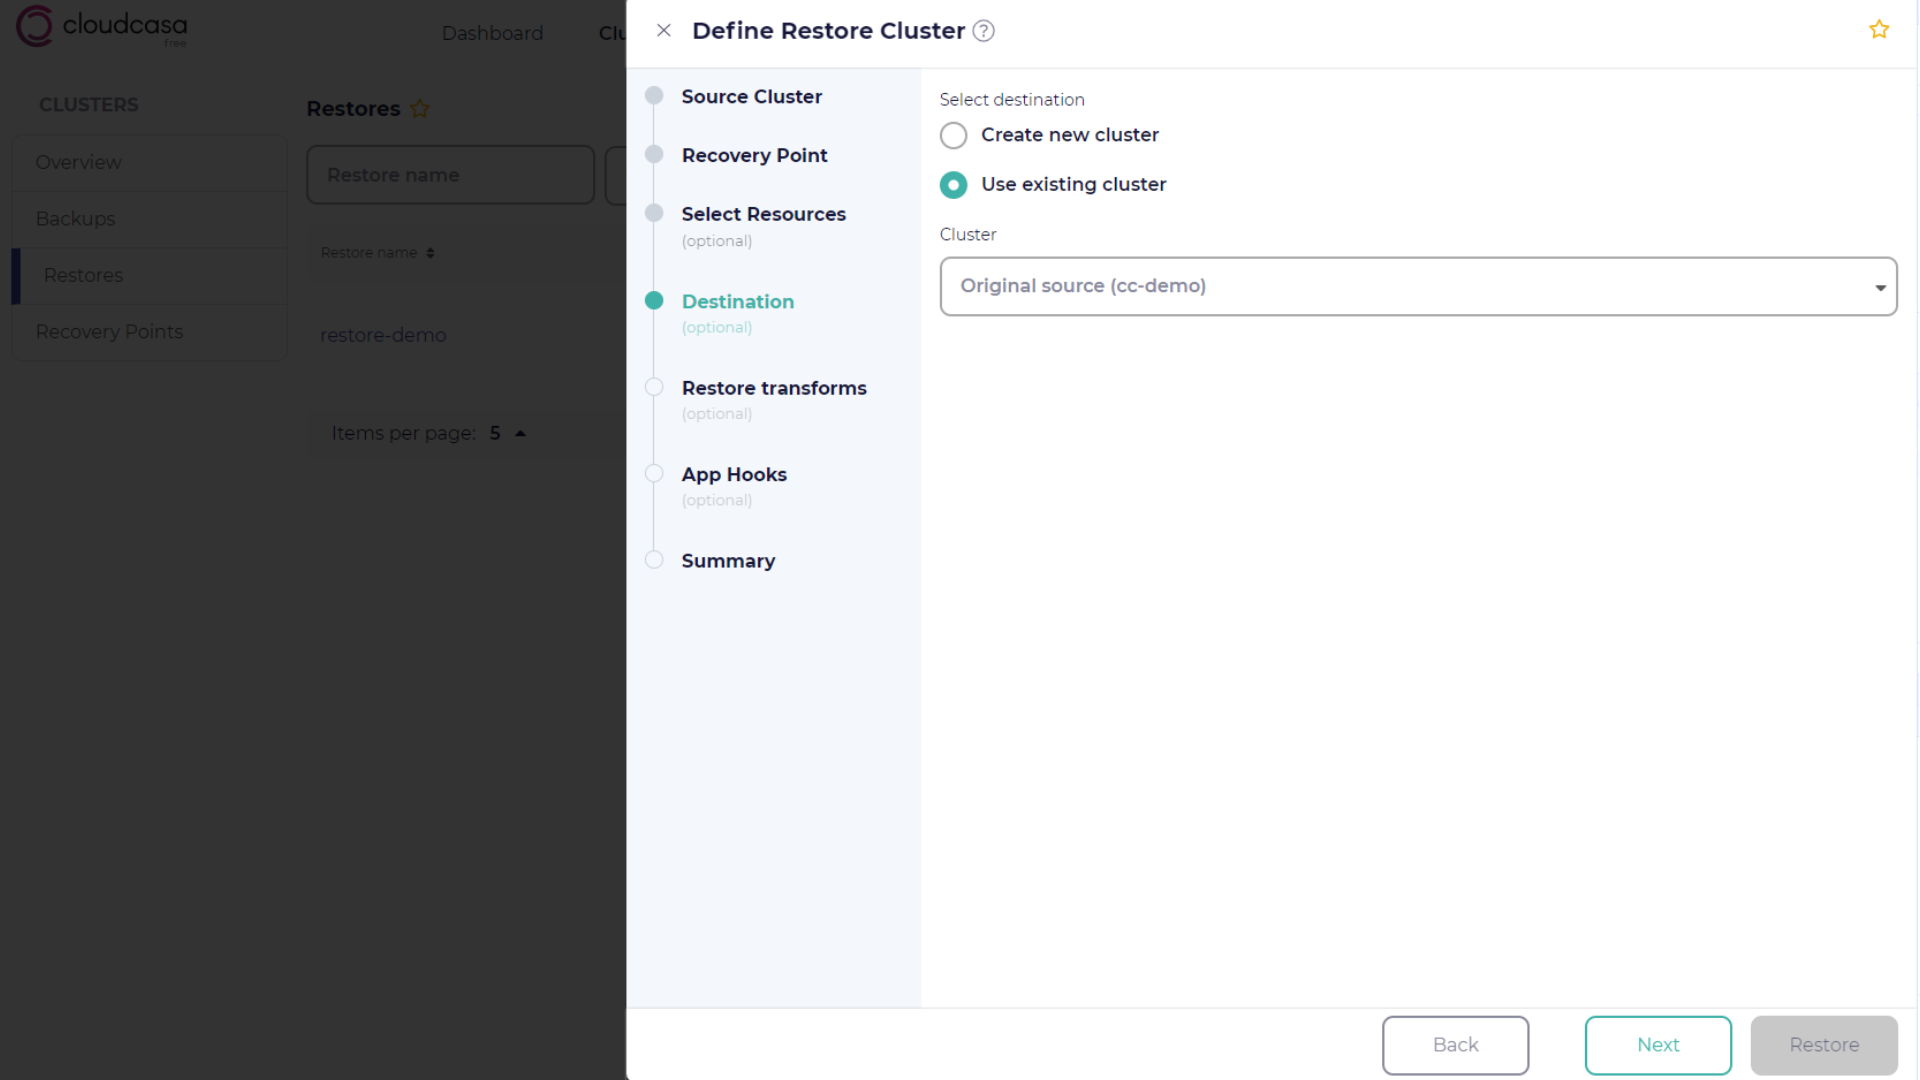
Destination selection
In the Destination step, select the destination cluster for the restore:
- Select destination
By default, your cluster resources will be restored to the same cluster from which the backup was taken. You can also select any other registered cluster as the destination, or automatically create a new EKS, AKS, or GKE cluster if one or more cloud accounts have been registered.
See also
For options associated with creating a new cluster, see Creating Clusters With CloudCasa.
Restore transforms selection
In the Restore Transforms step, you can choose transformations that will be applied during the restore. These include:
- Rename Namespaces
Enabling this option will allow you to rename restored namespaces by either adding a prefix and/or suffix, or applying a mapping.
- Add prefix/postfix
Add a prefix or postfix to the restored namespace(s). For example, if there were namespaces “sales” and “services” in the original cluster and you add a suffix, “-dev”, to the namespaces, the restore job will create the namespaces “sales-dev” and “services-dev” in the destination cluster.
- Set new names
This allows you to create a set of mappings from old namespace names to new namespace names. Names left unmapped will be restored unchanged.
- Change Storage Classes
Gives you the option to remap storage classes at restore time. When selected, the UI will display the storage classes used by PVs/PVCs in the backup, and allow you to enter new storage classes to substitute for each during the restore. By default, the same storage classes will be used.
Make sure that a target storage class is compatible with the source storage class with regards to properties such as supported access modes. Note that this option is only available for restores of copy backups, not snapshot backups.
- Preserve node ports
If selected, automatically assigned node ports for services in the source cluster will be preserved upon restore. Make sure that these ports are available in the target cluster.
Note that any manually assigned node ports are not affected by this option and are always preserved on restore.
- Overwrite existing resources
Enabling this option will cause the restore to overwrite existing Kubernetes resources. It will do this by attempting to update existing resources to match the corresponding resources from the backup. This update is subject to resource update semantics. For example, pod resources don’t allow updates, but most others do. Any resources that cannot be updated will generate a warning in the restore log.
Note that for PVCs, the contents of existing PVCs will be modified if this option is selected.
By default, existing resources will not be overwritten. The exception to this is ServiceAccount resources. Resource data from backed up ServiceAccounts will be merged into existing ServiceAccounts regardless of the overwrite setting.
- Enable Resource Modifiers
Resource modifiers allow you to customize how Kubernetes resources are restored by modifying their specifications during the restore process. If this option is enabled, you can upload a YAML file containing a description of which resources should be modified and how to modify them.
See also
- VM Options -> Clear MAC address(es)
Specifies that MAC addresses for restored VMs should be cleared and new addresses should be assigned. This defaults to on. Disable it to preserve the saved MAC addresses for restored VMs. Do this only if you are sure that it will not result in duplicate MAC addresses on your network.
- VM options -> Generate new firmware UUID
Specifies that new firmware UUIDs should be generated for restored VMs. This defaults to off.
- VM Options -> Run Strategy
This field controls whether and how restored VMs are started after restore. You can select any valid Run Strategy option or select “Use strategy from backup” to retain the run strategy for each VM from the backup. If you are uncertain, we recommend selecting “Halted” and booting VMs manually after restore.
See also
See the VM Restore reference for more information.
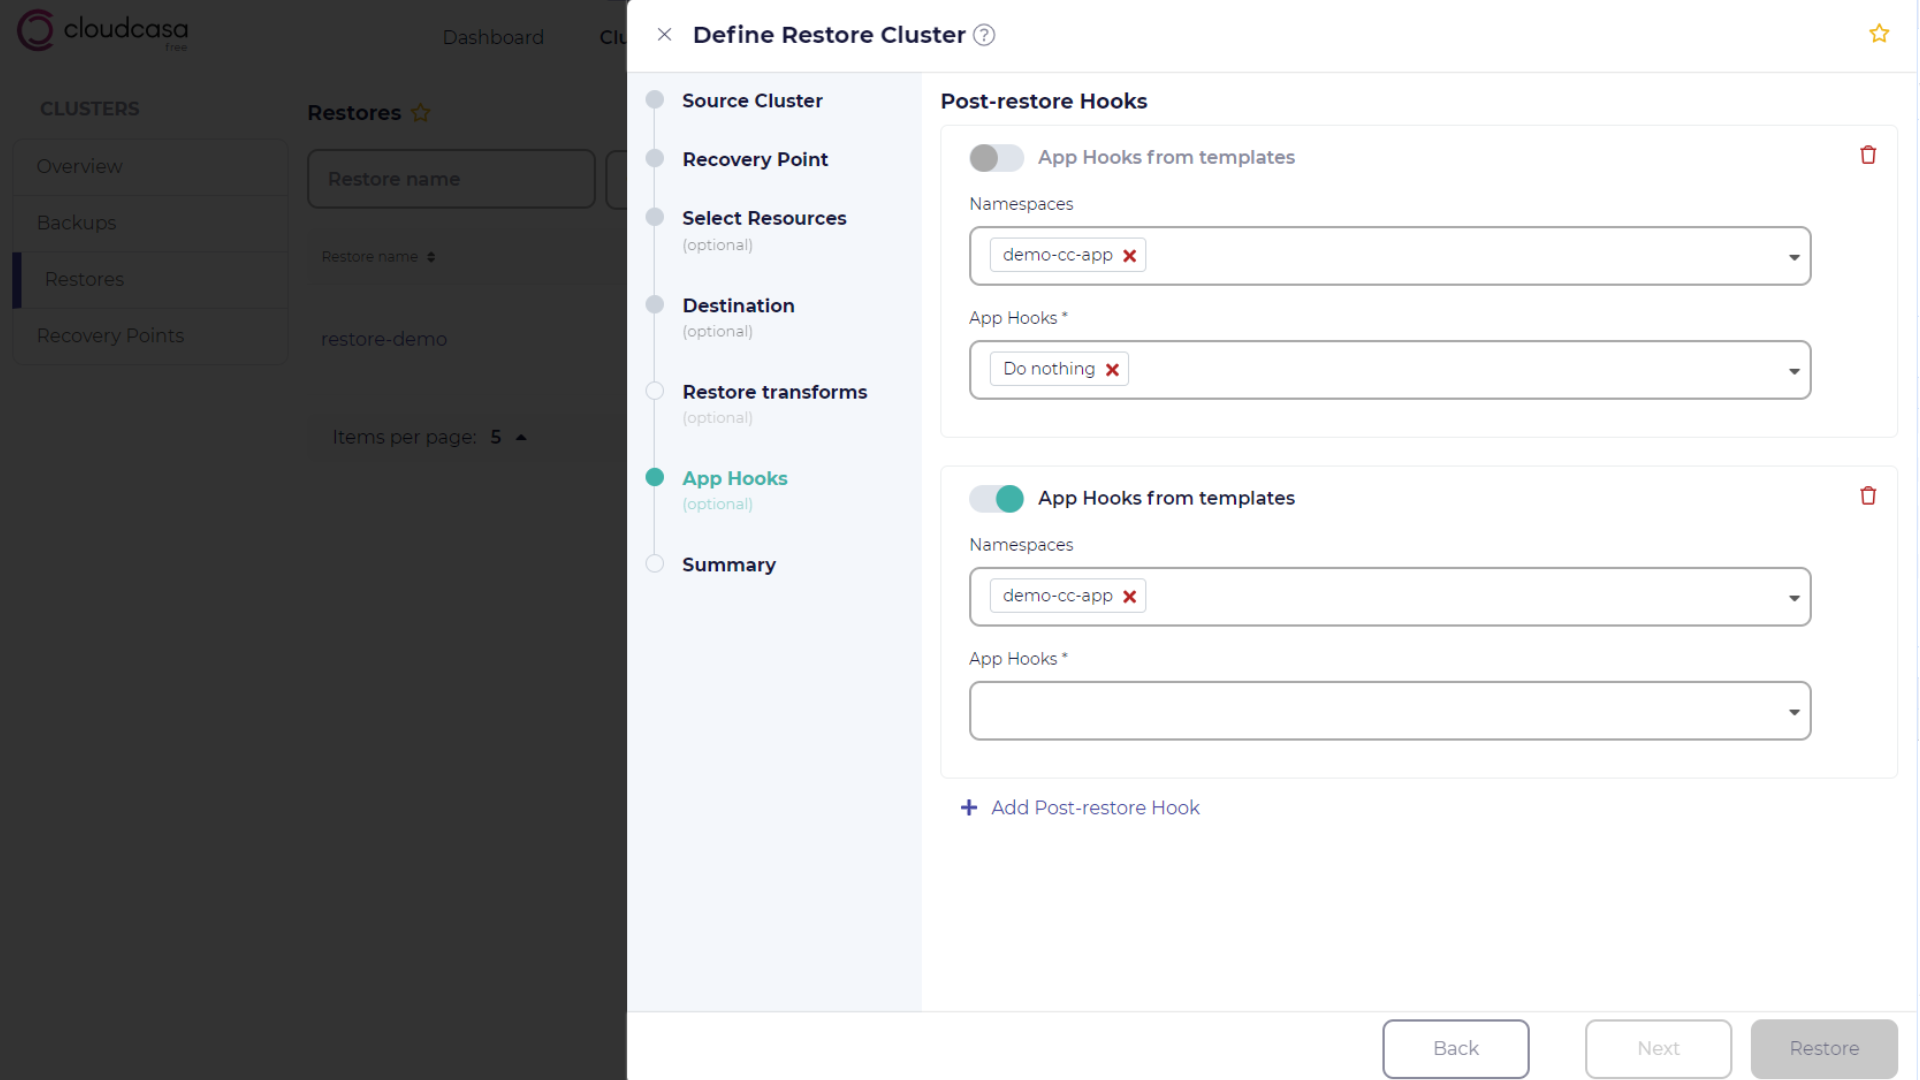
App hooks selection
In the App Hooks step, you can specify application hooks used to invoke application-specific commands after PVs have been restored. For more information about this feature, see App Hooks.
Summary step
In the Summary step, you can review the summary of the new cluster restoration job. You must also enter a name for the job here, which will be used to identify it in the activity view and on the restores page.
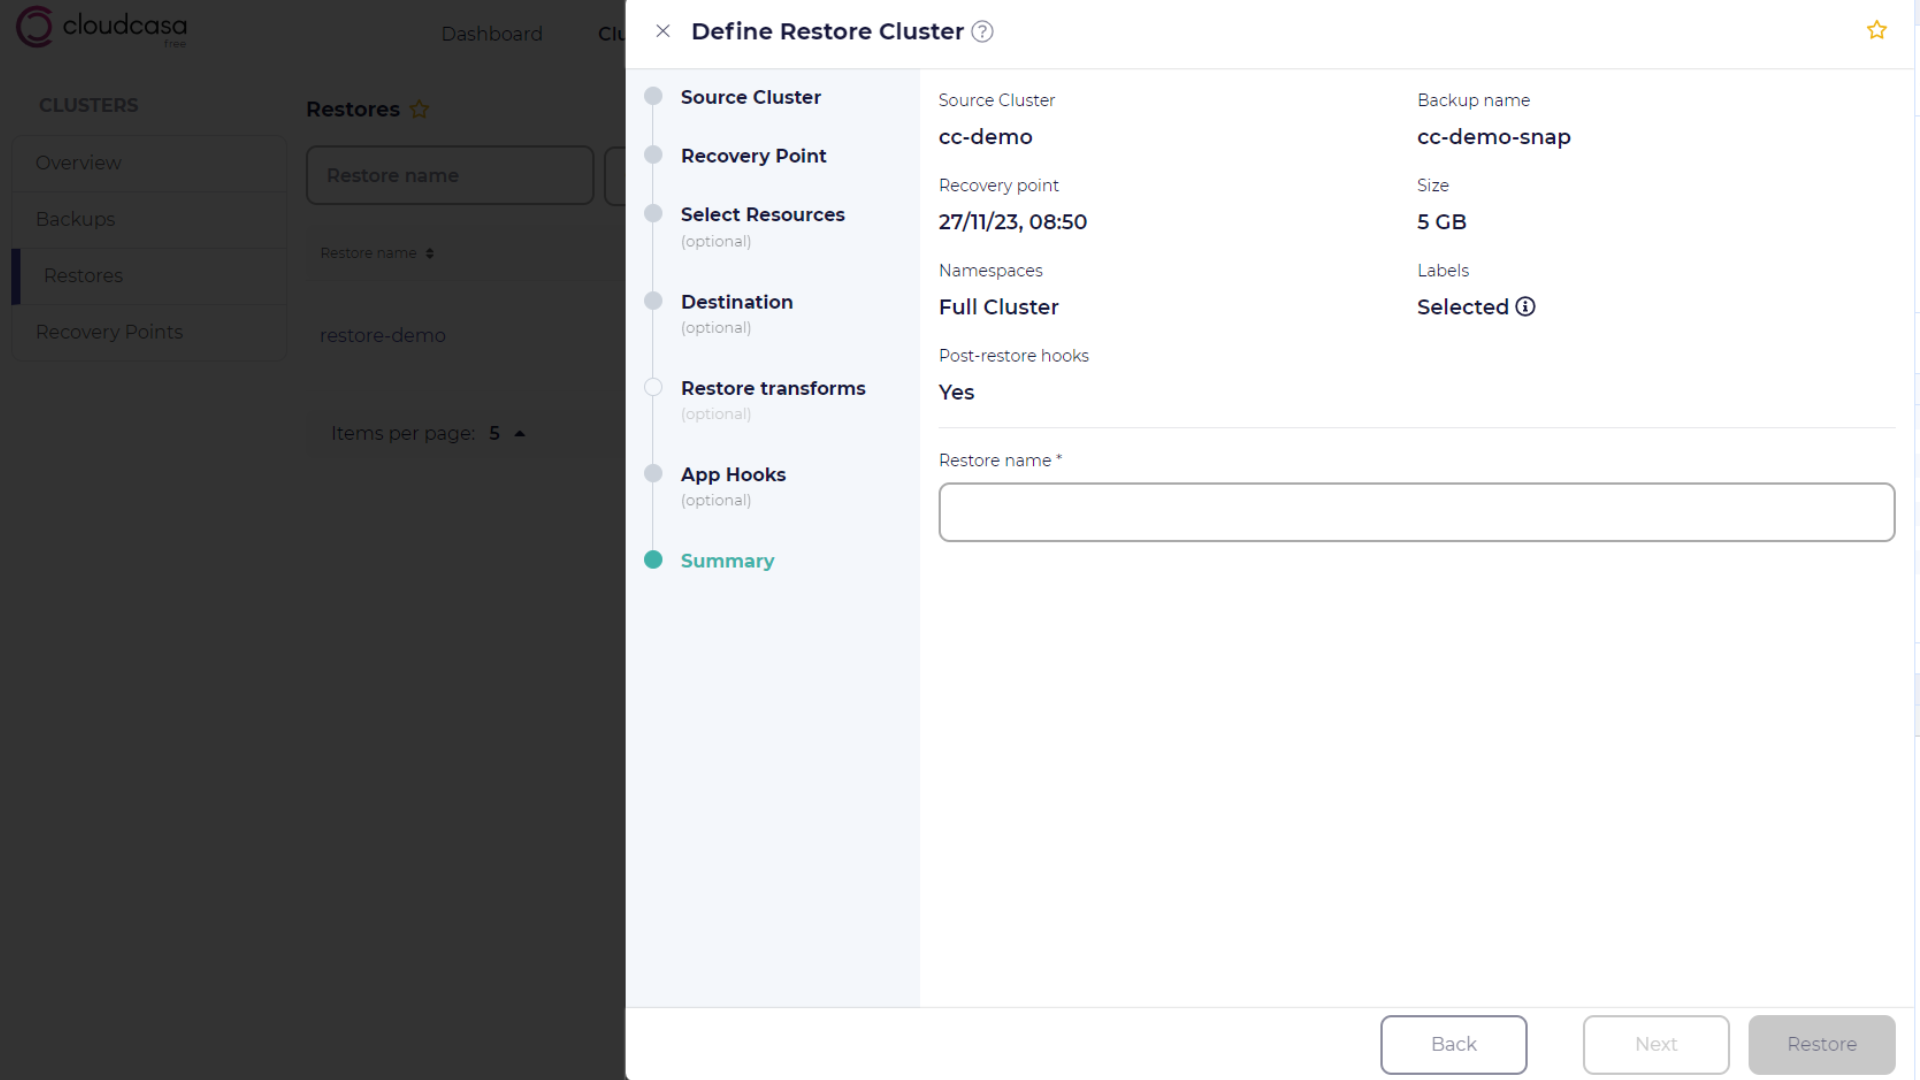
Click Restore to create the new cluster restore job.