Database Backup Wizard
The database backup wizard allows you to create and edit database backup jobs. One database backup job can protect more than one database.
Creating a backup job for databases
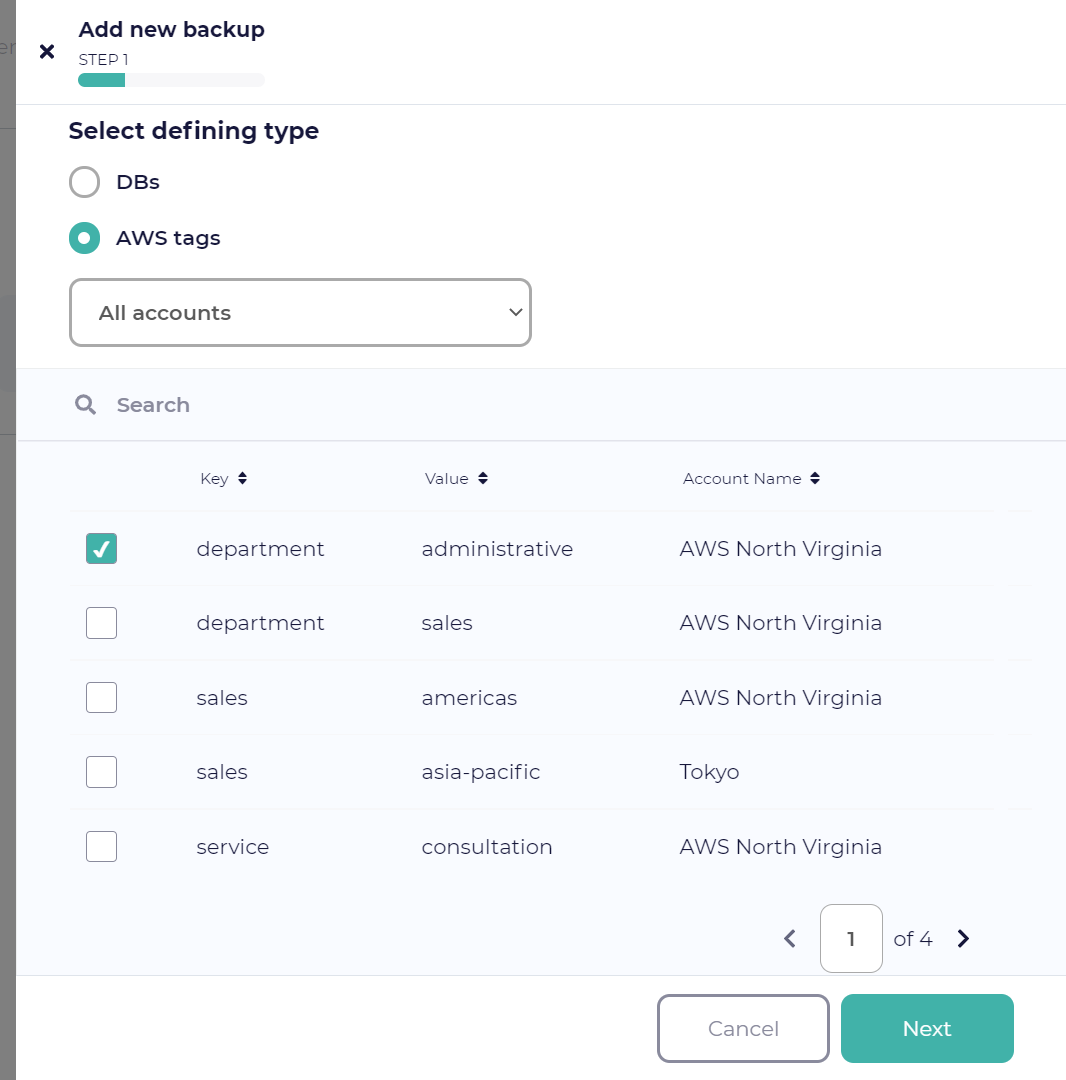
In Step 1 of the wizard, choose how you would like to select databases for backup.
- Select by DB name
Select databases to back up from the list of databases registered with CloudCasa. These are auto-discovered from your registered AWS accounts. You can select multiple databases from the list.
- Select by AWS tags
Select databases to back up using AWS tags. Note that with this option, the databases to back up are selected dynamically based on the tags configured at run time.
Click Next.

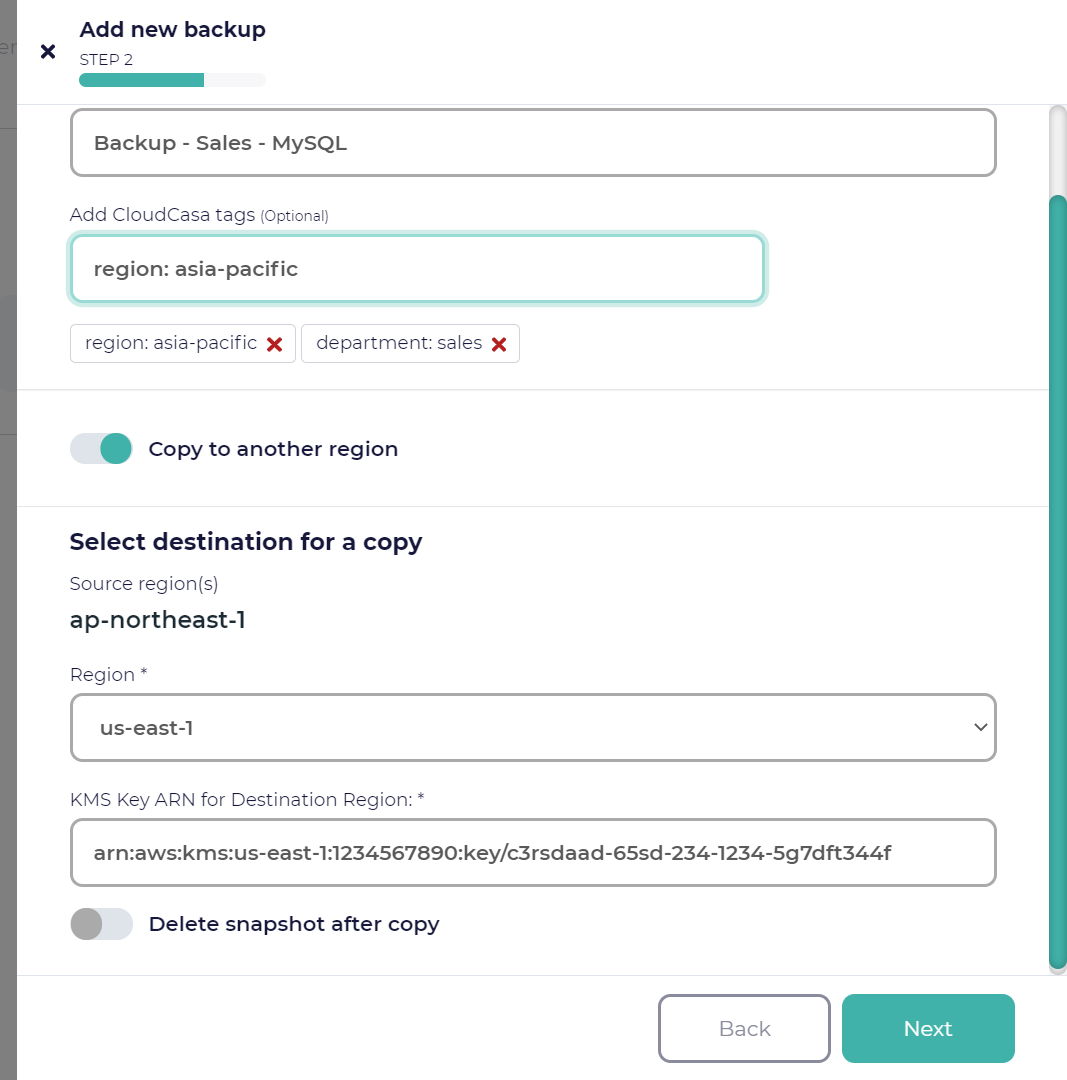
In Step 2 of the wizard, enter the name you would like to assign to the backup job. You can also optionally add CloudCasa tags. These are used only within CloudCasa, and are distinct from AWS tags.
Next, you can optionally choose to store your backup snapshots in a different AWS region. For example, assume that you want to back up a database in the AWS Tokyo region and store the backup data in the AWS N. Virginia region. In this case, enable Copy to another region, select the region, and enter the KMS “Key ARN” (AWS Resource Name) for the destination region. You can obtain this from the AWS Key Management Service (KMS) console.
See also
For general information about the AWS key ARN and the AWS KMS console, see the following document:
AWS KMS Developer Guide: Finding the key ID and ARN
Note that copies to another region may take some time, and that due to limitations imposed by AWS, only one inter-region copy operation can happen at a time.
You can choose to delete the snapshots in the source region after copying to the destination region by enabling the Delete snapshot after copy option.
Click Next.
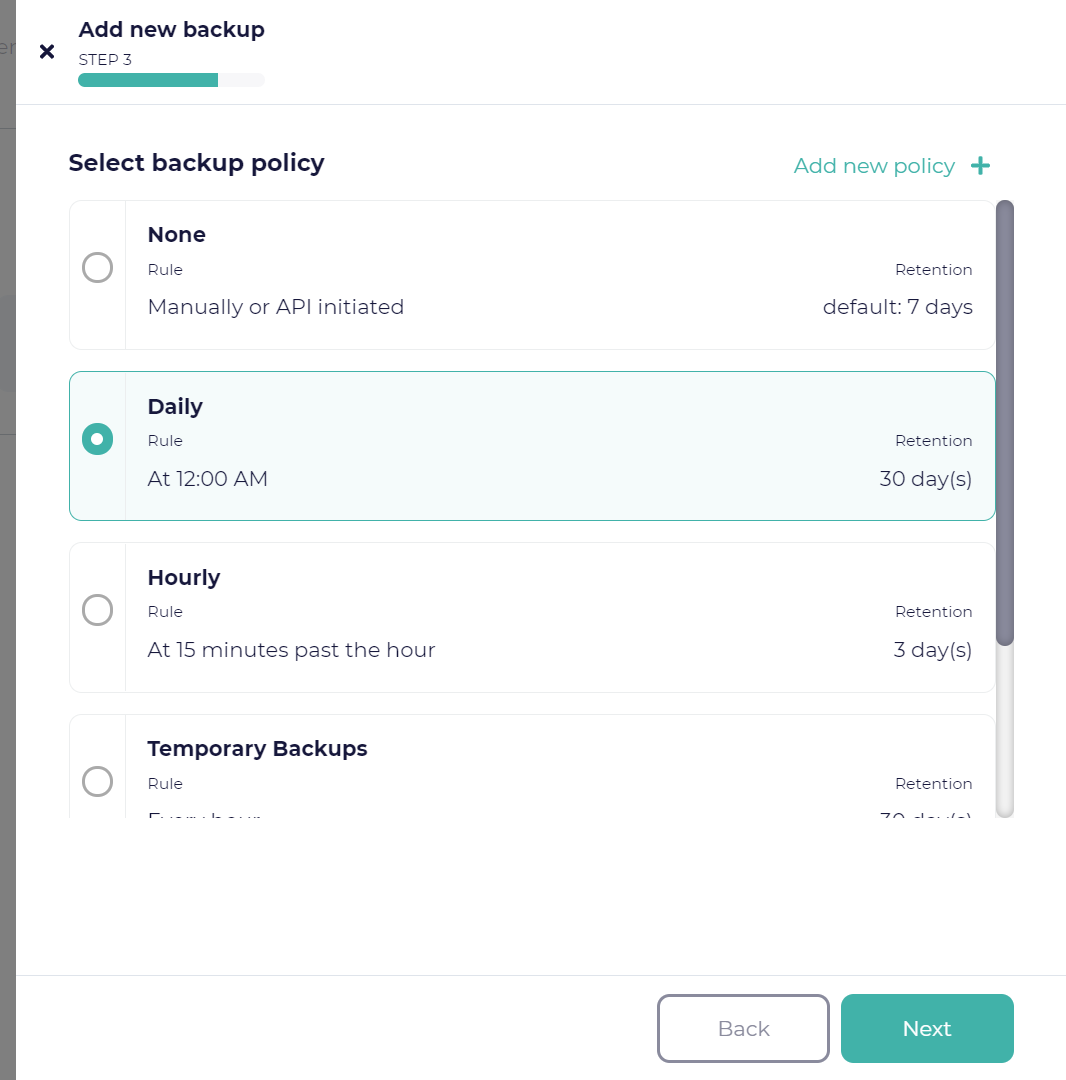
Select a backup policy. Policies define the schedule and retention periods for backups. If you select None, the job will not be scheduled automatically, but can be run manually or by invoking it via the API. If you don’t select a policy, you will instead be given the option to run the job immediately by selecting Run now and additionally selecting a retention time (in days) for the backup. Note that this retention time, unlike a policy, only applies to this one backup run.
See also
For more information about policies, see Policies.
Click Confirm to create the backup job.
Your new database backup job will be created. If you selected no policy and chose the Run now option, the newly defined job will start to execute immediately. If not, we recommend starting the job manually to make sure it functions as expected.