Rancher Extension User’s Guide
Deploying the CloudCasa Agent on a Selected Cluster
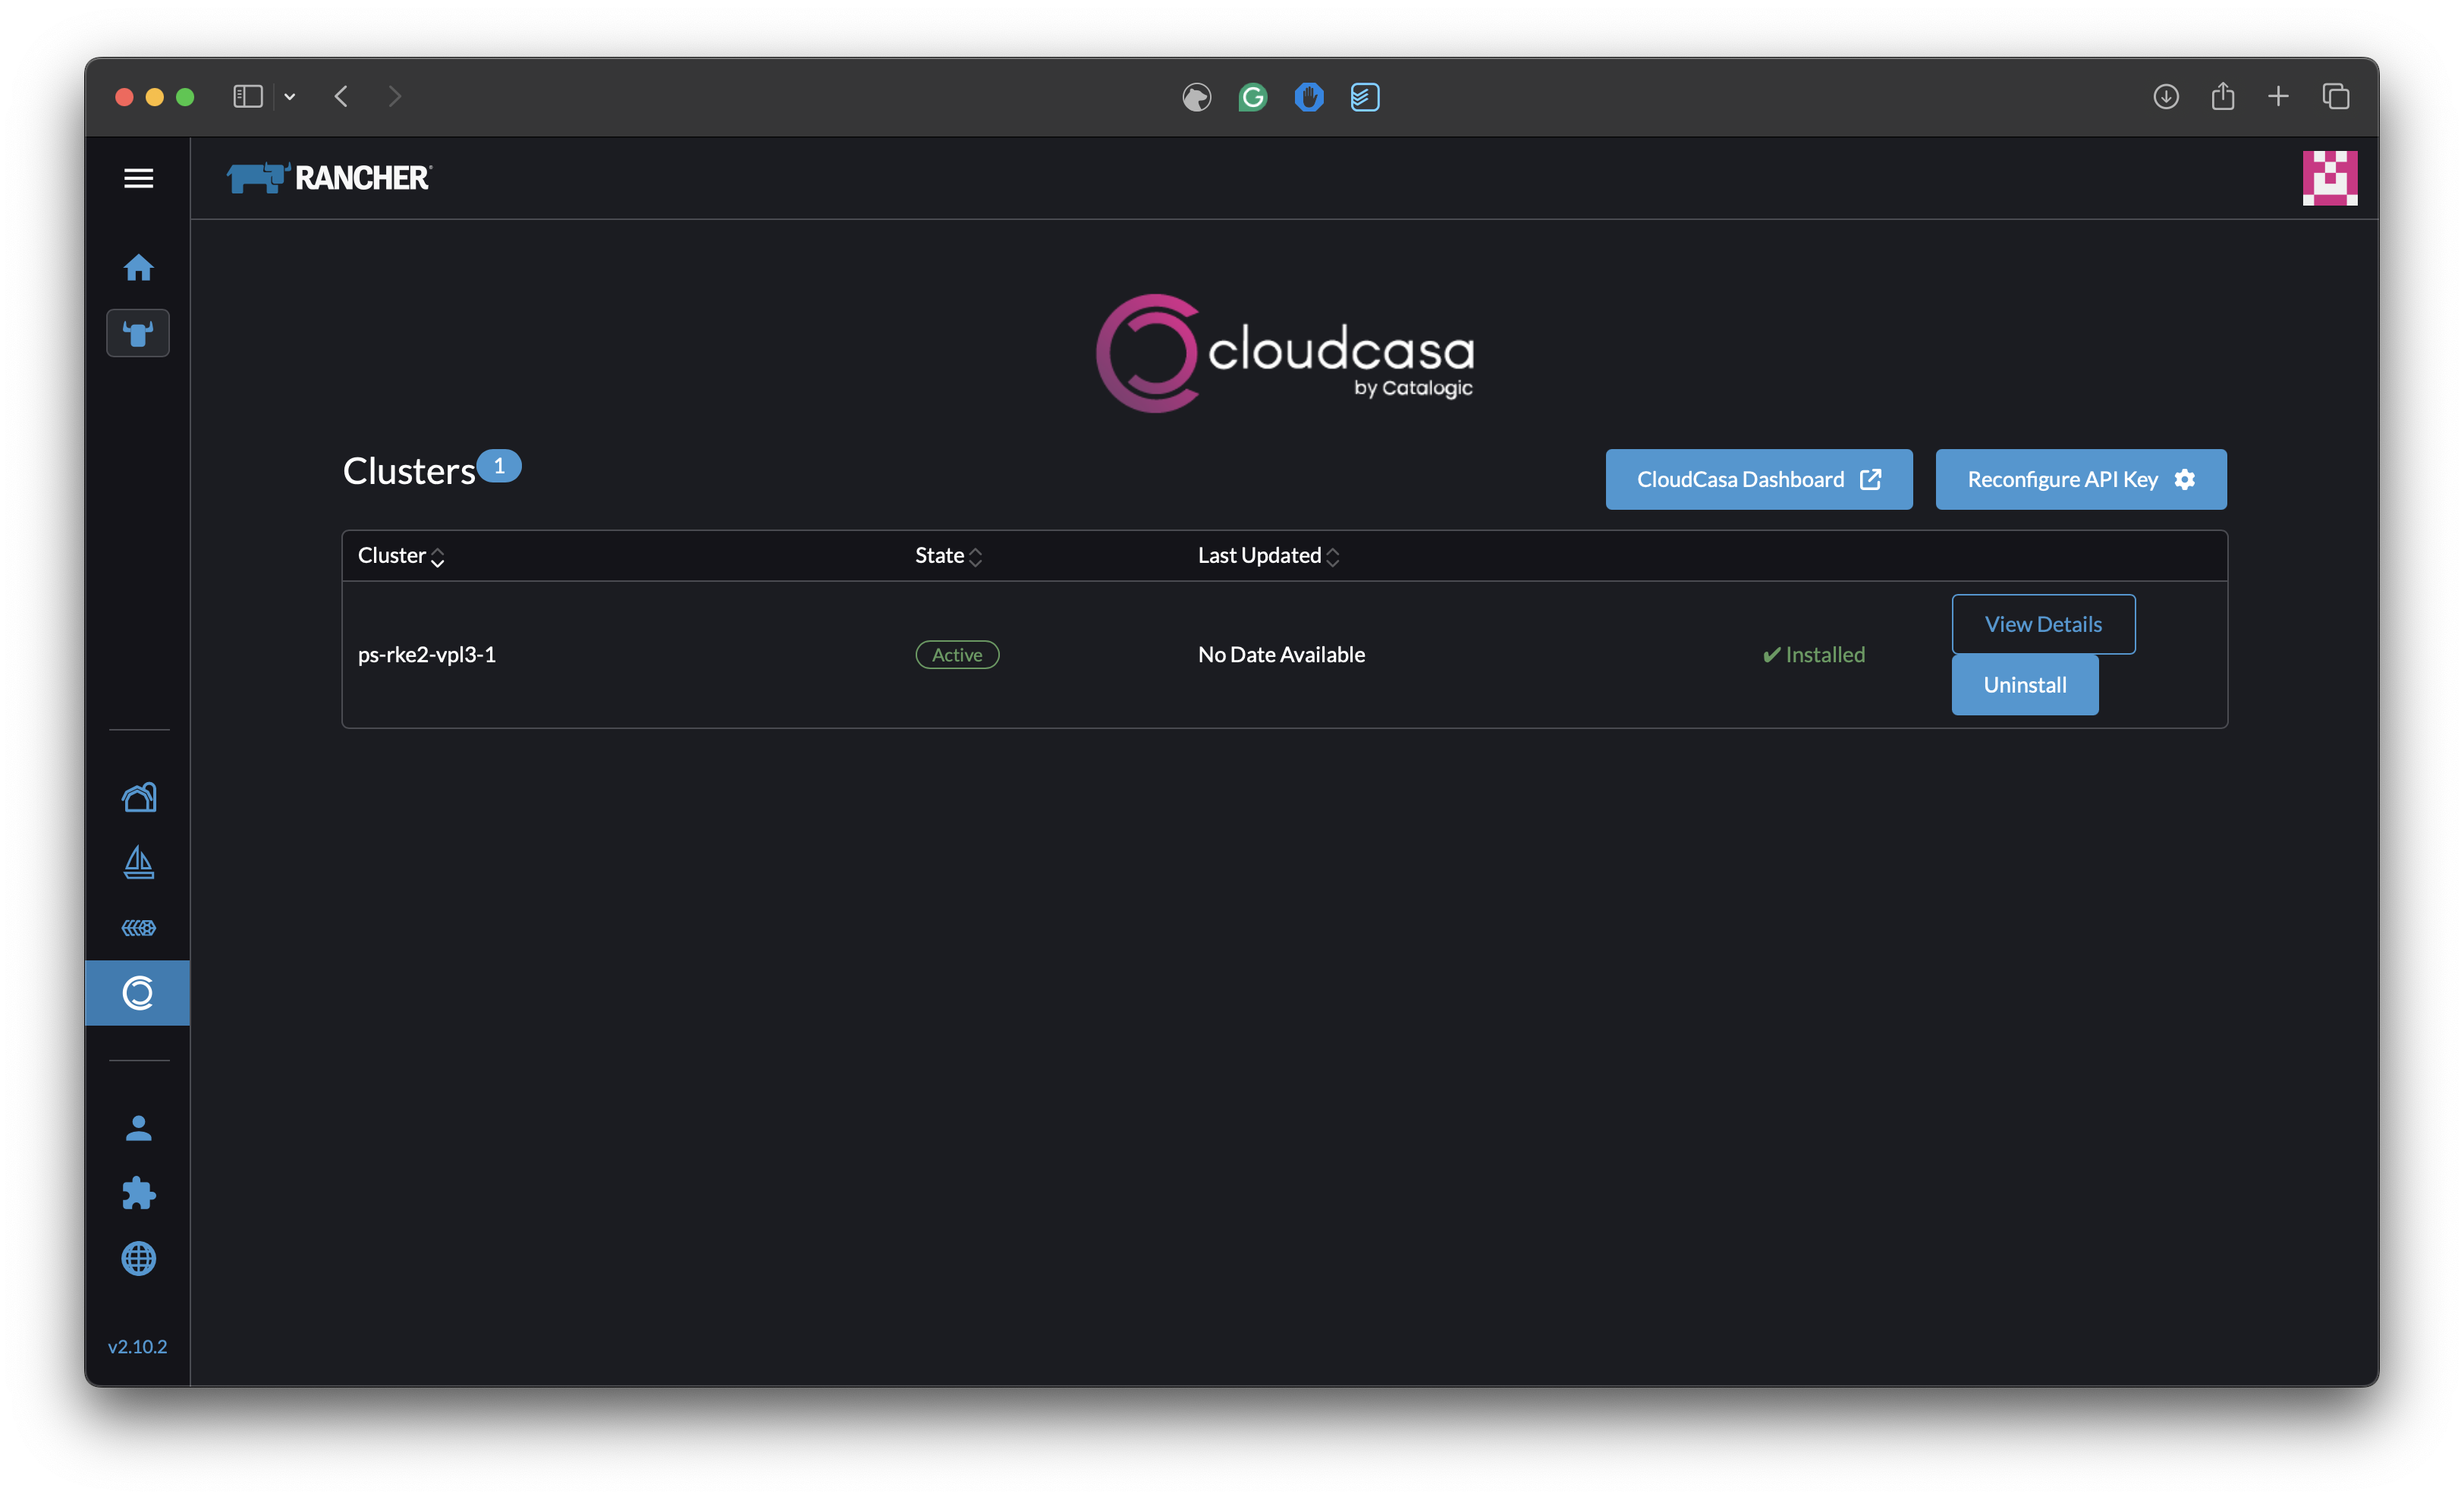
To extend CloudCasa’s protection and management to a specific cluster:
Initiate Deployment:
Locate the desired cluster from the list.
Click the Install button found on that cluster’s row. This triggers the deployment process for the CloudCasa agent on the selected cluster.
Monitoring the Process:
Wait for the installation process to complete. The interface will show an “Installing…” status message to let you know when the agent is fully deployed.
Viewing Detailed Cluster Protection Information
Once the CloudCasa agent has been successfully installed:
Access Detailed Information:
Click the View Details button associated with the cluster where you just installed the agent.
Dashboard Insights:
You will be directed to a detailed dashboard specific to that cluster. This screen provides comprehensive information about the protection status, backup configurations, and overall health of your data protection setup.
What to Look For: Key metrics and status indicators that ensure your clusters are being actively monitored and safeguarded by CloudCasa.
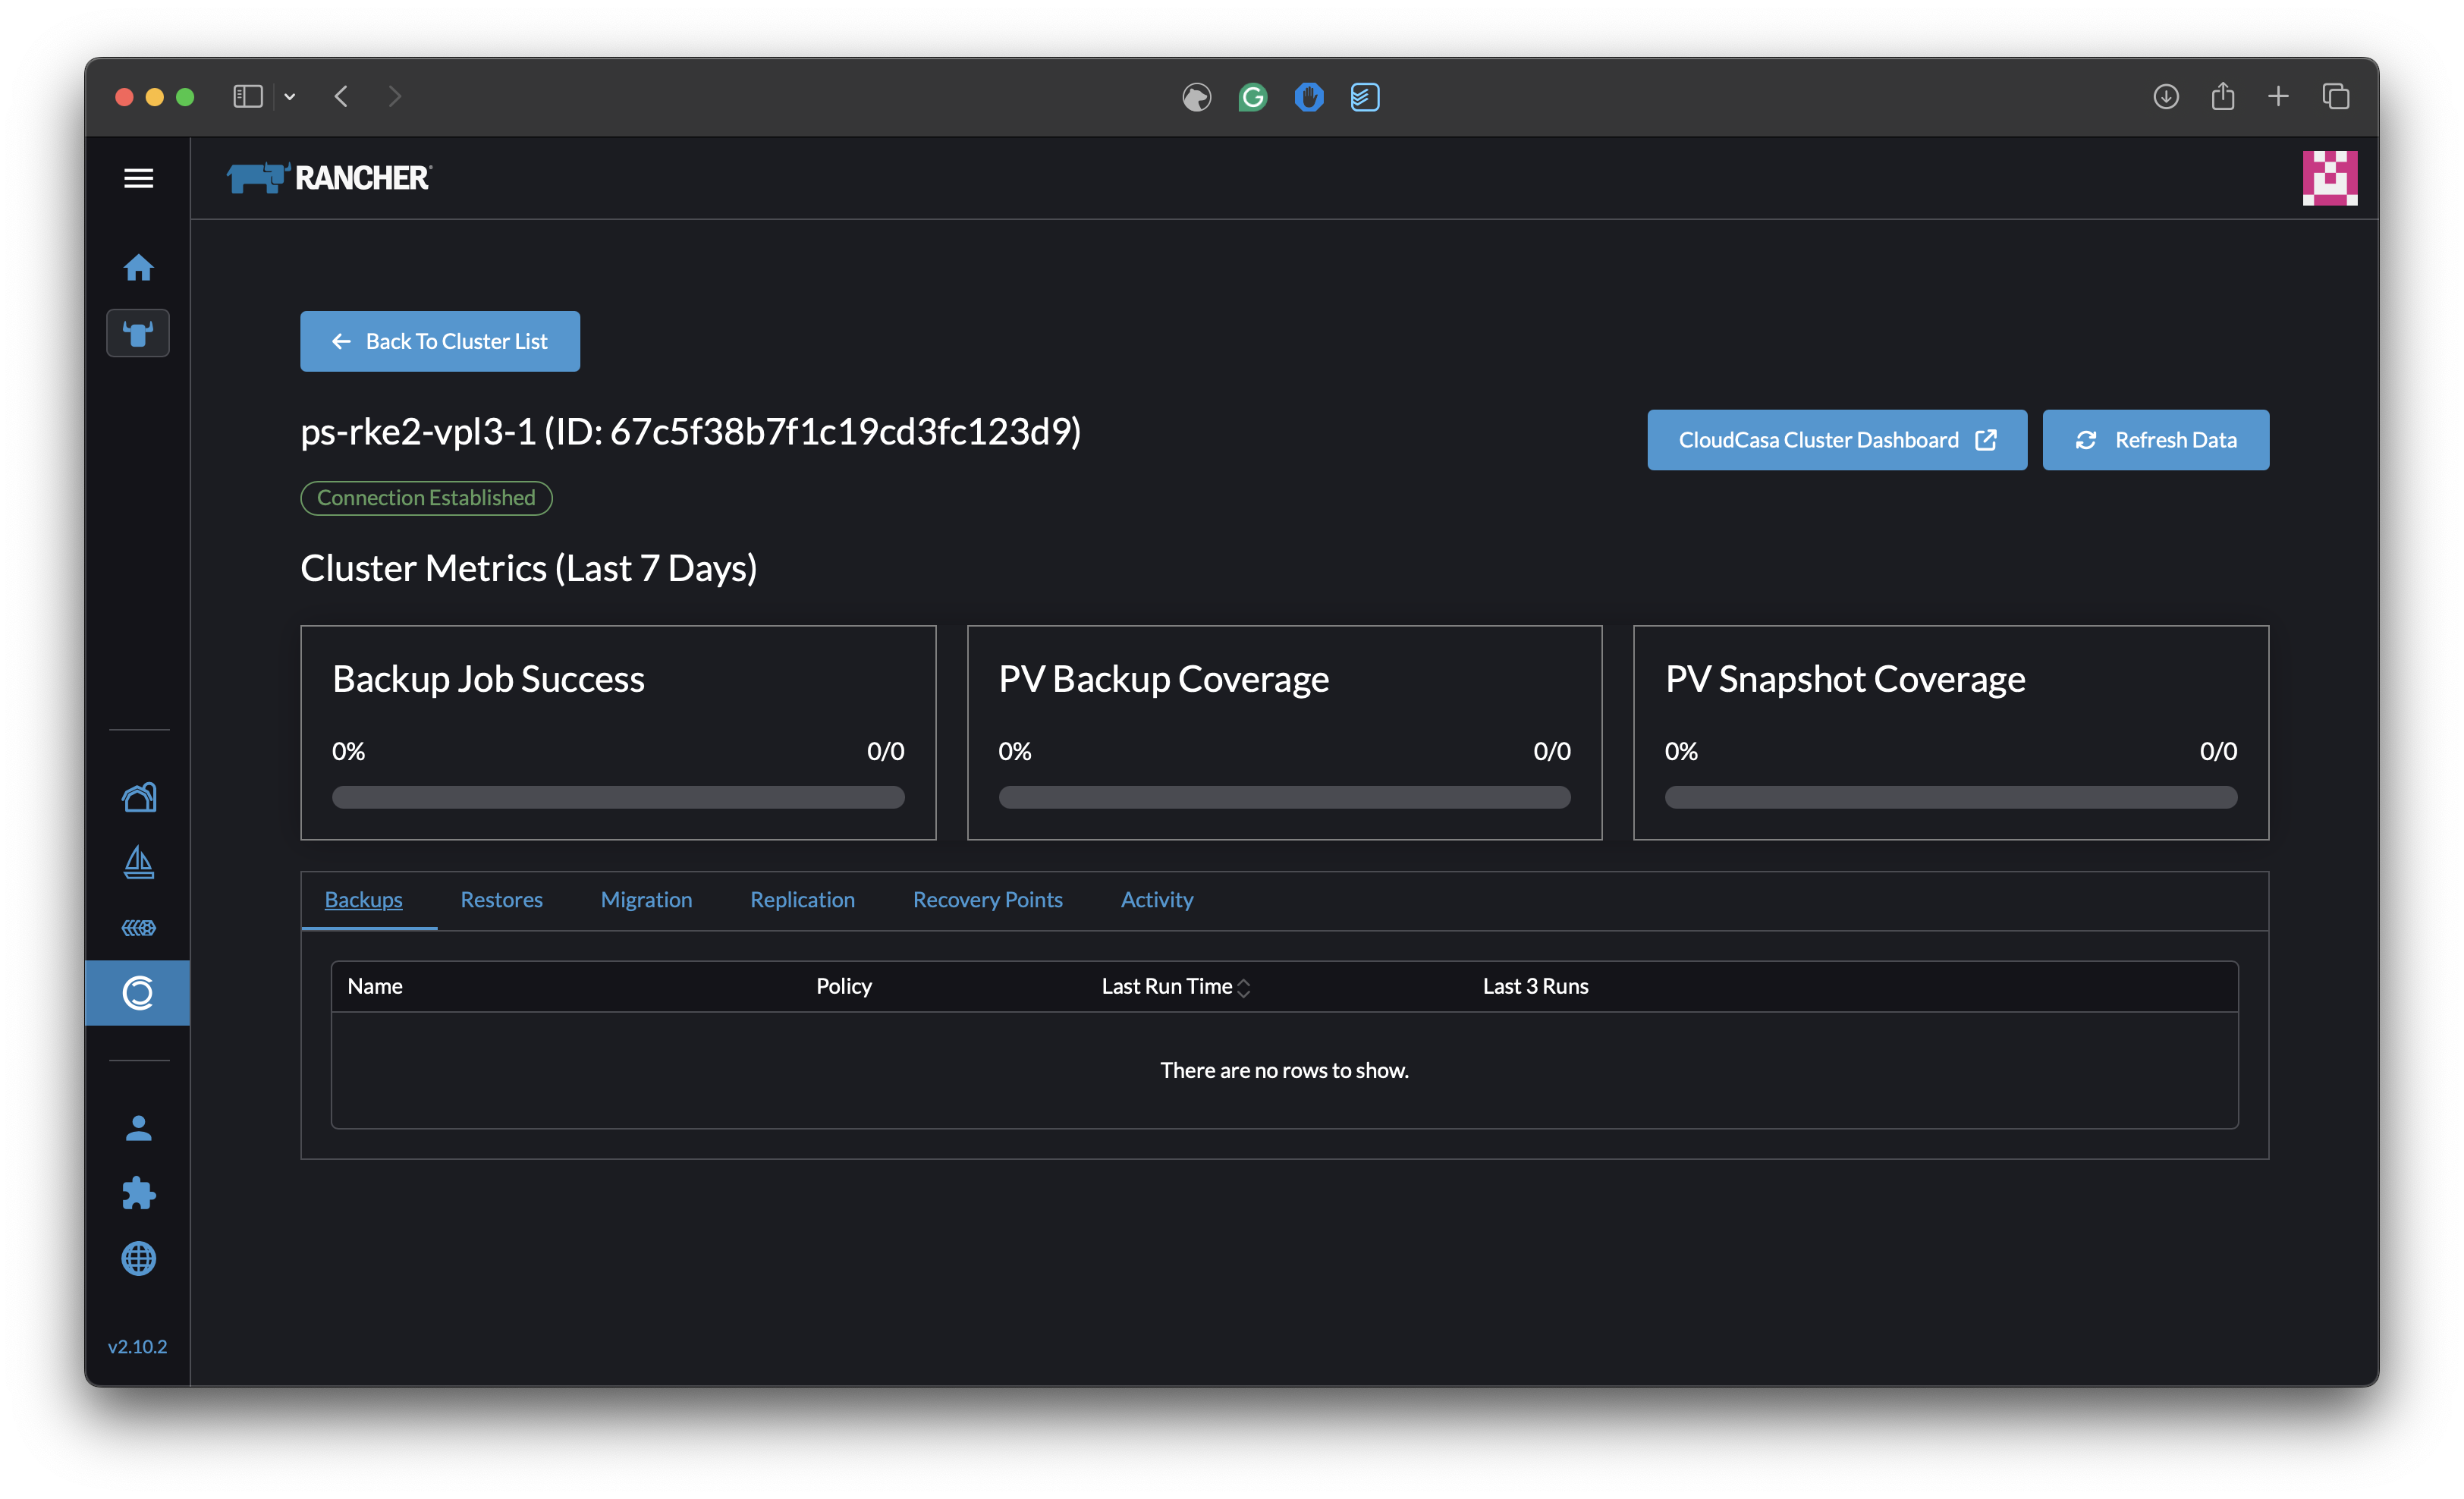
The Backups, Restores, Migration, and Replication tabs will show all backup, restore, migration, and replication jobs currently defined for the cluster. You can run jobs from here, and also pause and resume automatic job scheduling.
The Recovery Points tab will display available recovery points for the cluster.
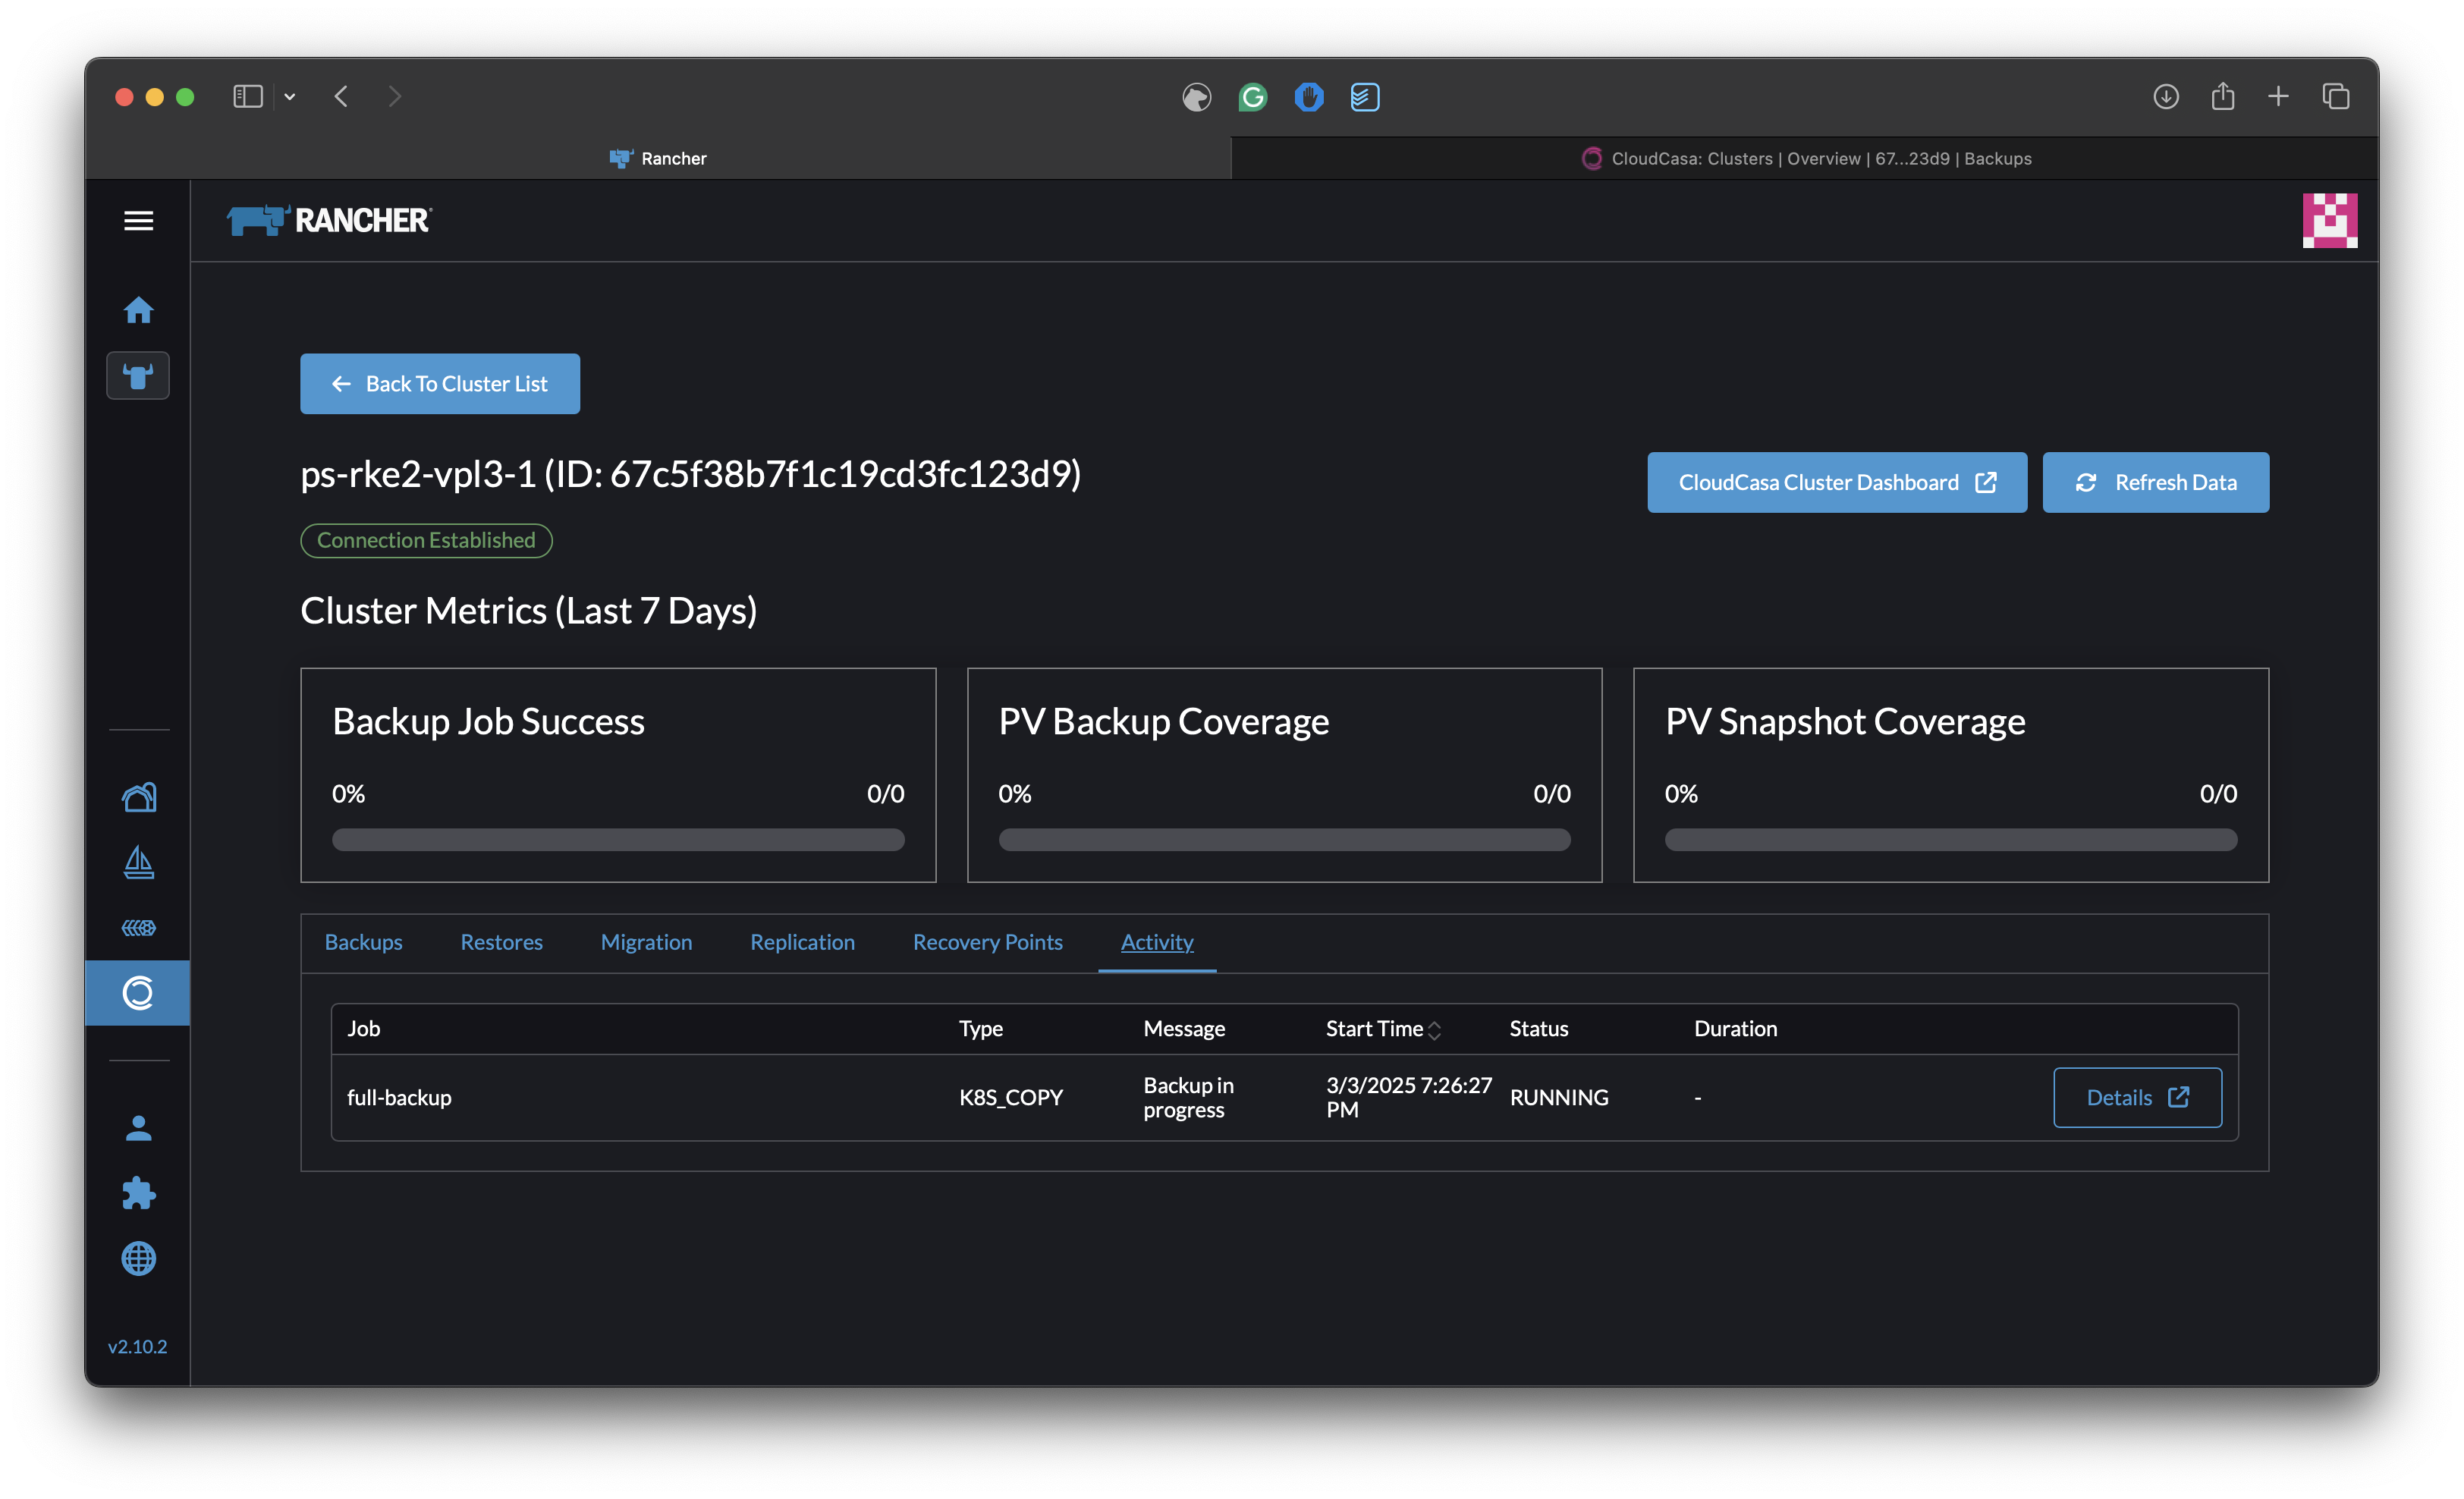
The Activity tab will display information about job runs related to the cluster, including currently running jobs.
The CloudCasa Cluster Dashboard link will open up a new window with the cluster’s dashboard in the CloudCasa UI.
The refresh data button allows you to refresh dashboard information on demand.
Running and Pausing/Resuming jobs with the Extension
Once you have created backup or other job definitions in CloudCasa, you can run them from Rancher. You can also view CloudCasa job activity for the cluster.
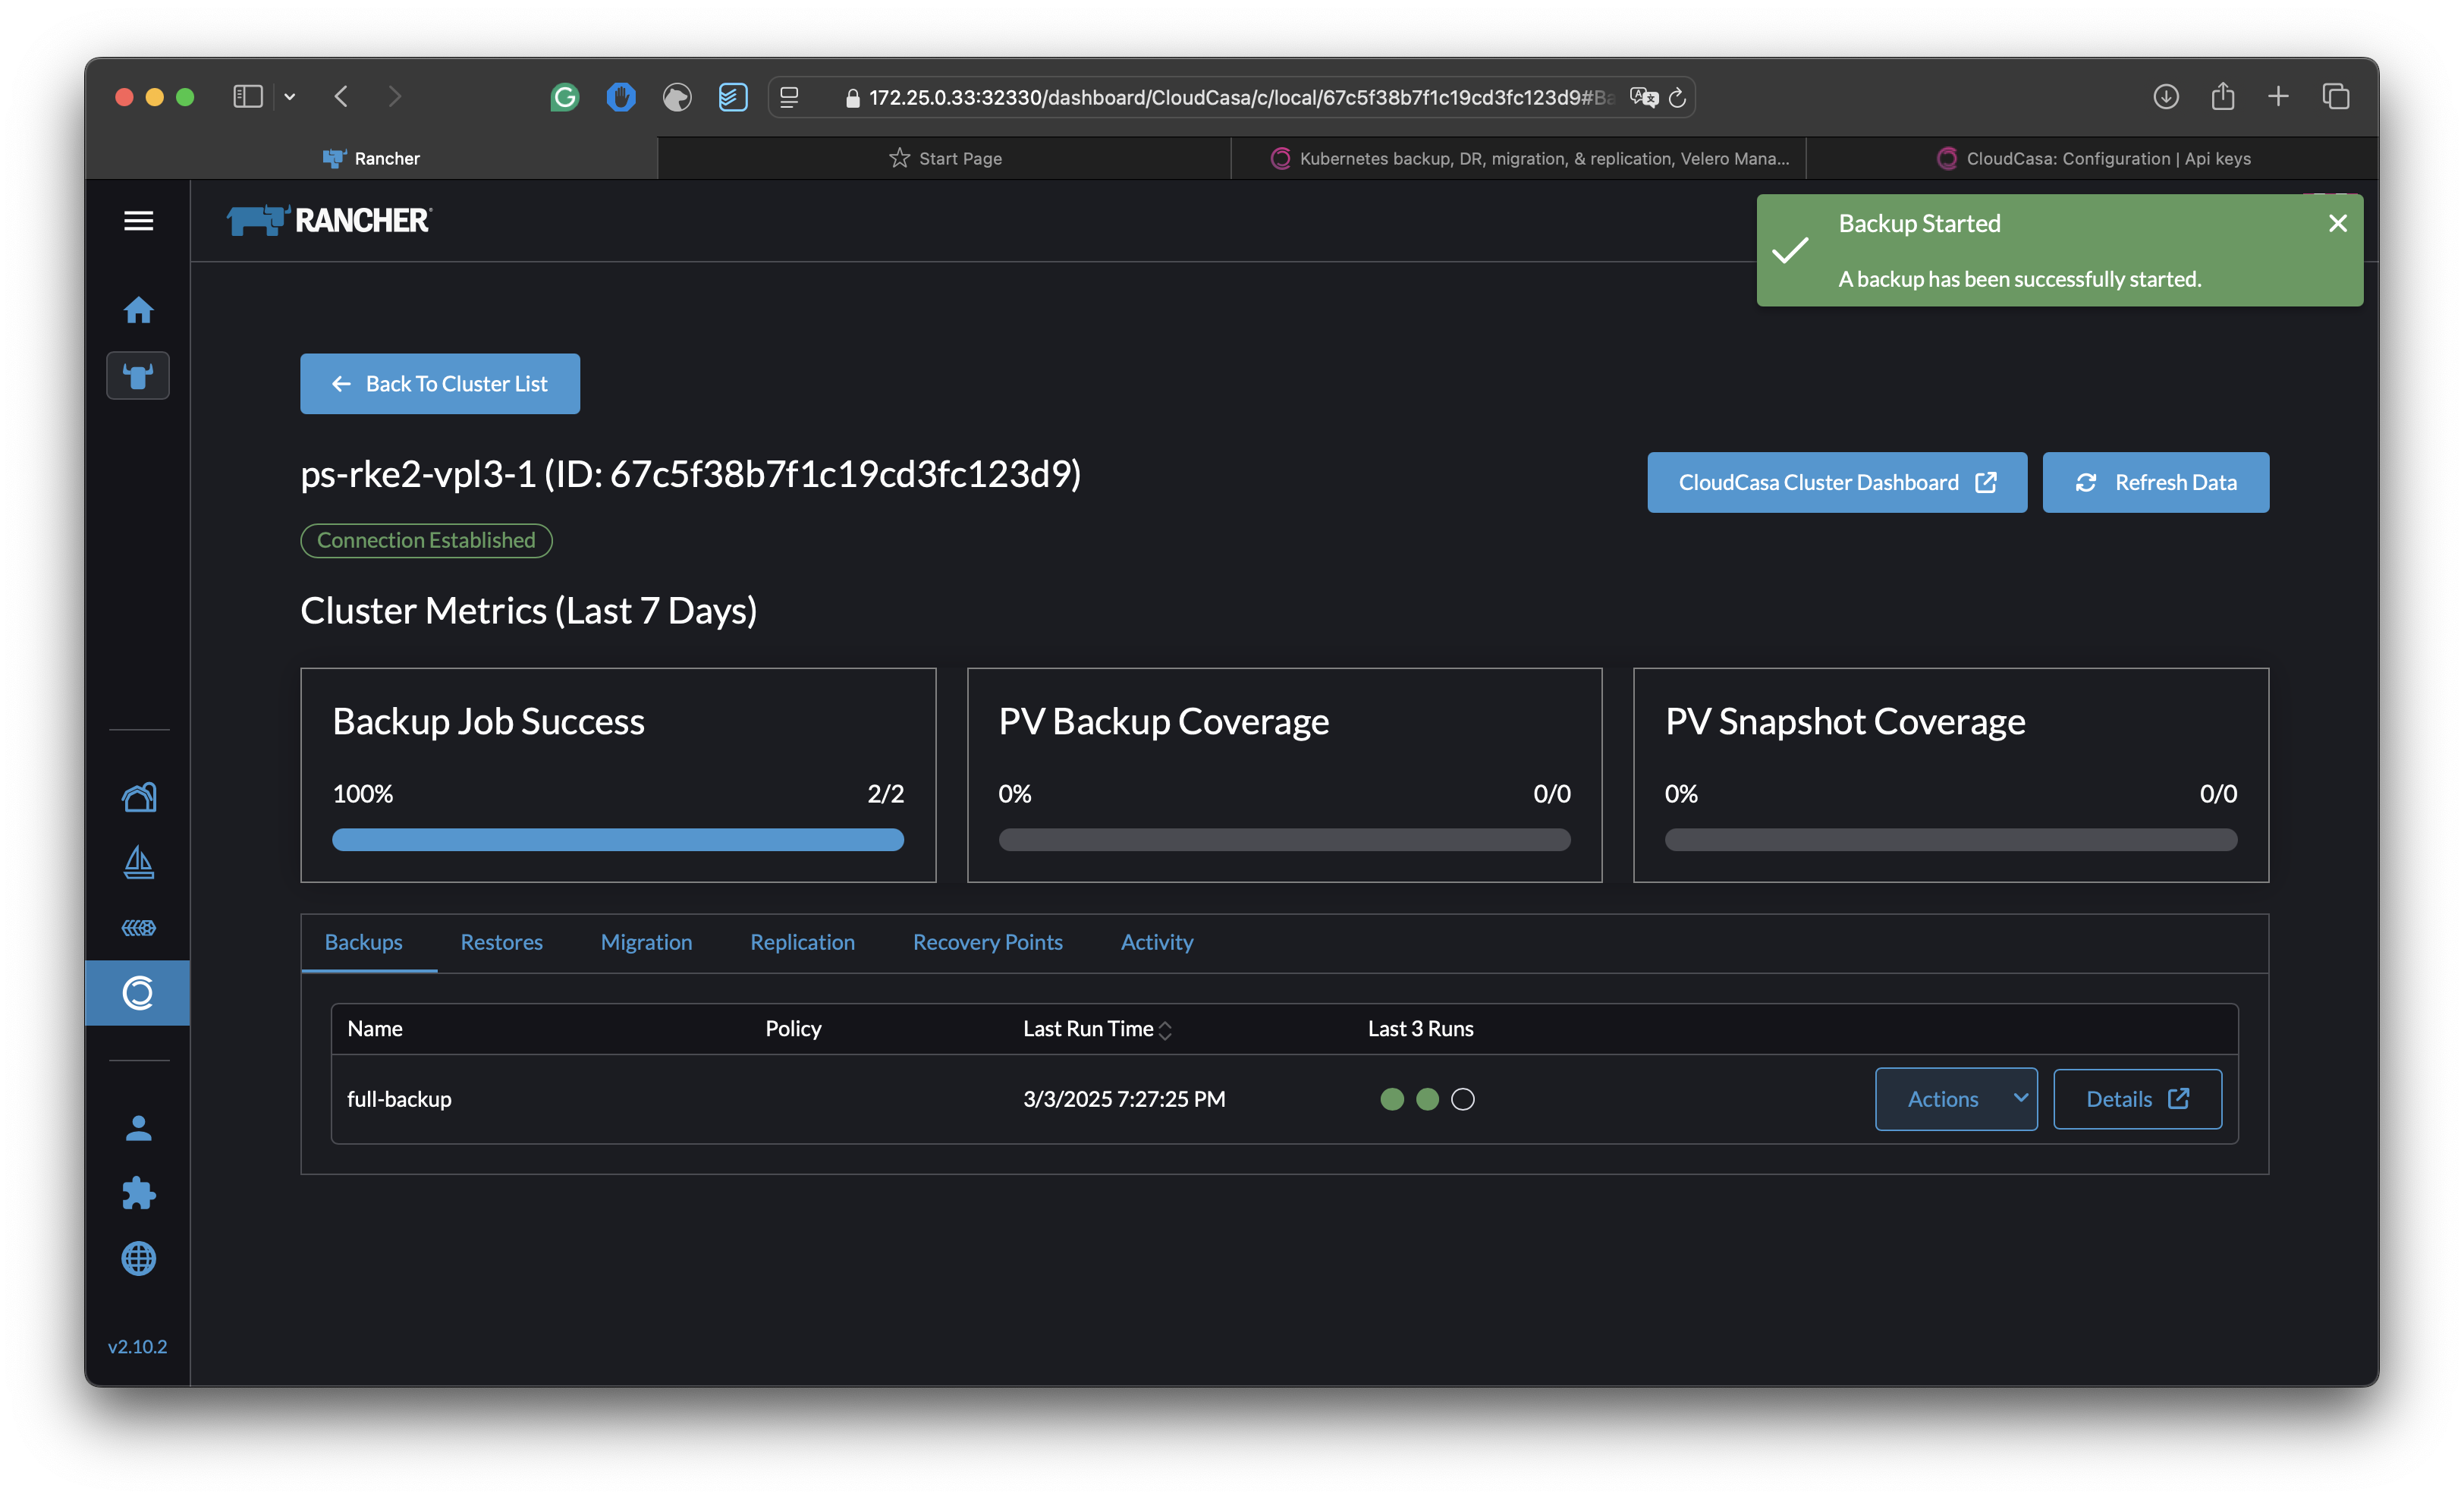
Interacting with a CloudCasa job from the Rancher UI:
Find the Job definition you want to interact with.
Click the Actions drop-down button and choose to Start the job, or Pause/Resume scheduling of the job (if the job is scheduled via a policy).
Selecting the Restore or Edit option will open a new window with the CloudCasa UI page allowing you to complete the requested operation.
Click the Refresh Data button to refresh the view with the latest data from CloudCasa.
Contributing
The CloudCasa Rancher Extension is an open-source project licensed under the Apache 2.0 license. Contributions, suggestions, and reports of issues are welcome.
See the project GitHub repository (https://github.com/catalogicsoftware/cloudcasa-rancher-extension) for more information.