Rancher Extension Installation
Introduction
CloudCasa is a comprehensive, cloud-native backup and recovery solution for Kubernetes. If you’re using SUSE Rancher to manage your clusters, installing the CloudCasa extension makes it easy to monitor your protection status and manage backups directly from the Rancher dashboard.
This guide will walk you through the step-by-step process of installing the CloudCasa extension in Rancher.
Log In to Your Rancher UI
Begin by opening your preferred web browser and navigating to your Rancher user interface. Use your credentials to log in.
Upon successful login, you’ll be taken to your Rancher dashboard, where you can access various administrative and cluster management tools.
Tip: Ensure you have administrative privileges or the required access rights, as installing extensions may require higher-level permissions.
Enable the Partner Extension Repository
Enable the Rancher Partner Extension Repository if it has not already been enabled.
From the Rancher Dashboard, open the hamburger menu in the top left corner and select “Extensions.”
If the Partner Extension Repository is not enabled there will be a prompt at the top of the page that says “There are new extensions repositories available. To enable these repositories, click the button on the right.”
After adding the repository the CloudCasa Rancher Extension will be available to install.
Install the CloudCasa Extension Component
With the Partner Extension Repository available, the next step is to install the CloudCasa extension.
Locating the Extension:
Navigate back to the main Extensions page and switch to the Available tab. This tab displays all extension components that are available for installation from your configured repositories.
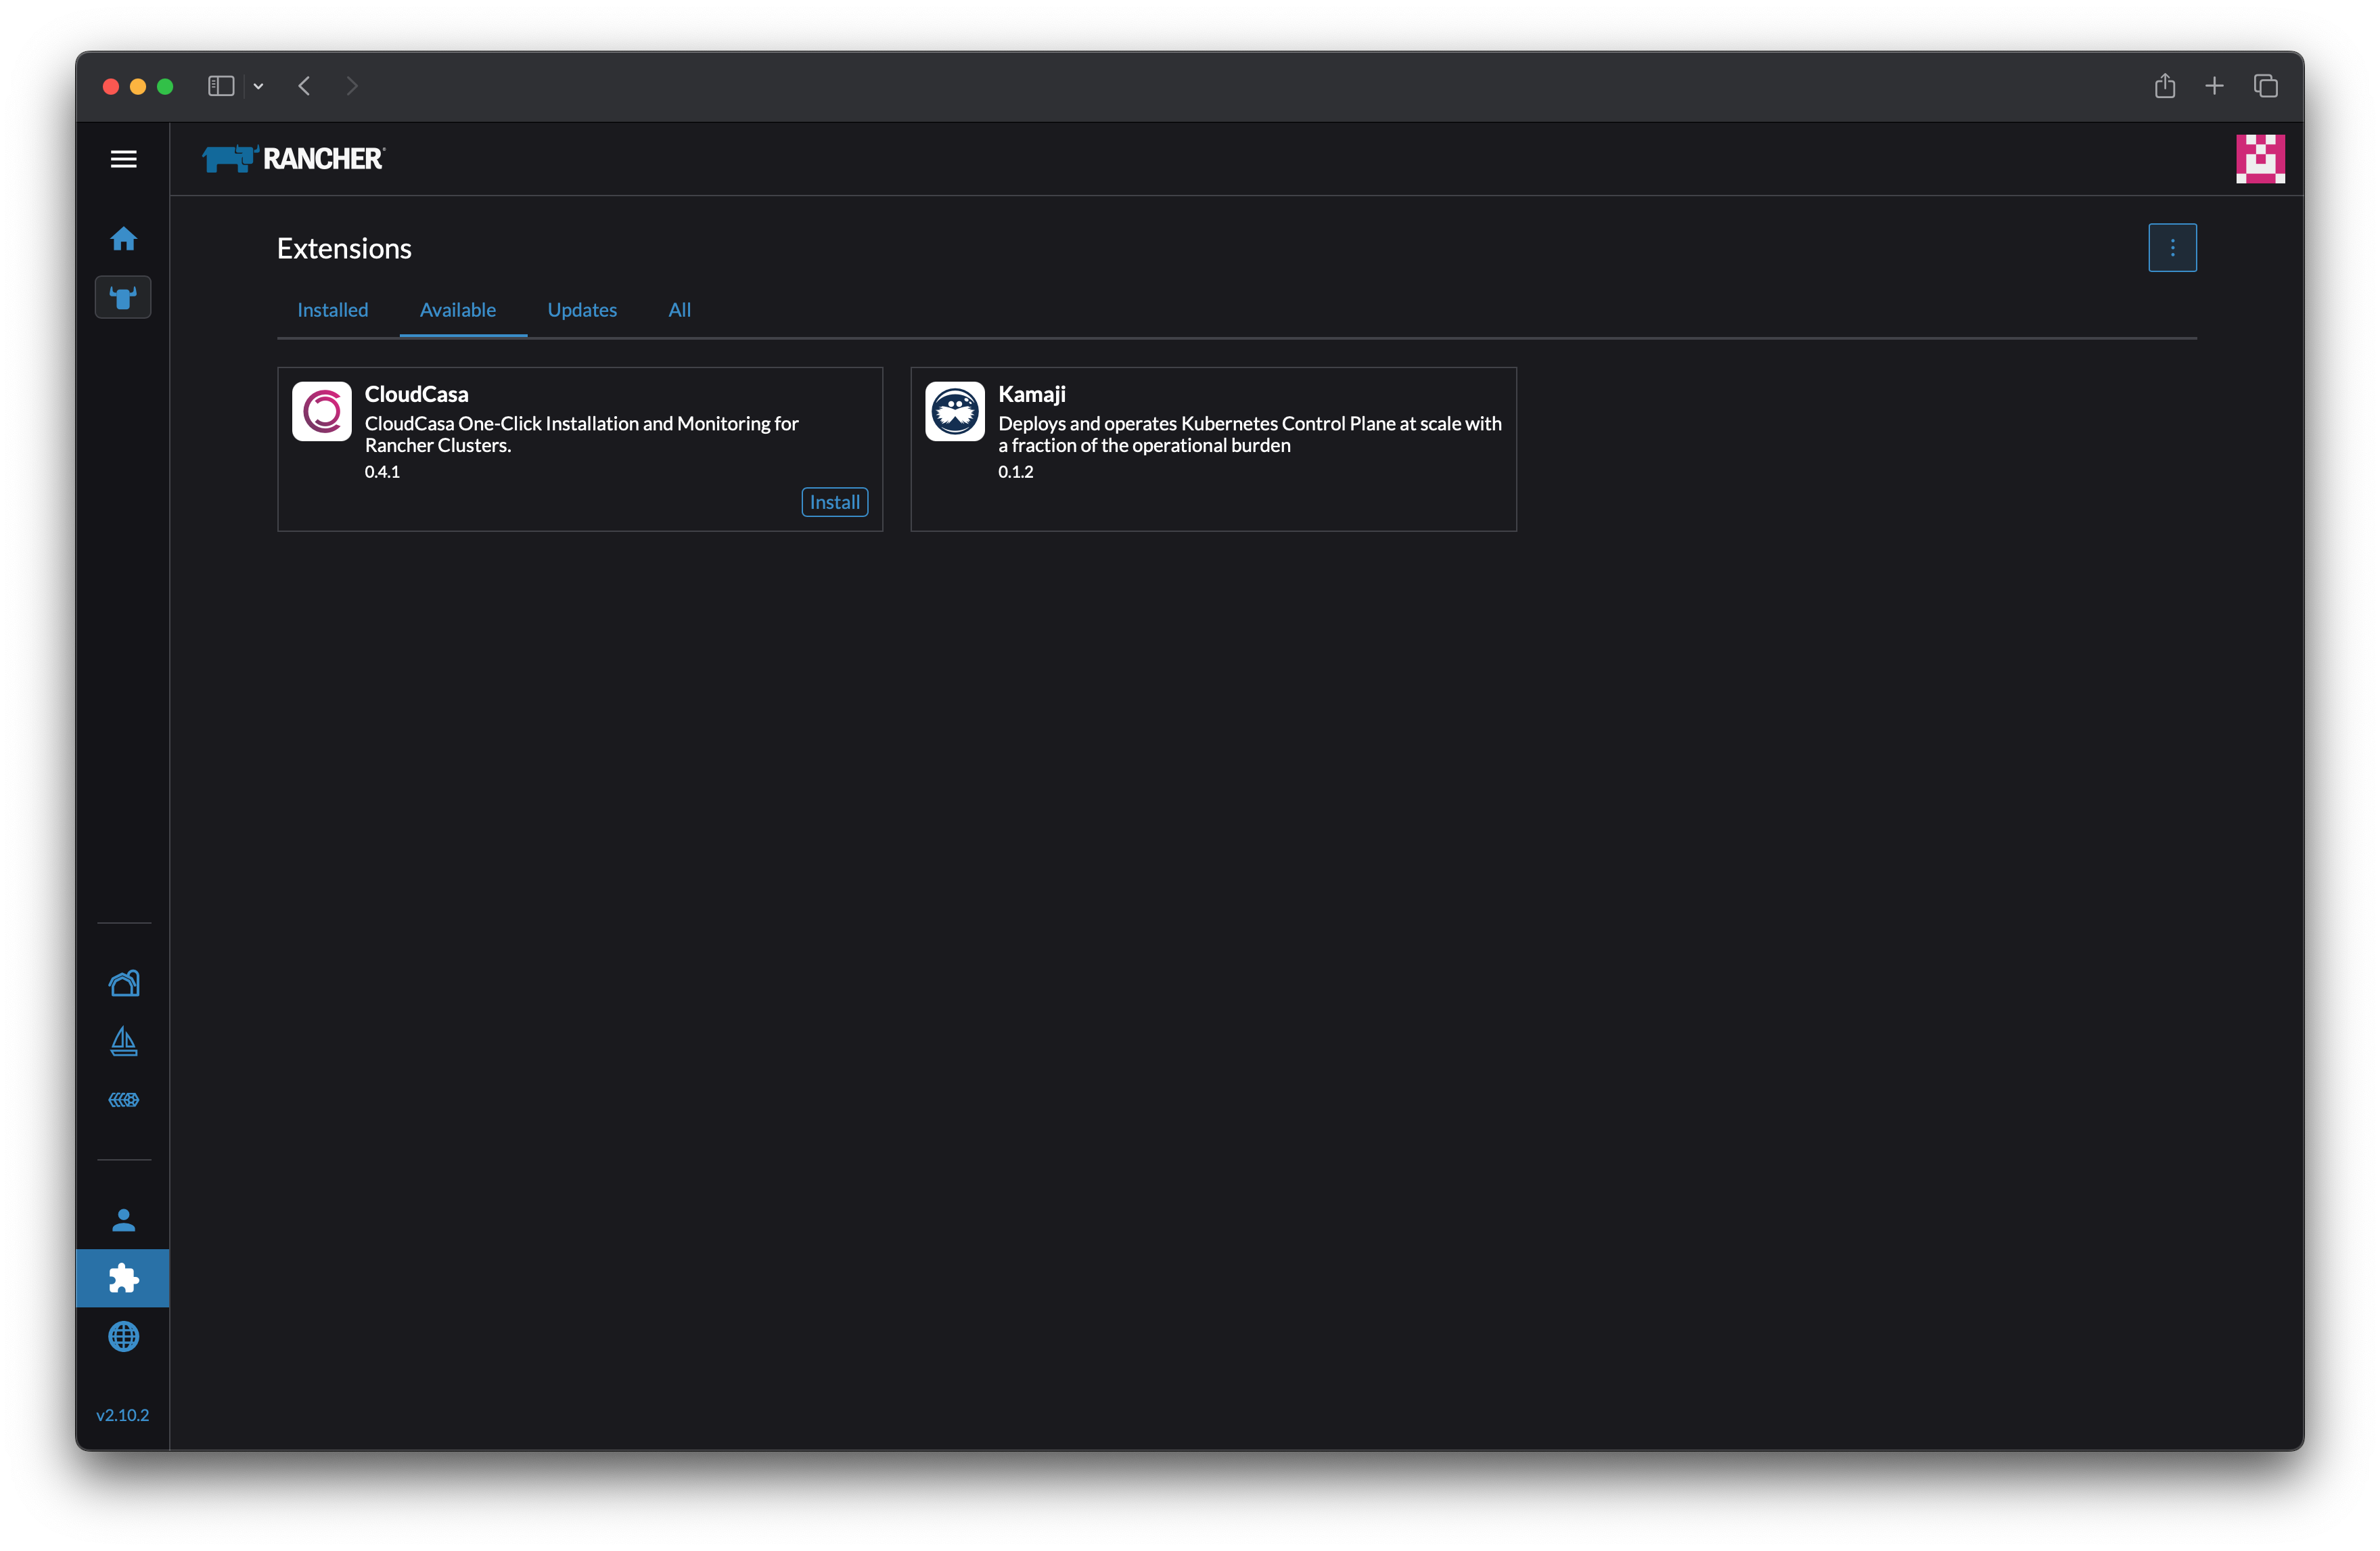
Installing the Extension:
Find the CloudCasa extension component in the list.
Click on the Install button associated with it.
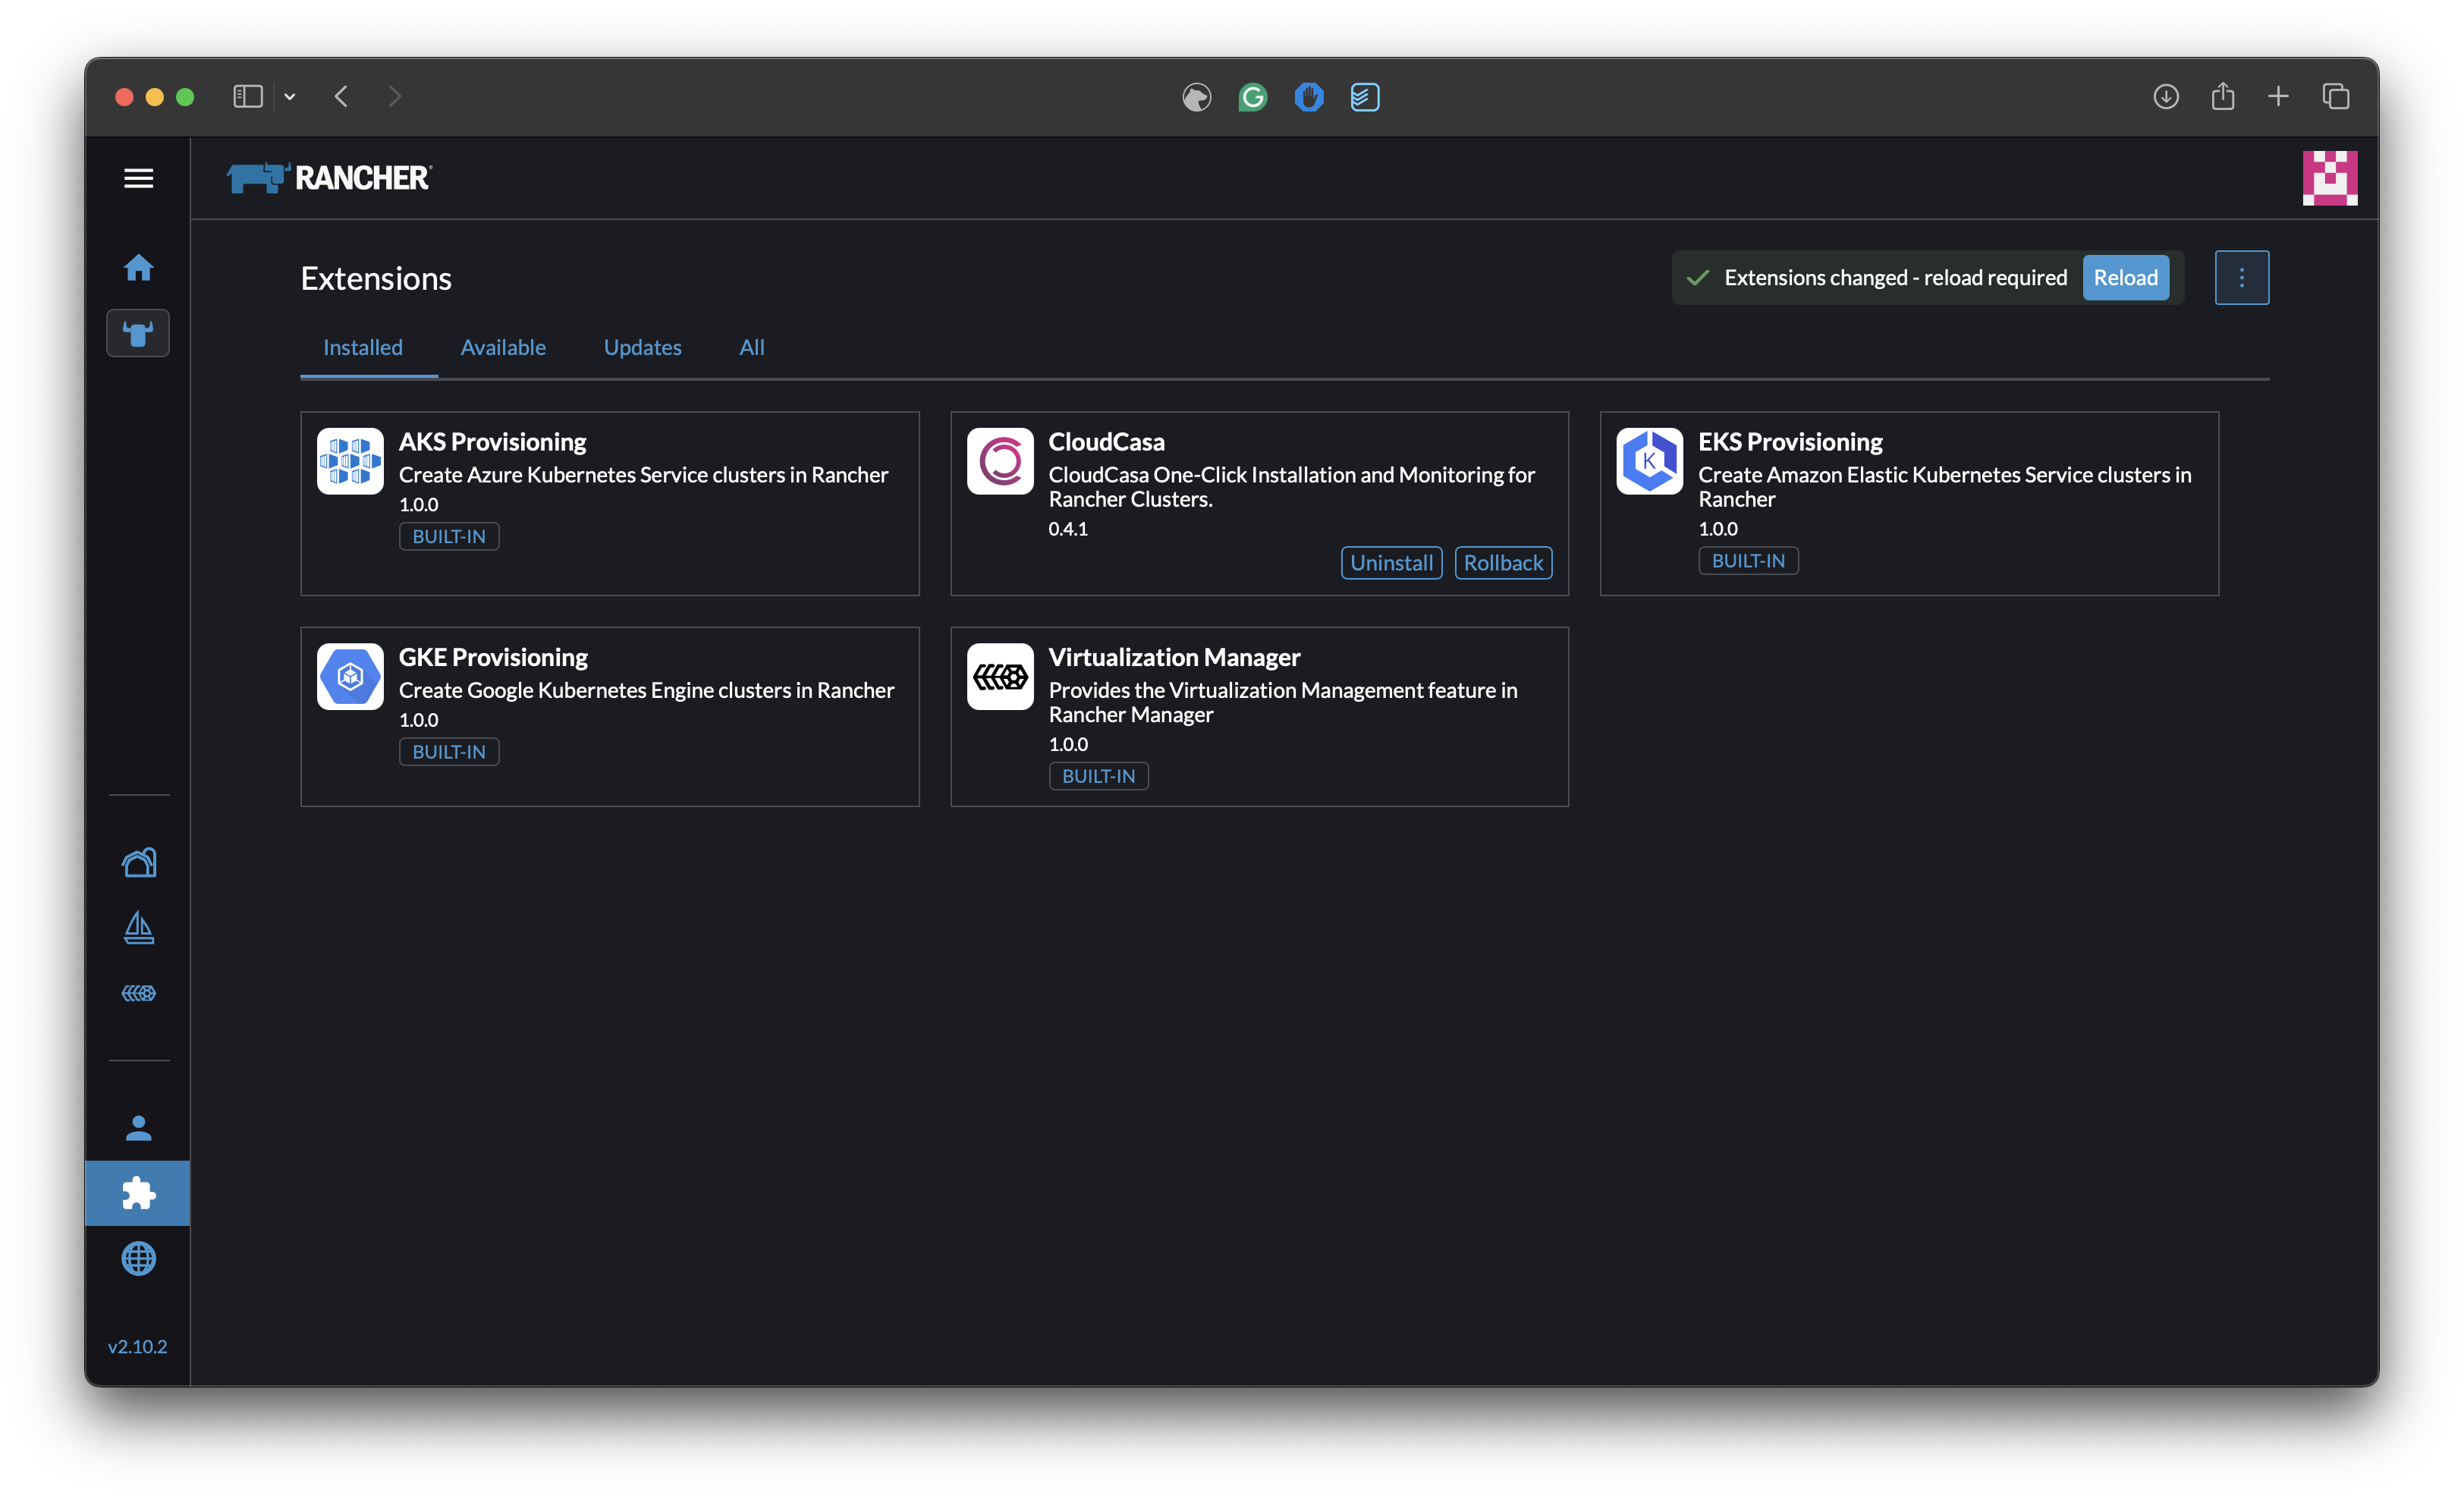
Post-Installation Prompt:
After initiating the installation, Rancher will prompt you to reload your browser window. This is necessary to apply the extension’s changes to the user interface. Be sure to reload the page as instructed.
Verify the Installation of the CloudCasa Component
After the page reloads, you should see the CloudCasa extension installed.
Confirmation:
Go to the list of installed extensions in the Extensions section.
You should now see the CloudCasa component listed. This confirms that the installation process has successfully added the extension to your Rancher environment.
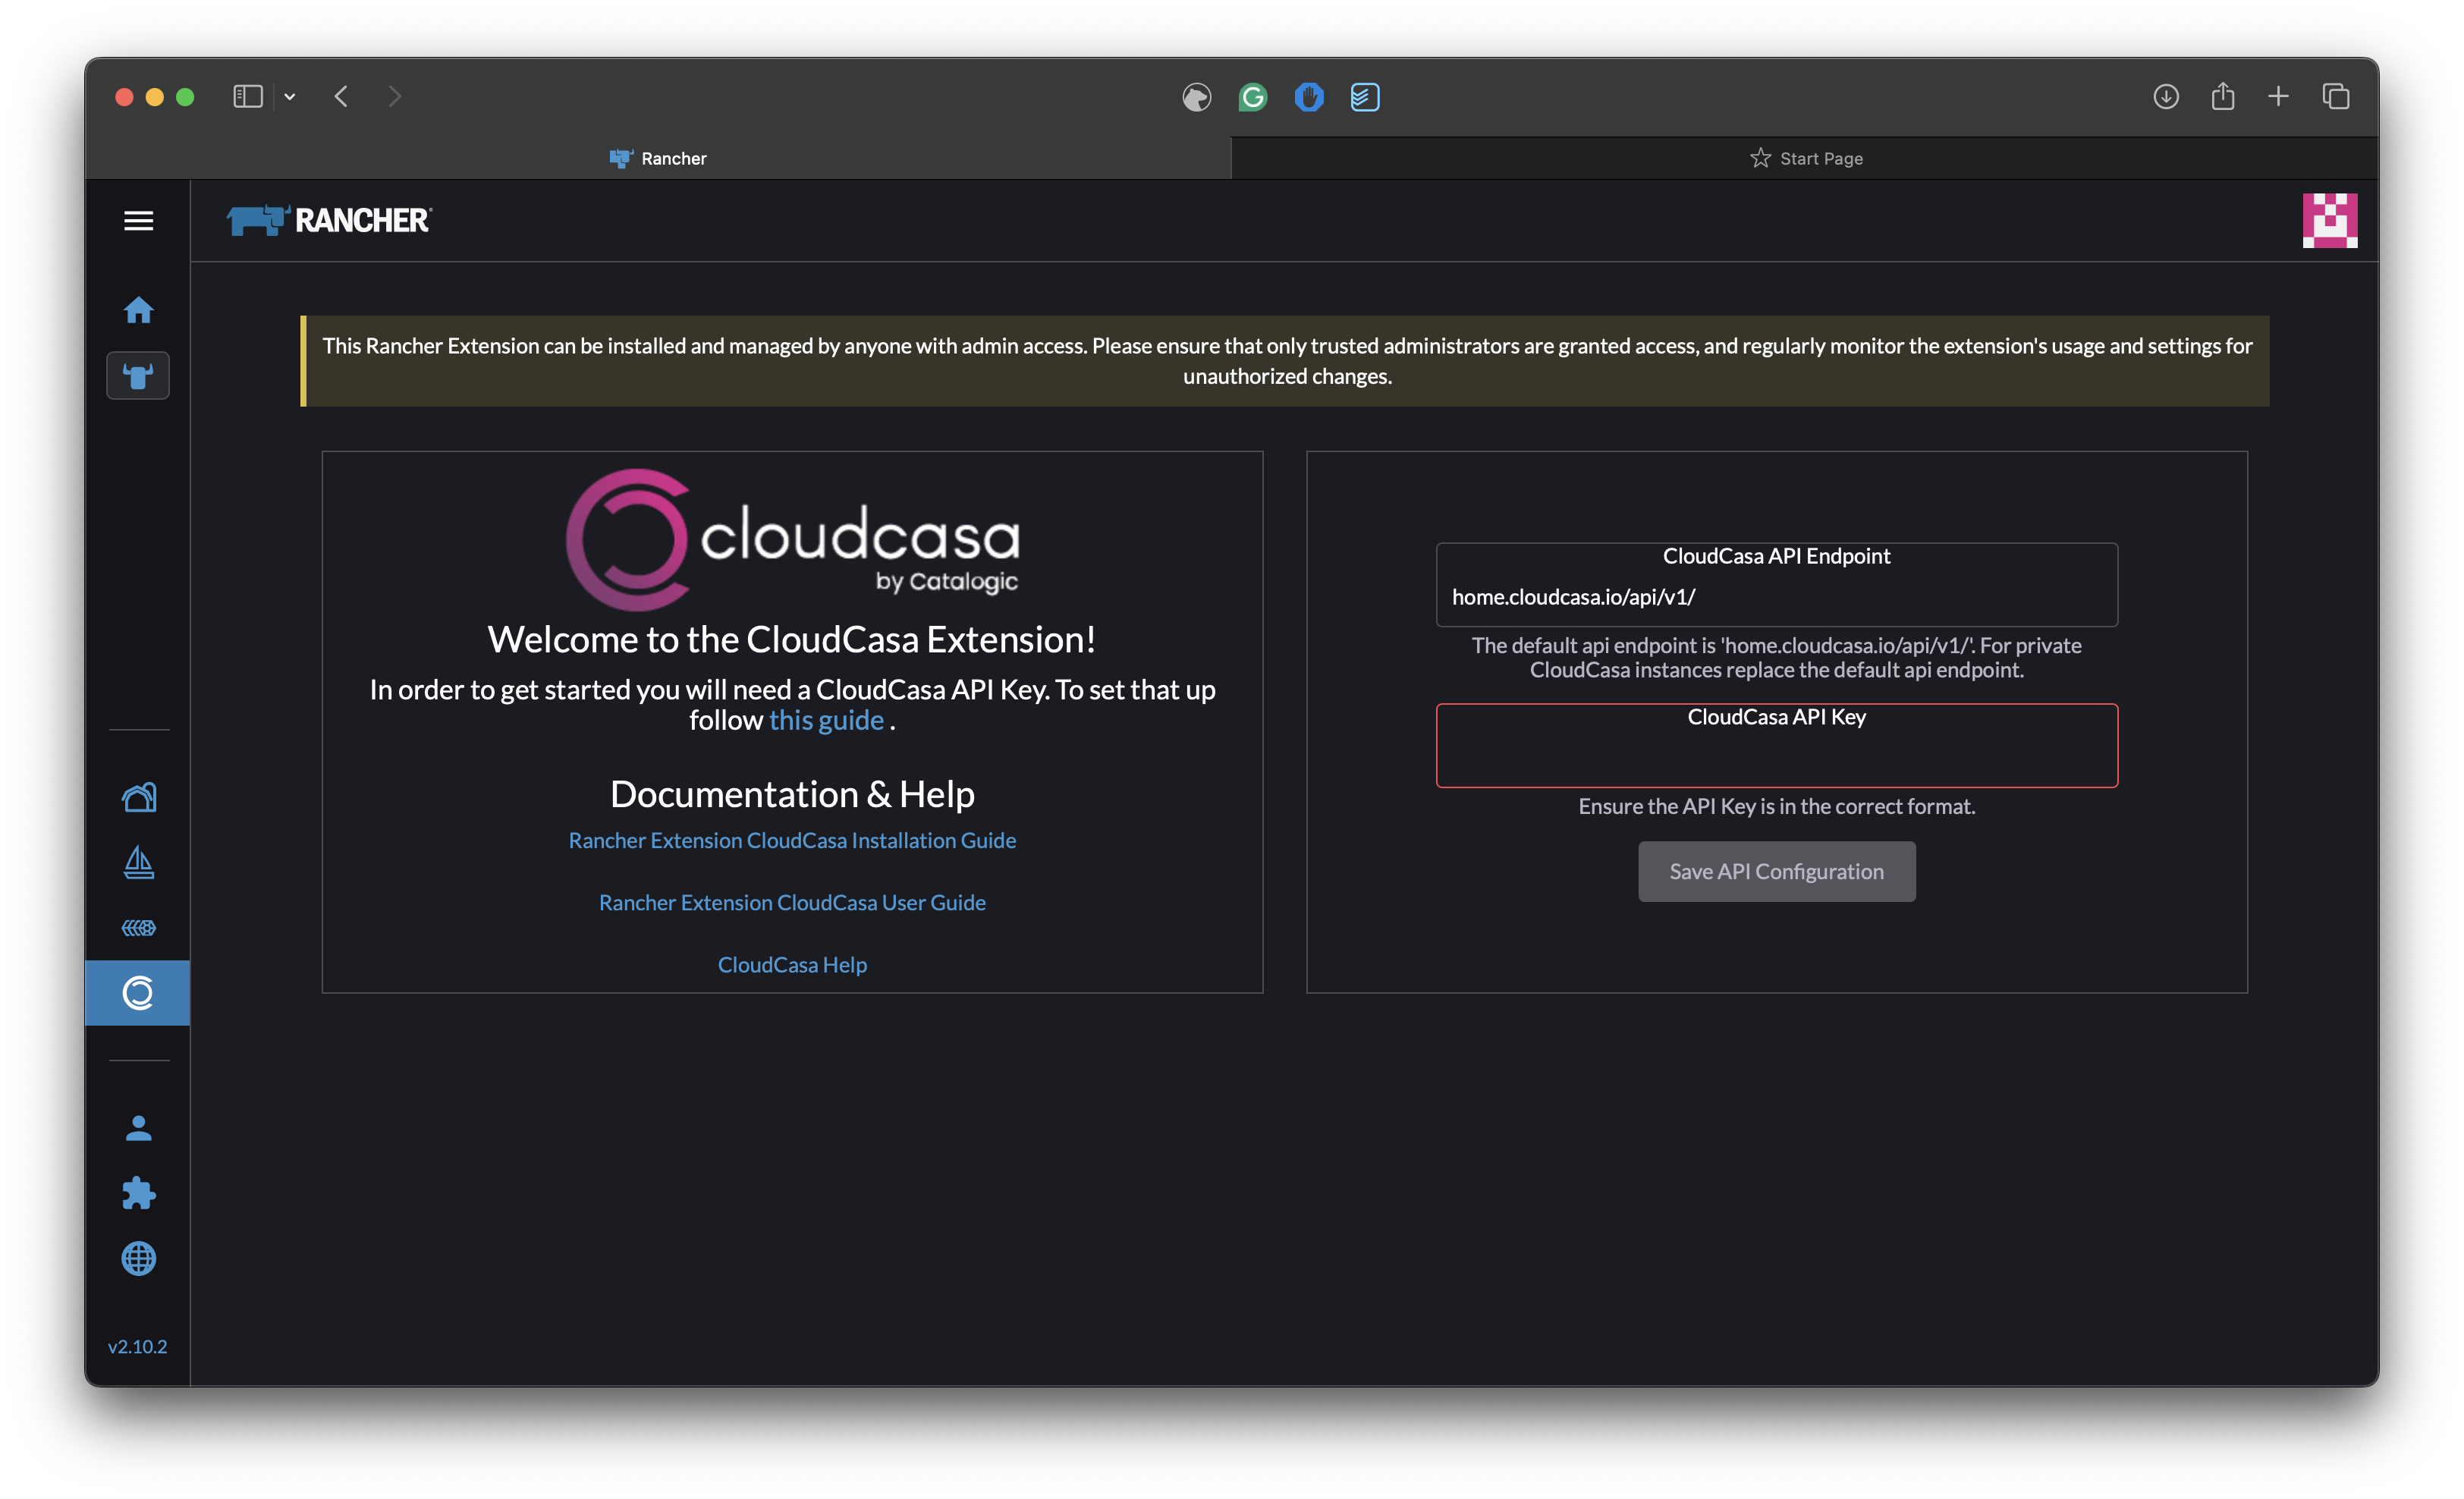
Access the CloudCasa Configuration Screen
A new icon representing CloudCasa should now appear in your main navigation menu.
Navigating to the Configuration:
Click the new CloudCasa icon on the left side of the Rancher UI.
Configuring the API Key and API Endpoint:
The interface will display a configuration screen where you will need to enter an API Key and, for self-hosted CloudCasa, an API Endpoint.
Important: This API Key must be obtained from the CloudCasa UI. The key is necessary for enabling secure communication between Rancher and CloudCasa. You will find detailed instructions on creating an API key in API Keys.
Enter the API Key in the provided field.
If you are using CloudCasa SaaS, leave CloudCasa API Endpoint set to the default value of “home.cloudcasa.io/api/v1/”. If you are using the self-hosted version of CloudCasa, you will need to replace the host part with the name or IP of your CloudCasa server.
Now save the configuration, and you’re ready to go!
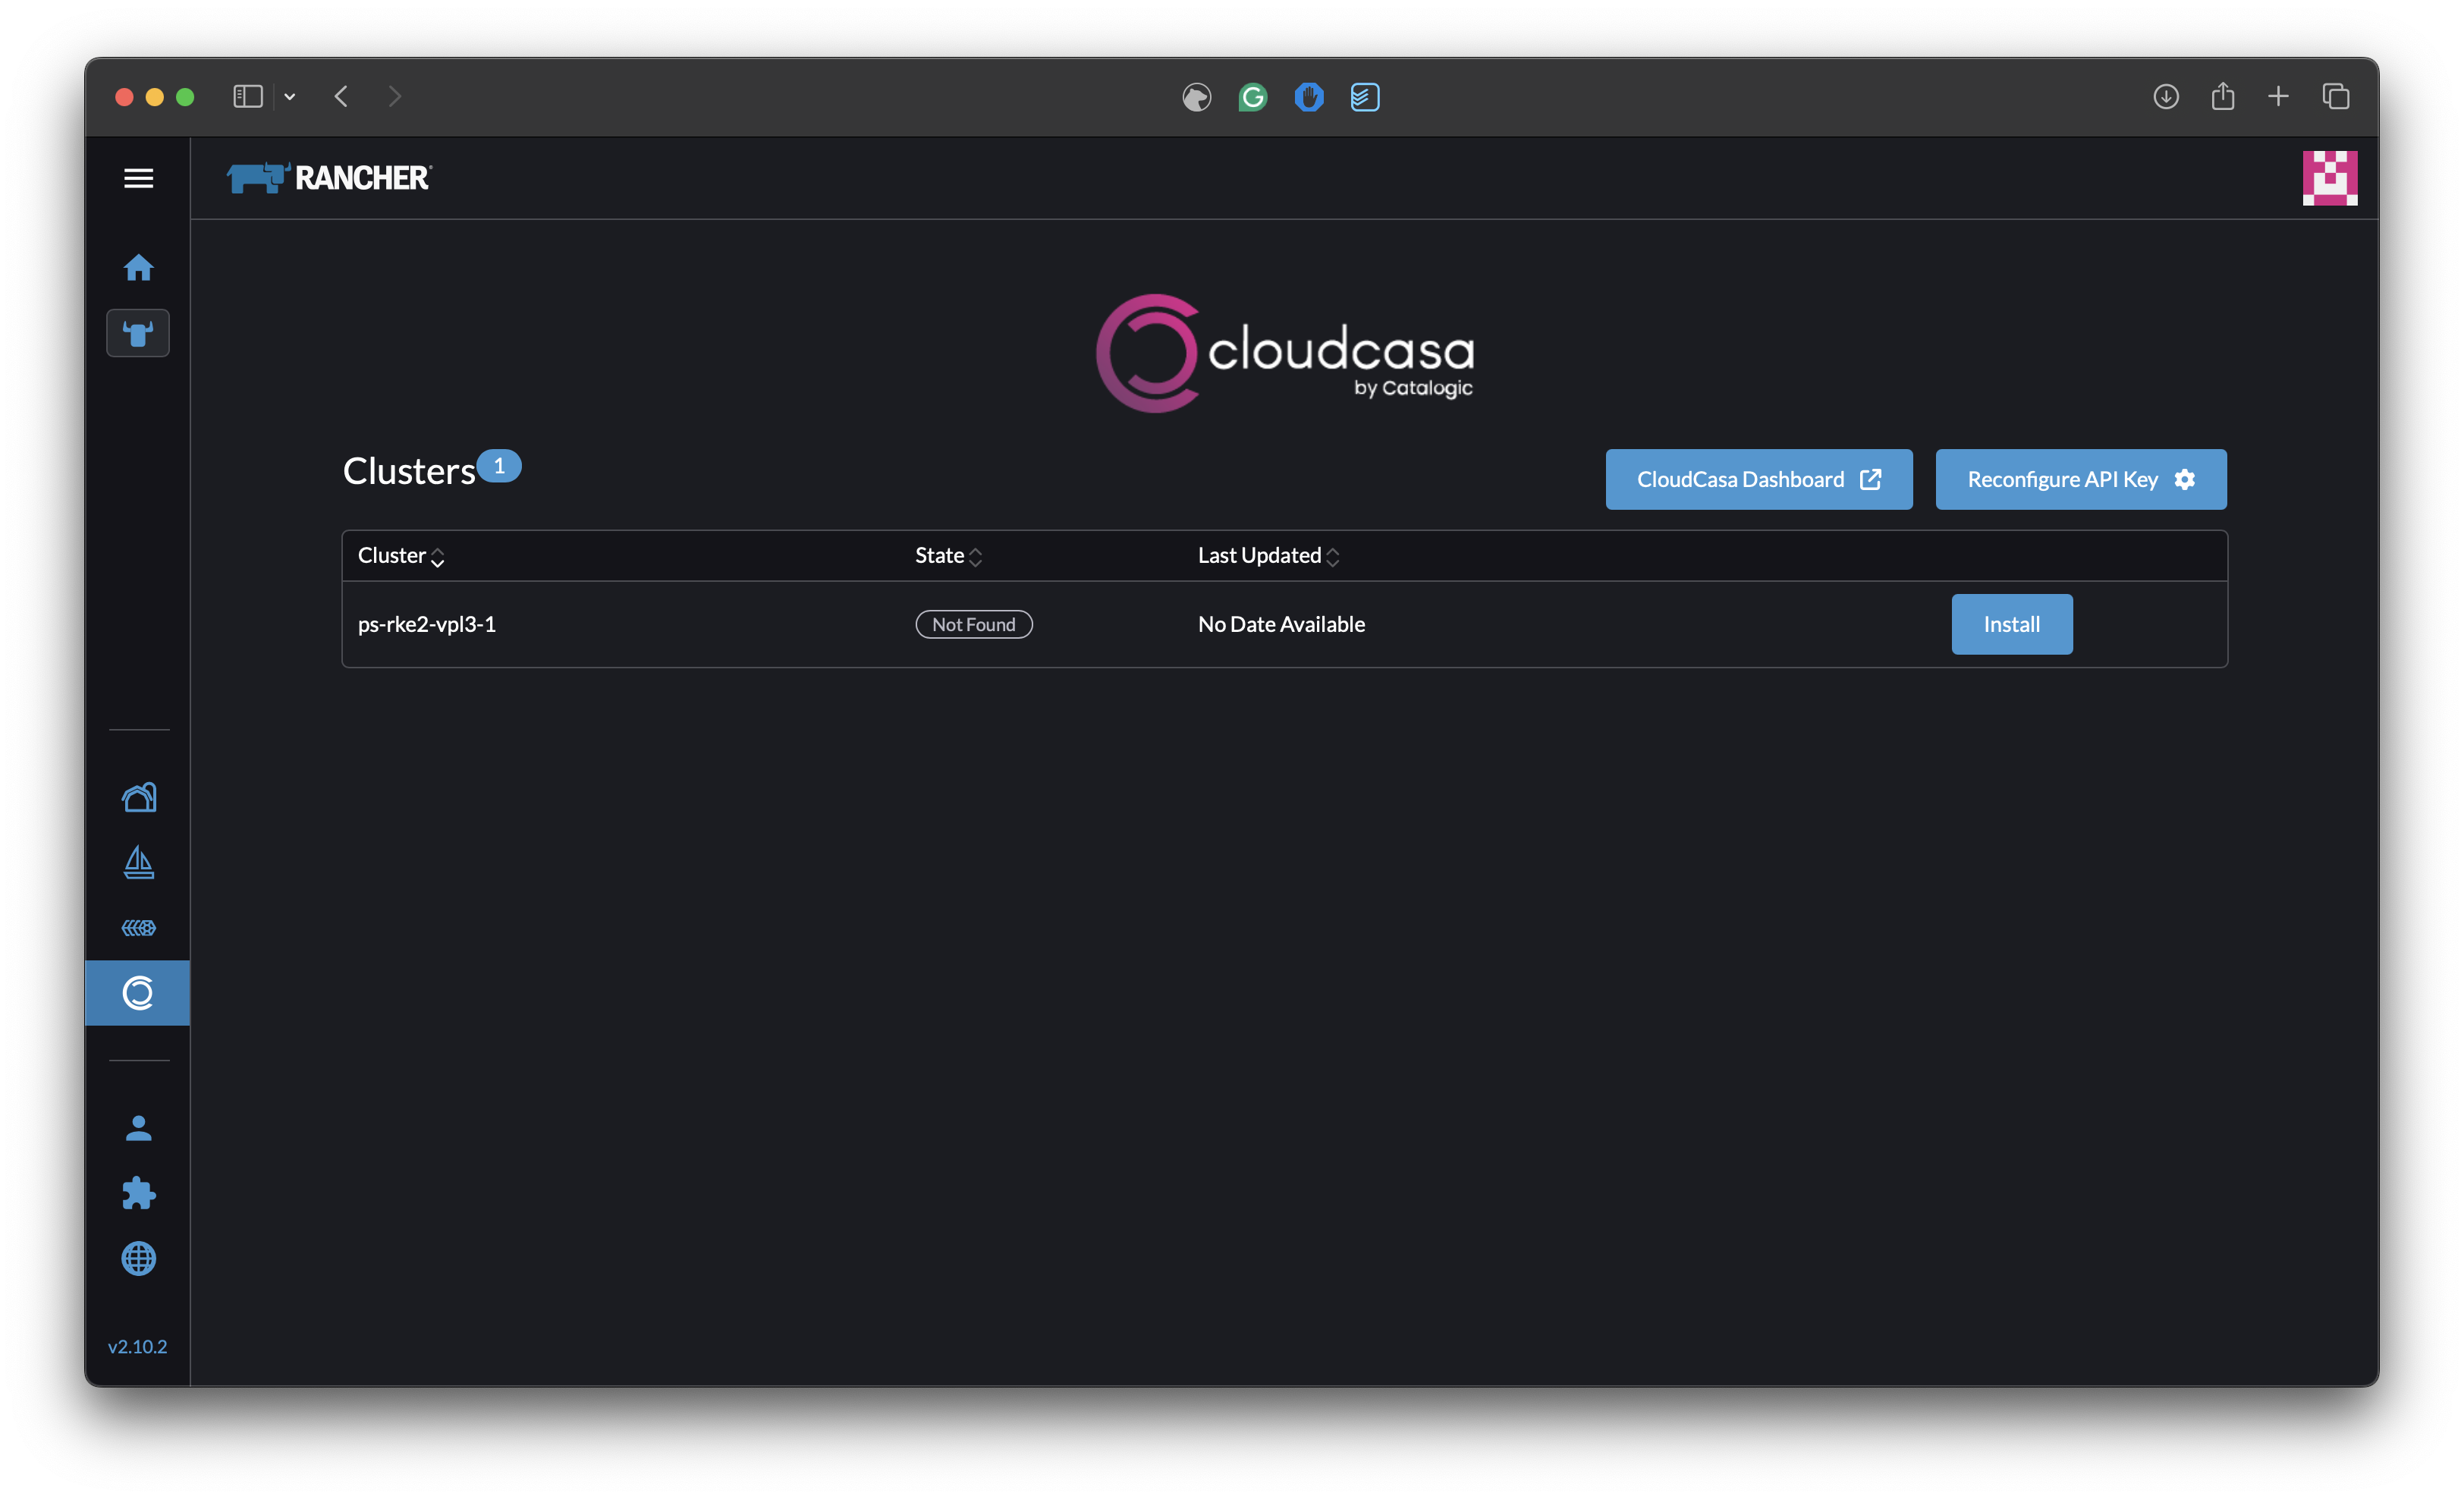
Review Your Main Dashboard for CloudCasa Agent Status
After configuring the API Key:
Dashboard Overview:
Navigate back to the main dashboard. Here, you will see a list of clusters managed by your Rancher instance.
Next to each cluster, there will be an indicator showing the status of the CloudCasa agent installation. This gives you a high-level view of which clusters have the CloudCasa agent deployed and whether they are operational.